Invisible Mannequin Vs Ghost Mannequin: What’s the Difference?
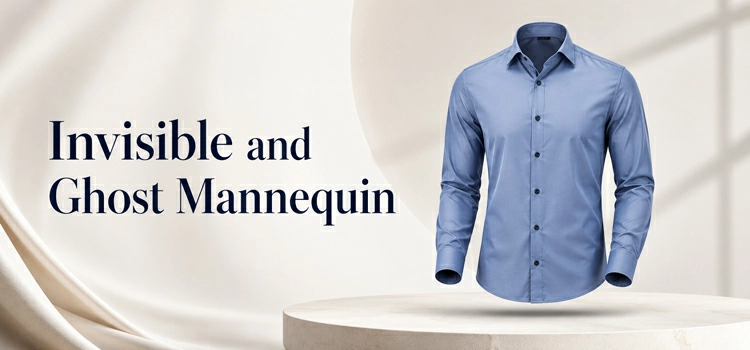
Invisible mannequin and ghost mannequin refer to the same photo editing technique. Editors remove the mannequin from clothing photos in post-production. The result looks like an invisible body wears the garment. Both terms mean the same thing in product photography.
An invisible mannequin is a physical mannequin used during a product photo shoot. Photographers place clothes on it to give the garment a natural 3D shape. After the shoot, photo editors remove the mannequin using software like Photoshop. The clothes appear to float in mid-air on their own.
This technique helps buyers see the true fit and shape of a garment. It shows how the clothing sits on a body without using a live model. Brands use this method to cut costs and maintain visual consistency across their product catalog.
What Is a Ghost Mannequin?
Ghost mannequin is another name for the invisible mannequin effect. The term “ghost” describes the invisible body that seems to wear the clothes. You cannot see the mannequin. But you can see the shape it creates inside the garment.
The ghost mannequin effect is a post-production process. Editors combine multiple photos of a garment, the outside and the inside, into one final image. This creates a hollow, 3D look that shows all parts of the clothing clearly.
Are Invisible Mannequin and Ghost Mannequin the Same Thing?
Yes. They are the same technique with two different names. The fashion and e-commerce industry uses both terms interchangeably. Some photographers prefer “invisible mannequin” to describe the shoot process. Others use “ghost mannequin” to describe the editing process.
The result is always the same. A clean, professional clothing photo with no mannequin visible. The garment looks like a ghost wears it. This is where the name “ghost mannequin” comes from.
How Does the Ghost Mannequin Effect Work?
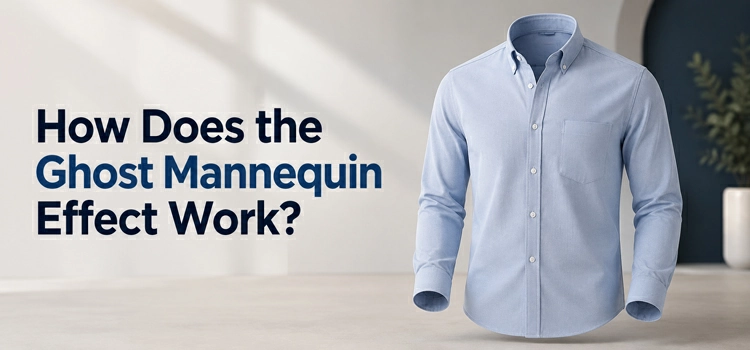
Ghost mannequin photography involves dressing the mannequin, shooting the garment front, capturing interior details separately, then editing both images in Photoshop. The mannequin is removed, edges and shadows are cleaned, and inner sections are blended to create a 3D image.
The ghost mannequin process follows a clear set of steps.
Step 1: Dress the mannequin. Place the garment on the mannequin. Make sure it fits well and looks natural.
Step 2: Shoot the front. Photograph the front of the garment on the mannequin.
Step 3: Shoot the interior. Remove the garment from the mannequin. Photograph the inside of the collar, hem, or sleeves.
Step 4: Edit in Photoshop. Combine both images. Remove the mannequin using the pen tool or clipping path method.
Step 5: Blend and clean. Merge the interior shot into the main image. Clean up edges and fix shadows.
The final image shows a 3D garment with visible inner details. It looks natural and professional.
Why Do Brands Use the Ghost Mannequin Effect?
Brands use ghost mannequin photography because it reduces model costs, keeps catalog images consistent, shows garment fit and structure clearly, speeds shooting and editing, and works across many clothing items, from tops and dresses to jackets, bottoms, and socks too.
Brands use this technique for several strong reasons.
It saves money. Hiring a professional model for every product is expensive. A mannequin costs much less and delivers consistent results.
It keeps images consistent. Every product photo looks the same. The lighting, angle, and shape stay uniform across the catalog.
It highlights fit and structure. Buyers see exactly how the garment fits a body. This reduces product return rates.
It speeds up production. Photographers shoot faster with a mannequin than with a live model. Editing is also faster when the process is standardized.
It works for all clothing types. Tops, bottoms, dresses, jackets, and even socks work well with this technique.
What Types of Products Use Ghost Mannequin Photography?
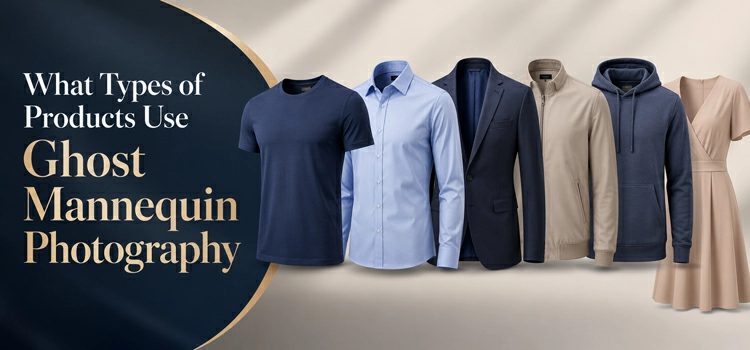
Ghost mannequin photography suits structured apparel like shirts, jackets, dresses, trousers, hoodies, suits, sportswear, underwear, children’s clothing, knitwear, and sweaters. Softer or flatter items, such as scarves and socks, require careful shaping with padding or pins before shooting for results.
Ghost mannequin photography works best for structured clothing items. These include:
- T-shirts and shirts
- Jackets and coats
- Dresses and skirts
- Trousers and jeans
- Hoodies and sweatshirts
- Suits and blazers
- Sportswear and active wear
- Underwear and lingerie
- Children’s clothing
- Knitwear and sweaters
Soft or very flat items like scarves or socks need extra care. Photographers may use padding or pins to give them shape before the shoot.
What Is the Difference Between Ghost Mannequin and Flat Lay Photography?
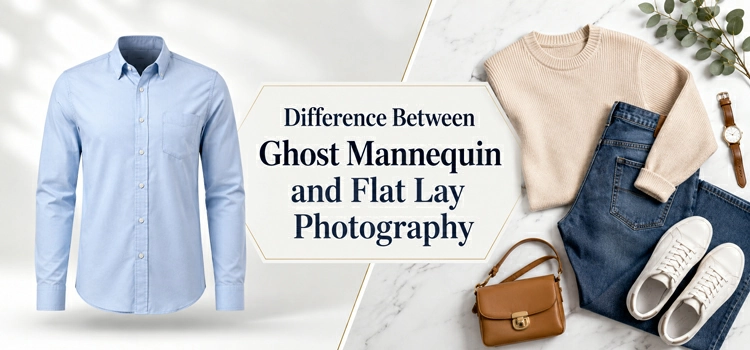
Flat lay photography shows clothes from above, creating simple, affordable two-dimensional images. Ghost mannequin photography gives garments a realistic 3D shape, showing fit and structure. E-commerce brands often use ghost mannequin photos for products and flat lays for lifestyle content.
Flat lay photography places clothes flat on a surface. The camera shoots from above. The garment looks two-dimensional. Ghost mannequin photography gives clothes a 3D shape using a mannequin.
Ghost mannequin images look more realistic. They show how the garment fits a body. Flat lay images are simpler and cheaper to produce. But they do not show shape, fit, or structure as clearly.
Most e-commerce brands prefer ghost mannequin images for main product photos. They use flat lays for editorial or lifestyle content.
Ghost Mannequin vs Model Photography- Which Is Better?
Ghost mannequin photography suits large catalogs because it is consistent, fast, and cost-effective, helping shoppers compare products easily. Model photography supports lifestyle branding by showing clothing on real people, creating emotional appeal. Many brands use both for different marketing needs.
Both methods work well. But they serve different purposes.
Ghost mannequin photography is better for consistency, speed, and cost savings. It works well for large product catalogs. Every image looks the same. Shoppers can compare products easily.
Model photography is better for lifestyle branding. It shows how clothing looks on a real person. It adds emotion and connection to the image. But it costs more and takes more time.
Many brands use both. They use ghost mannequin images on product pages and model photos on homepages or social media.
What Software Do Editors Use for Ghost Mannequin Editing?
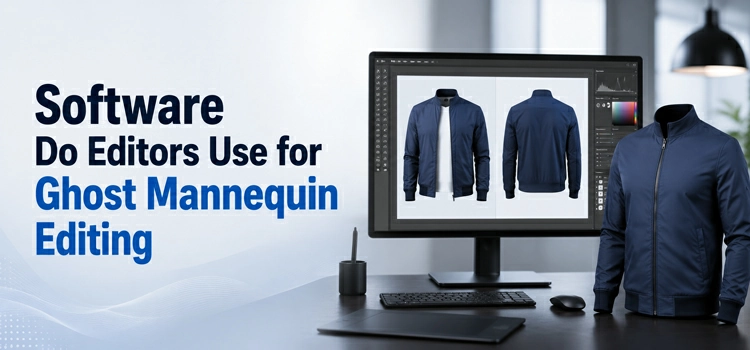
Professional editors usually rely on Adobe Photoshop for ghost mannequin editing because it gives precise control over layers, masks, and paths. Alternatives like GIMP can help with simpler tasks, while outsourcing supports fast, consistent high-volume editing.
Most professional editors use Adobe Photoshop for ghost mannequin editing. It offers full control over layers, masks, and paths.
Some editors also use:
- GIMP– A free alternative to Photoshop
- Pixlr– A browser-based editor for basic edits
- Clipping Magic– Automated background removal
- Remove.bg– AI-powered background remover
For high-volume work, many brands outsource ghost mannequin editing to professional photo editing services. These services deliver fast turnaround and consistent quality.
How Much Does Ghost Mannequin Editing Cost?
Mannequin editing costs depend on image complexity and volume. Basic edits run $1-$5, while complex neck, sleeve, and bottom joint costs $5-$15. Bulk orders may drop to $0.50-$2 per image. Outsourcing saves labor, time, and effort overall.
The cost varies based on complexity and volume.
Basic ghost mannequin edit– $1 to $5 per image. This includes simple mannequin removal and background cleanup.
Complex ghost mannequin edit– $5 to $15 per image. This includes neck joint, sleeve joint, and bottom joint edits.
Bulk pricing– Many editing services offer discounts for large volumes. Prices drop to $0.50 to $2 per image for hundreds of photos.
In-house editing using Photoshop costs more in labor. Outsourcing saves time and often delivers better results.
What Is a Neck Joint in Ghost Mannequin Editing?
A neck joint fills the empty collar area after removing a mannequin’s neck. Editors use an interior collar photo to rebuild a realistic neckline, making the garment look naturally worn instead of hollow, unfinished, or artificial in ghost mannequin post-production.
A neck joint is a specific editing technique. It fills in the empty collar area after the mannequin’s neck is removed. Editors use the interior collar photo to create a natural-looking neckline.
Without a neck joint, the collar looks hollow and unfinished. With a proper neck joint, the garment looks like someone wears it. The neckline appears clean and realistic. Neck joint editing is one of the most important steps in ghost mannequin post-production.
Can You Do Ghost Mannequin Editing Without Photoshop?
Several tools can assist with ghost mannequin editing, but Photoshop delivers the cleanest, most controlled results. GIMP is a strong free alternative for basic to intermediate work, while Canva lacks advanced masking and automated clipping tools cannot complete interior compositing.
Yes. You can use several tools without Photoshop.
GIMP offers layer masking and path tools. It can handle basic to intermediate ghost mannequin editing for free.
Canva is too basic for this task. It does not support complex masking.
AI Clipping Path tools automate background removal. But they cannot handle the interior photo compositing step.
For best results, professional editors recommend Photoshop. It gives the most control and produces the cleanest output. For occasional editing, GIMP is a practical free option.
What Are Common Mistakes in Ghost Mannequin Photography?
Common ghost mannequin mistakes include blurry interior shots, visible mannequin edges, mismatched lighting, wrinkled garments, and poor mannequin fit. To avoid them, shoot consistently, steam clothing before photography, match mannequin size, and use precise clipping paths for clean, natural results.
Many photographers and editors make avoidable mistakes.
Poor interior shots. The interior of the collar or hem looks blurry or misaligned. Always shoot interior photos in the same lighting and angle as the main shot.
Visible mannequin edges. Editors leave mannequin edges visible in the final image. Use a precise clipping path to avoid this.
Mismatched lighting. The combined images look unnatural because the lighting differs. Shoot all photos in the same lighting setup.
Wrinkled garments. The clothing has creases or folds that distort its shape. Steam the garment before the shoot.
Wrong mannequin size. The mannequin is too big or small for the garment. Use a mannequin that matches your target size.
How Do You Choose the Right Mannequin for Product Photography?
Choose a mannequin that matches your garment size and product type to keep shapes accurate. Prefer matte, neutral-colored surfaces, such as gray or black, because they reduce reflections, simplify Photoshop removal, and help create cleaner, more professional ghost mannequin images.
Choosing the right mannequin matters. It affects the final image quality.
Match the garment size. Use a mannequin that fits your most common product size. A too-large or too-small mannequin distorts the garment’s shape.
Choose the right type. Full body mannequins work for full outfits. Half mannequins work for tops. Leg mannequins work for trousers and skirts.
Use a matte surface. Shiny mannequins create reflections. Matte surfaces make editing easier and cleaner.
Pick a neutral color. Gray or black mannequins are easiest to remove in Photoshop. Avoid mannequins with patterns or textures.
FAQs: Invisible Mannequin vs Ghost Mannequin
Invisible mannequin photography uses a mannequin to give clothing a natural 3D shape during shoots. Editors later remove it in Photoshop, making garments appear floating. This helps shoppers understand fit, reduces model costs, and keeps ecommerce product images consistent overall.
-
Is ghost mannequin the same as invisible mannequin?
Yes. Ghost mannequin and invisible mannequin refer to the exact same technique. Both names describe the process of removing a mannequin from a clothing photo in post-production. The fashion and e-commerce industry uses both terms interchangeably. The result is a 3D floating garment with no visible support.
-
Why do clothing brands prefer ghost mannequin photos?
Clothing brands prefer ghost mannequin photos because they save money and time. Brands do not need to hire models for every product. The images stay consistent across large catalogs. Ghost mannequin photos also show the garment’s true fit and shape, which helps buyers make confident purchase decisions and reduces return rates.
-
What does a ghost mannequin photo look like?
A ghost mannequin photo shows a garment floating on its own. The clothing holds its natural 3D shape. No mannequin or model is visible. The inside of the collar, hem, or sleeve is also visible. The background is usually white or light gray. The image looks clean, professional, and realistic.
-
How many photos do you need for a ghost mannequin shoot?
You need at least two photos per garment. One photo shows the outside of the garment on the mannequin. The second photo shows the interior of the collar, hem, or sleeves after removing the garment from the mannequin. Editors combine both images to create the final ghost mannequin effect.
-
Can any clothing item use the ghost mannequin effect?
Most clothing items work well with ghost mannequin photography. Structured garments like shirts, jackets, dresses, and trousers work best. Very soft or flat items like scarves may need extra preparation. Photographers use stuffing, pins, or padding to give these items the shape they need before the shoot.
-
How long does ghost mannequin editing take?
A simple ghost mannequin edit takes 15 to 30 minutes per image for an experienced editor. Complex edits with multiple joints, neck, sleeve, and hem, can take 45 to 60 minutes. Professional editing services with large teams can deliver bulk orders within 24 to 48 hours at lower cost per image.
-
What is the difference between a clipping path and ghost mannequin editing?
A clipping path is a technique used to cut out a subject from its background. Ghost mannequin editing uses clipping paths as part of a larger process. After cutting out the garment, editors also composite interior photos, fill in hollow areas, and blend layers together. Ghost mannequin editing is more complex and requires multiple editing steps.
-
Do I need a professional photographer for ghost mannequin photos?
You do not need a professional photographer for basic ghost mannequin shots. But good lighting, a clean background, and a stable camera setup are essential. A professional photographer helps you get consistent, high-quality results faster. For large catalogs, professional photography saves time in editing and reduces the number of rejected shots.
-
What background color works best for ghost mannequin photography?
A pure white background works best for ghost mannequin photography. It makes the editing process easier. Editors can quickly remove the background and the mannequin. Some brands use light gray for a softer look. Avoid busy or dark backgrounds. They increase editing time and can affect the color accuracy of the final garment image.
-
Is ghost mannequin photography good for e-commerce?
Yes. Ghost mannequin photography is one of the best techniques for e-commerce product images. It shows clothing in a realistic 3D form. Buyers see the true shape and fit. The images look professional and consistent. Most major e-commerce platforms like Amazon and ASOS prefer or require this type of clean, white-background product photography.
-
Can I outsource ghost mannequin editing?
Yes. Many businesses outsource ghost mannequin editing to professional photo retouching companies. These services handle large volumes at competitive prices. They deliver clean, consistent results within 24 to 48 hours. Outsourcing is a practical choice for brands that shoot many products regularly but do not have an in-house editing team.
-
What file format should I deliver for ghost mannequin editing?
Deliver RAW or high-resolution JPEG files for ghost mannequin editing. RAW files give editors the most flexibility with color and exposure. JPEG files work fine if the lighting is good in-camera. Always shoot at the highest resolution possible. Final edited images are usually delivered as JPEG or PNG files with a white or transparent background.
-
How does ghost mannequin editing improve sales?
Ghost mannequin editing improves sales by presenting clothing in the most realistic and appealing way. Buyers see the true shape, structure, and fit of a garment. Clear product images reduce uncertainty and build buyer confidence. When shoppers know exactly what they are buying, they purchase more and return products less. This directly increases conversion rates and revenue.
Conclusion
Invisible mannequin and ghost mannequin are two names for the same powerful product photography technique. Both help clothing brands present garments in a clean, realistic, and professional way without using a live model. By removing the mannequin and adding interior details like the neck, sleeves, or hem, editors create a natural 3D look that shows the true shape, fit, and structure of the garment.
For e-commerce businesses, this technique is more than just a visual upgrade. It improves consistency, builds customer trust, reduces confusion, and helps shoppers make better buying decisions. Whether you run a small fashion store or manage a large product catalog, ghost mannequin editing can make your clothing images look more polished, professional, and ready to sell.