Neck Joint Ghost Mannequin: Technique & Examples
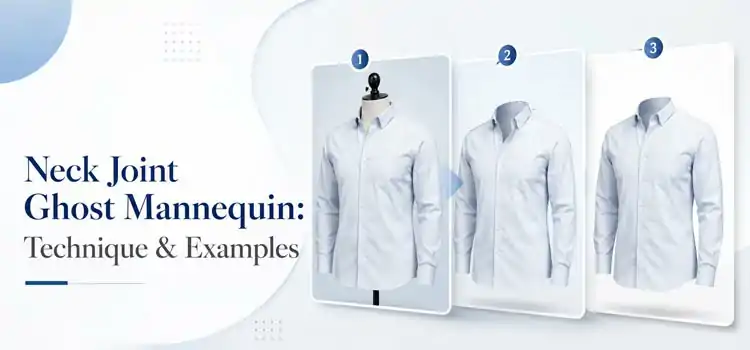
You shoot a garment on a mannequin. The photo looks stiff and unprofessional. The neck area blocks the collar structure. Buyers cannot see the inner lining or label. This is a problem every clothing brand faces. The neck joint after ghost mannequin technique solves it completely.
This technique removes the mannequin from the neckline in photography post-production. It combines two photos of the same garment. The result is a clean, 3D collar with a hollow center. The garment looks worn but has no model, no dummy, and no distractions.
In this content, you will know exactly how the technique works, what tools photo editors use, what mistakes to avoid, and what great results look like. You will also find real examples and answers to the most common questions brands ask before starting.
What Is the Neck Joint Technique in Ghost Mannequin Service?
“The neck joint technique is a photo editing method. It combines two or more product shots to remove the mannequin from the neckline area. The result shows a floating, hollow collar that looks natural and professional.”
Every clothing brand needs clean product images. Customers want to see how a shirt collar, jacket lapel, or neckline looks from the inside. A mannequin blocks that view.
The neck joint technique solves this. A product photographer shoots two images of the same garment. The first shot shows the front of the product on the mannequin. The second shot shows the inside of the collar with the garment laid flat or flipped.
An editor then combines both images in Photoshop. They mask the mannequin neck, fill in the inner collar, and blend the edges. The final image shows a perfect 3D collar with no dummy, model, or distracting background.
This is a core part of the Ghost Mannequin Service that e-commerce brands rely on for consistent, conversion-ready product photos.
Why Do Fashion Brands Need Neck Joint Editing?
“Fashion brands need neck joint editing to present their garments professionally. It shows the full neckline shape, collar structure, and inner label. Clean neck joint images build buyer trust and increase online sales.”
Online customers cannot touch or try on a product. They rely entirely on images. A poorly cropped neck or a visible mannequin makes a product look cheap.
Neck joint editing fixes this problem. It gives each product a polished, catalog-quality look. Brands that sell on Amazon, ASOS, Zalando, or their own Shopify store all need this consistency.
Here are the main reasons brands choose neck joint editing:
- Better presentation: The collar shape and structure become fully visible.
- Consistent style: Every product image looks uniform across the catalog.
- Higher trust: Clean images signal quality to buyers.
- More conversions: Shoppers buy more when images look professional.
- No model cost: Brands save money by skipping expensive model shoots.
How Does the Neck Joint Process Work Step by Step?
“The neck joint process works in three main steps. First, the photographer shoots the garment on a mannequin. Second, they shoot the inside of the collar separately. Third, an editor merges both images and removes the mannequin.”
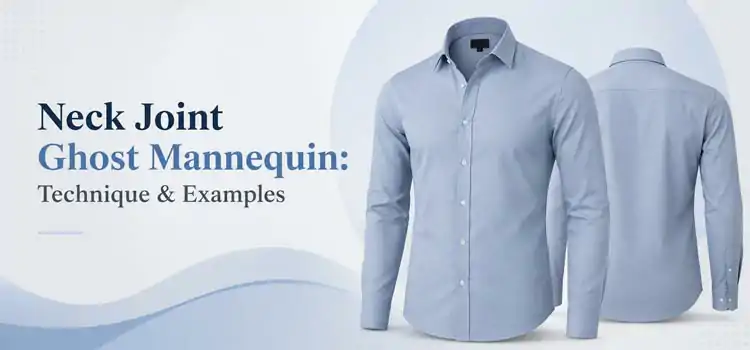
Step 1: Front Shot on Mannequin
The photographer places the garment on a plustic mannequin. They shoot the front view on a white or grey background. The neck of mannequin is visible in this shot.
Step 2: Inside Collar Shot
The photographer removes the garment from the mannequin. They flip the collar outward or lay the garment flat. They shoot the inner neckline, inner label, and collar lining clearly.
Step 3: Photoshop Editing and Merging
We, the editors open both images in Adobe Photoshop and use the pen tool to trace the exact collar and neck area. Then we mask the mannequin parts and place the inner collar image underneath. Lastly, we blend the two layers carefully so the join looks invisible.
The final image shows a clean, hollow collar. No mannequin or rough edges. Just a sharp, professional product photo.
What Types of Garments Need Neck Joint Editing?
“Neck joint editing works for almost every garment with a neckline. T-shirts, dress shirts, hoodies, jackets, blazers, polo shirts, and knitwear all benefit from this technique. Any product with a visible collar or neckline is a good candidate.”
Different garment types need slightly different approaches:
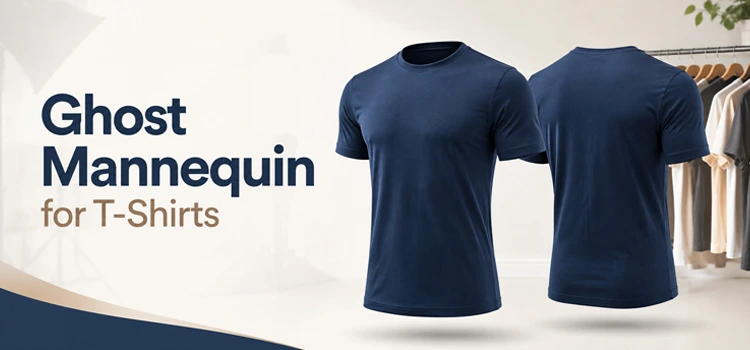
T-Shirts and Polo Shirts- These have simple round or polo necklines. The inside collar shot is easy to capture. Editing is straightforward and fast.
Shirts and Formal Shirts- Dress like shirts have collars with sharp points. The inside collar lining and label are both important. Editors must align the collar points perfectly in the merge.
Hoodies and Sweatshirts- Hoodies have thick fabric and a drawstring channel. The inner neck area needs masking to show depth and volume.
Jackets and Blazers- These are complex. Lapels, inner linings, and collar structures all need accurate photo editing. Editors spend more time on these garments.
Knitwear and Sweaters- Knit fabric has texture. The editor must preserve the texture while removing the mannequin. This requires high zoom work and careful brush masking.
What Tools Do Editors Use for Neck Joint Editing?
“Editors use Adobe Photoshop as the main tool for neck joint editing. They use the pen tool, layer masks, and blending modes. Some teams also use Lightroom for color correction before the main editing begins.”
Here is a breakdown of the key tools:
Pen Tool- This tool creates precise vector paths around the neckline. It gives clean, sharp edges on the collar.
Layer Masks- Editors place the inside collar image on a separate layer. They use a mask to hide and reveal specific areas. This keeps the editing non-destructive.
Clone Stamp Tool- This fills in gaps or missing areas along the neck edge. It copies surrounding pixels to match texture and color.
Healing Brush- This smooths any rough transitions between the two merged images.
Curves and Levels- These tools match the brightness and color tone of both shots so they look like one image.
Zoom and High Resolution Work- Neck joint editing requires working at 100% to 200% zoom. Pixel-level accuracy matters here.
What Are Common Mistakes in Neck Joint Editing?
“Common mistakes in neck joint editing include misaligned collar edges, mismatched lighting, rough mask edges, and color tone differences between the two shots. These errors make the final image look unnatural and reduce buyer confidence.”
Knowing the mistakes helps editors avoid them. Here are the most common ones:
Misaligned Collar- If the front shot and inside shot do not align, the collar looks crooked or doubled. Precise transformation and scaling fix this.
Lighting Mismatch- The two shots may have different light angles or intensities. The merged image then shows a clear join line. Matching lights during the shoot prevents this.
Rough Mask Edges- A quick selection tool often leaves jagged, blocky edges. The pen tool gives cleaner results.
Color Tone Difference- One shot may look warmer or cooler than the other. Color correction in Photoshop must match both shots before merging.
Missing Inner Label- Some clients forget to shoot the inner label. The final image then has a gap or a patched area that looks wrong.
What Do Good Neck Joint Examples Look Like?
“Good neck joint examples show a seamless collar with a natural hollow center. The inner lining is clearly visible. The collar edges are sharp and smooth. No mannequin parts show through. The lighting and color look consistent across the whole image.”
Here are the qualities of a great neck joint result:
- The collar has a perfect 3D shape
- The inside neckline and label are visible and sharp
- No mannequin neck or shoulder shows anywhere
- The background stays clean white or transparent
- Both image layers blend with zero visible join line
- The garment texture looks natural with no smearing or blurring
These qualities make a product image ready for any e-commerce platform.
How Much Does a Professional Ghost Mannequin Service Cost?
“A professional Ghost Mannequin Service typically costs between $0.80 and $5.00 per image. The price depends on garment complexity, editing time, turnaround speed, and the service provider. Bulk orders usually cost less per image.”
Here is a rough pricing breakdown:
| Garment Type | Estimated Price Per Image |
| T-shirt / Basic Top | $0.80 – $1.50 |
| Dress Shirt / Polo | $1.50 – $2.50 |
| Hoodie / Sweatshirt | $2.00 – $3.00 |
| Jacket / Blazer | $3.00 – $5.00 |
| Complex / Layered Pieces | $5.00+ |
Most professional services offer free trials. This lets brands test quality before committing to a bulk order.
Frequently Asked Questions
-
What is a ghost mannequin in photography?
A ghost mannequin is an invisible dummy used in fashion photography. The photographer shoots a garment on a mannequin. An editor then removes the mannequin in post-production. The result looks like the garment floats in the air with a hollow, 3D interior. This technique saves money on model shoots and keeps product images consistent.
-
Why is it called a “ghost” mannequin?
It is called a ghost mannequin because the dummy seems to disappear in the final image. The garment keeps its shape as if worn by an invisible person. The term comes from the visual result, the clothing looks like a ghost wearing it. Many editors and photographers in the fashion industry use this term widely.
-
Is neck joint editing the same as ghost mannequin editing?
Neck joint editing is one specific part of ghost mannequin editing. Ghost mannequin editing can involve removing the full mannequin, including arms, torso, and legs. Neck joint editing focuses only on the collar and neckline area. Most garments need at minimum a neck joint edit to look professional on any e-commerce platform.
-
How many photos do I need to shoot for neck joint editing?
You need at least two photos per garment. The first is a front shot of the garment on the mannequin. The second is an inside collar shot showing the neckline and label. For complex garments like jackets, you may need a third or fourth angle to capture all sides of the collar structure properly.
-
Can I do neck joint editing without Photoshop?
Photoshop is the industry standard, but you can use alternatives like GIMP or Affinity Photo. Both have pen tools and layer mask features. However, Photoshop remains the best tool for professional results. Most commercial editing studios and freelancers use Photoshop for speed, precision, and access to advanced blending tools.
-
How long does neck joint editing take per image?
A simple t-shirt neck joint takes about 10 to 20 minutes per image for an experienced editor. A complex jacket or blazer can take 30 to 60 minutes. Beginners may take longer. Professional editing services often work overnight and deliver edited images within 12 to 24 hours of receiving the original files.
-
What file format should I deliver to a neck joint editor?
Always deliver RAW or high-resolution JPEG files to your editor. RAW files give editors more control over color and exposure. If you shoot JPEG, make sure it is at the highest quality setting. Ask your editing service what format they prefer. Many services accept TIFF, PNG, and JPEG formats without issues.
-
What background color works best for ghost mannequin shooting?
A pure white background works best for e-commerce platforms like Amazon and Shopify. It makes masking and background removal much easier. A light grey background also works well and shows garment edges more clearly. Avoid patterned or dark backgrounds. They create extra work and can affect edge quality during masking.
-
Can neck joint editing work for all garment colors?
Yes, neck joint editing works for all garment colors. However, very light colors on white backgrounds can be tricky. White shirts, cream tops, and light grey garments blend into the background. An editor must use contrast adjustments carefully to keep the collar edges sharp. Colored garments are generally easier to mask and merge cleanly.
-
Do I need a special mannequin for this technique?
You do not need any special mannequin. Any standard dressmaker’s dummy or professional ghost mannequin works. Some brands use mannequins with detachable necks or shoulders. These make shooting easier because removing parts creates a cleaner inside collar shot. However, any mannequin with a removable neck panel helps speed up the editing process significantly.
-
How do I find a reliable ghost mannequin editing service?
Look for a service with a strong portfolio and clear pricing. Request a free trial before placing a bulk order. Check turnaround time, revision policy, and customer support availability. Read reviews from real clients. A reliable Ghost Mannequin Service will show before-and-after samples and communicate clearly about timelines, formats, and revision rounds.
-
What is the difference between neck joint and bottom joint editing?
Neck joint editing handles the collar and neckline area of a garment. Bottom joint editing handles the bottom hem, waist, or lower opening of a shirt, dress, or jacket. Both techniques are part of the ghost mannequin workflow. Some garments need both neck and bottom joints to show a fully hollow, wearable look in the final product image.
-
Can neck joint editing improve my sales?
Yes, clean neck joint images directly improve sales. Shoppers respond better to clear, professional product images. When buyers can see the full neckline, collar structure, and inner label, they feel more confident about the product. Studies consistently show that high-quality images reduce bounce rates and increase add-to-cart rates on e-commerce product pages.
Conclusion
The neck joint ghost mannequin technique is not optional for serious clothing brands. It is a standard part of professional product photography. It shows your garment honestly, cleanly, and with full detail.
You now know how the process works from shoot to final edit, what tools editors use, what mistakes to watch for, and what a great result looks like and know what to look for when choosing an editing service.
Start with one garment type. Shoot the front and the inside collar. Send both images to a professional editor. Review the result carefully. Check the collar edges, the inner lining, the label, and the overall blend.
Once you see the difference between a raw mannequin shot and a finished neck joint image, you will never go back. Your product pages will look sharper. Your buyers will trust your brand more. And your conversions will improve.