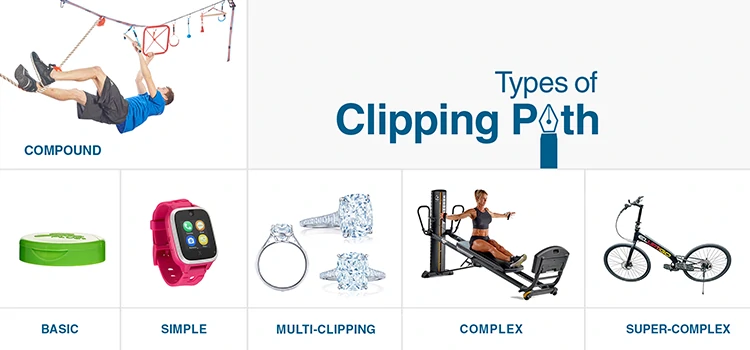
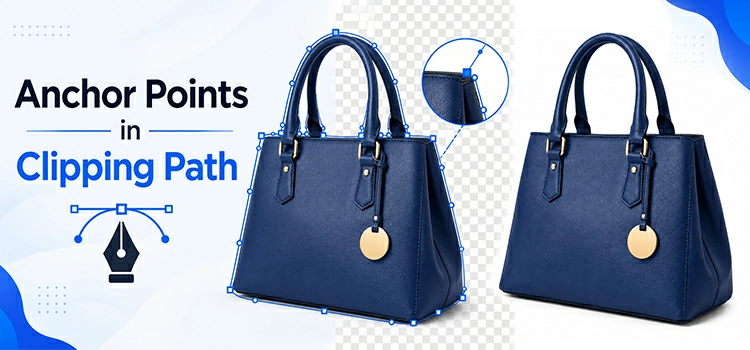
Anchor Points in Clipping Path: How Many Are Enough?
Anchor points control every clipping path that you draw around the product. Too few points, your path looks jagged. Too many, it becomes a nightmare to edit. Creating right number of anchor points saves time and produces clean, professional results. For clipping path, photo editors create anchor points using pen tool, select the images, and remove the product image background.
What Is an Anchor Point?
An anchor point marks a spot on a path where the direction changes. In tools like Adobe Photoshop or Illustrator, you place anchor points when you draw a pen path around a subject. Each point connects to the next with a line or curve segment.
Think of anchor points as joints. A human arm bends at the shoulder, elbow, and wrist, not at every inch of skin. Your path or anchor point works the same way.
Why the Number of Anchor Points Matters?
Every extra anchor point adds complexity. It gives you one more handle to manage, one more place where the curve can go wrong.
But too few points cause different problems. The path cuts corners. Curves look blocky. The subject edge appears unnatural, especially on organic shapes like hair, fabric, or skin.
The goal is making a balance: enough points to follow the shape accurately, not so many that the path becomes cluttered.
The General Rule
Use the minimum number of anchor points that still captures the shape cleanly.
Professional retouchers follow a simple principle: one anchor point per major direction change. If the edge curves consistently in one direction, a single point with smooth handles is enough for that section. You only add another point when the curve changes direction.
How Many Points for Common Shapes?
Simple geometric shapes need minimal anchor points, typically one per corner. Rounded shapes like circles require only four well-placed points. Complex products need points where curves change, while organic objects require careful simplification, using smooth handles instead of excessive anchor points.
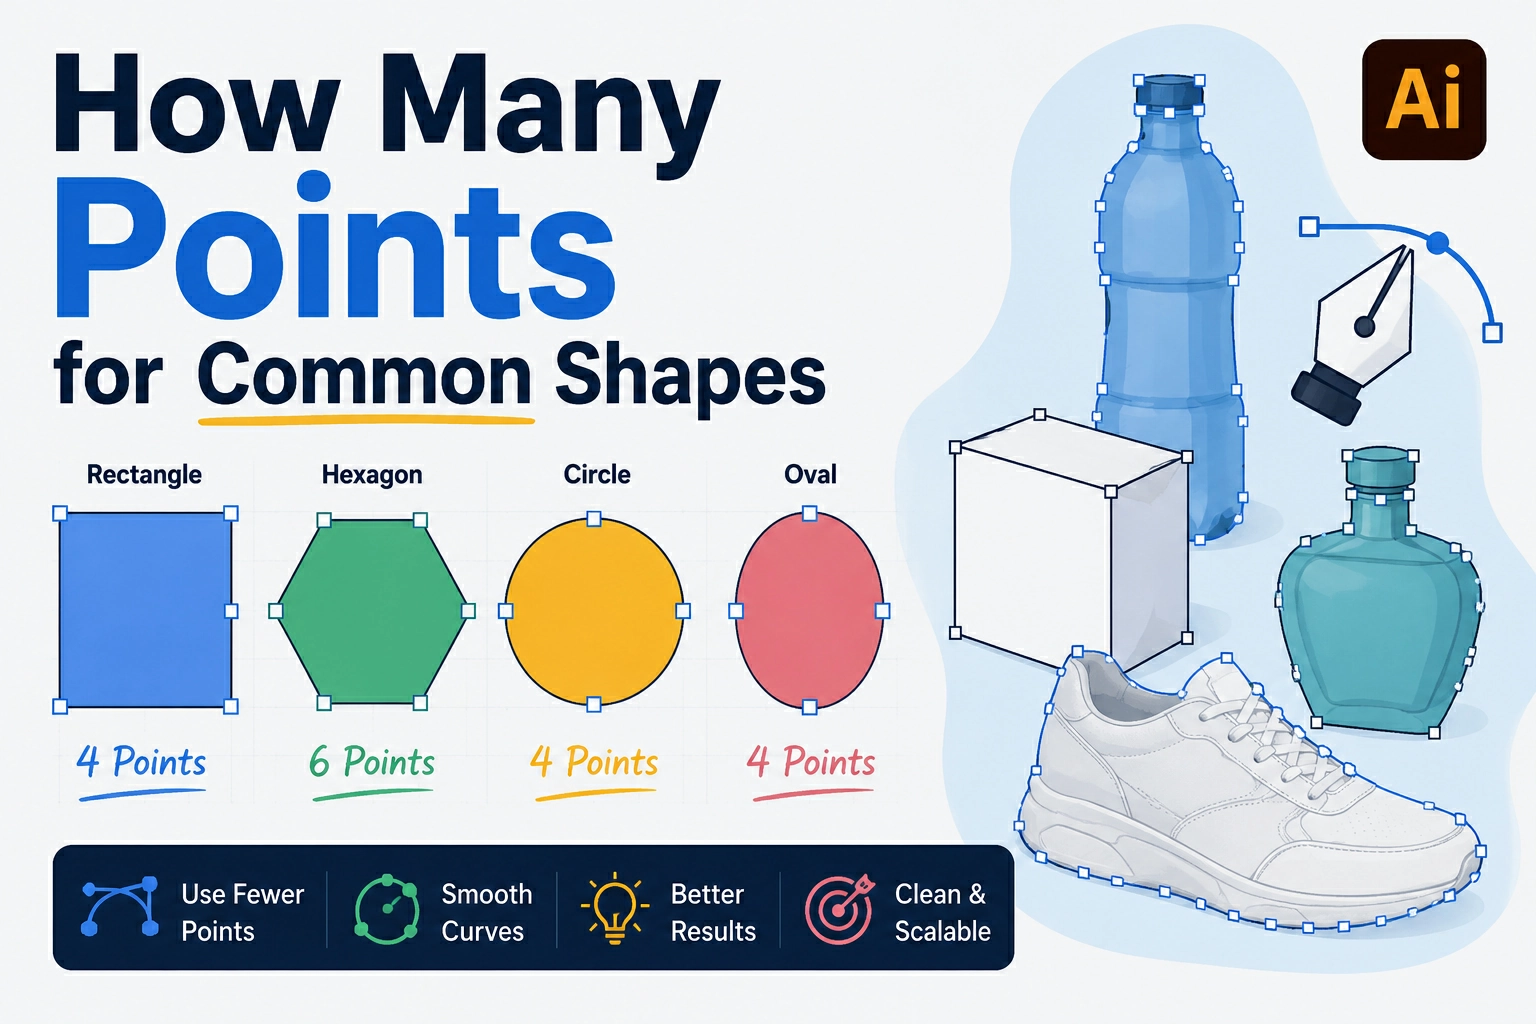
Simple Geometric Objects
Products like boxes, books, or rectangular electronics have straight edges and sharp corners. These need very few anchor points, typically one at each corner.
A standard rectangular box needs just 4 anchor points. A hexagonal bottle cap needs 6. Simple shapes stay simple.
Rounded or Oval Shapes
Circles and ovals trip up beginners. Many people place 8 or more points around a circle. You only need 4, one at each quarter of the curve (top, right, bottom, left). Each point gets smooth handles, and the curve flows naturally between them.
Complex Product Shapes
A bottle with a curved body, narrow neck, and flared top needs more thought. You place points wherever the curvature shifts, where the body starts to narrow, where the neck begins, where the cap edge sits.
For a moderately complex product, 12 to 20 anchor points often works well.
Organic and Irregular Shapes
Clothes, shoes, and natural objects have irregular edges. These need more anchor points, but still not as many as beginners tend to use.
Trace major shape changes. Ignore tiny surface irregularities unless your client needs pixel-perfect accuracy at extreme zoom levels. For most web and print work, smoothing minor bumps with handles is better than adding extra points for every small variation.
When do Too Few Points Cause Problems?
A path with too few points produces straight-line segments where curves should exist. The subject looks like it has been cut with scissors along a ruler.
You also lose accuracy at important edges, like the curve of a shoulder, the arc of a wheel, or the bend of a handle. The cutout looks fake when placed on a new background.
When do Too Many Points Cause Problems?
Excess anchor points create wavy, uneven edges. Each extra point interrupts the smooth flow of the path. The result looks bumpy, even if the individual points are correctly placed.
Over-pointed paths also make editing slow and painful. Moving one point pulls the segment in unexpected ways. Corrections ripple through the path.
For stock images and e-commerce product photos, editors often receive files with hundreds of unnecessary points. Cleaning those paths adds extra time and cost.
What are the Practical Tips for Getting the Count Right?
Use as few anchor points as possible, relying on smooth curves and extended handles for accuracy. Zoom in for precision, zoom out for shape verification, follow the subject’s visual edge instead of individual pixels, and adjust path detail based on the image’s final display size.
Start with fewer points than you think you need. You can always add more. Removing points from an over-drawn path is harder and more time-consuming.
Use smooth anchor points for curves. Corner points break the flow. Smooth points with extended handles cover large curved sections with far fewer anchors.
Zoom in to check, zoom out to judge. Zoom into 100% or 200% while placing points. Then zoom out to see if the overall shape reads correctly before finalizing.
Follow the shape, not the pixel edge. A clipping path should trace the optical edge of the subject, not chase every anti-aliased pixel. Slight smoothing looks more natural and requires fewer points.
Match the detail level to the output size. A product image displayed at 200px wide on a website needs far less path precision than a 3000px image going to print. Don’t over-detail a path the viewer will never zoom into.
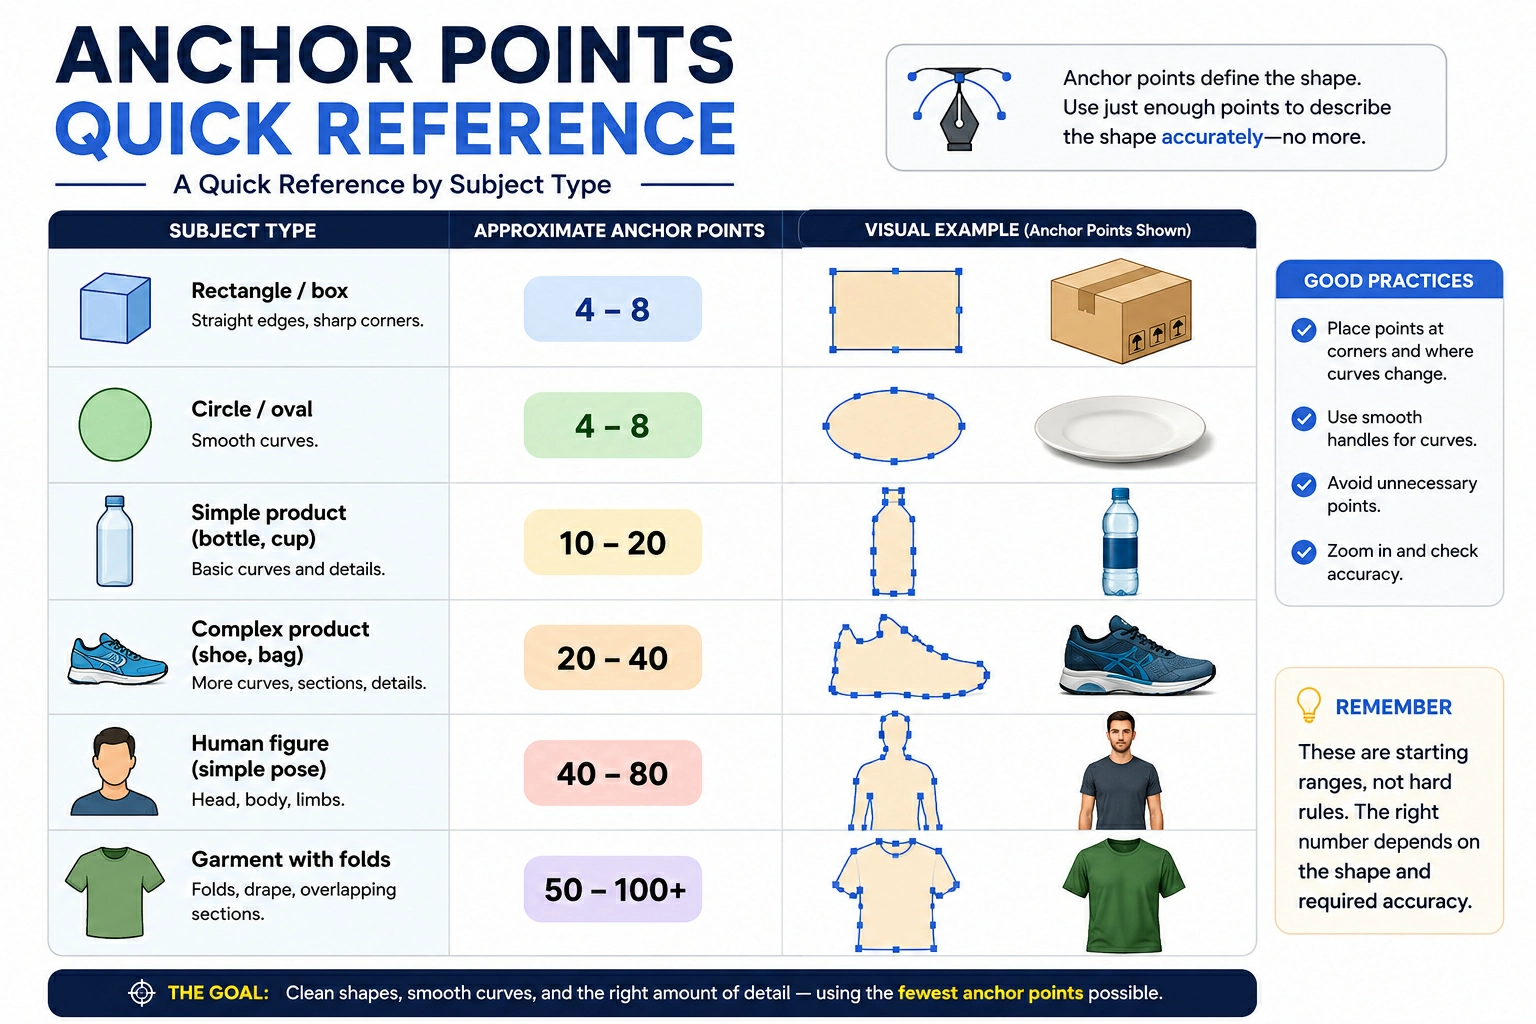
A Quick Reference by Subject Type
|
Subject Type |
Approximate Anchor Points |
|
Rectangle / box |
4–8 |
|
Circle / oval |
4–8 |
|
Simple product (bottle, cup) |
10–20 |
|
Complex product (shoe, bag) |
20–40 |
|
Human figure (simple pose) |
40–80 |
| Garment with folds |
50–100+ |
These are starting ranges, not hard rules. The right number depends on the shape and required accuracy.
What are The Role of Handles?
Anchor point handles matter as much as the points themselves. A point placed correctly but with poorly adjusted handles will produce a bad curve.
Extend your handles along the direction of the curve. Longer handles create smoother, wider arcs. Shorter handles create tighter curves. Learning to control handles reduces how many anchor points you need, a single well-handled point can cover a large curved section.
What are the Common Mistakes to Avoid?
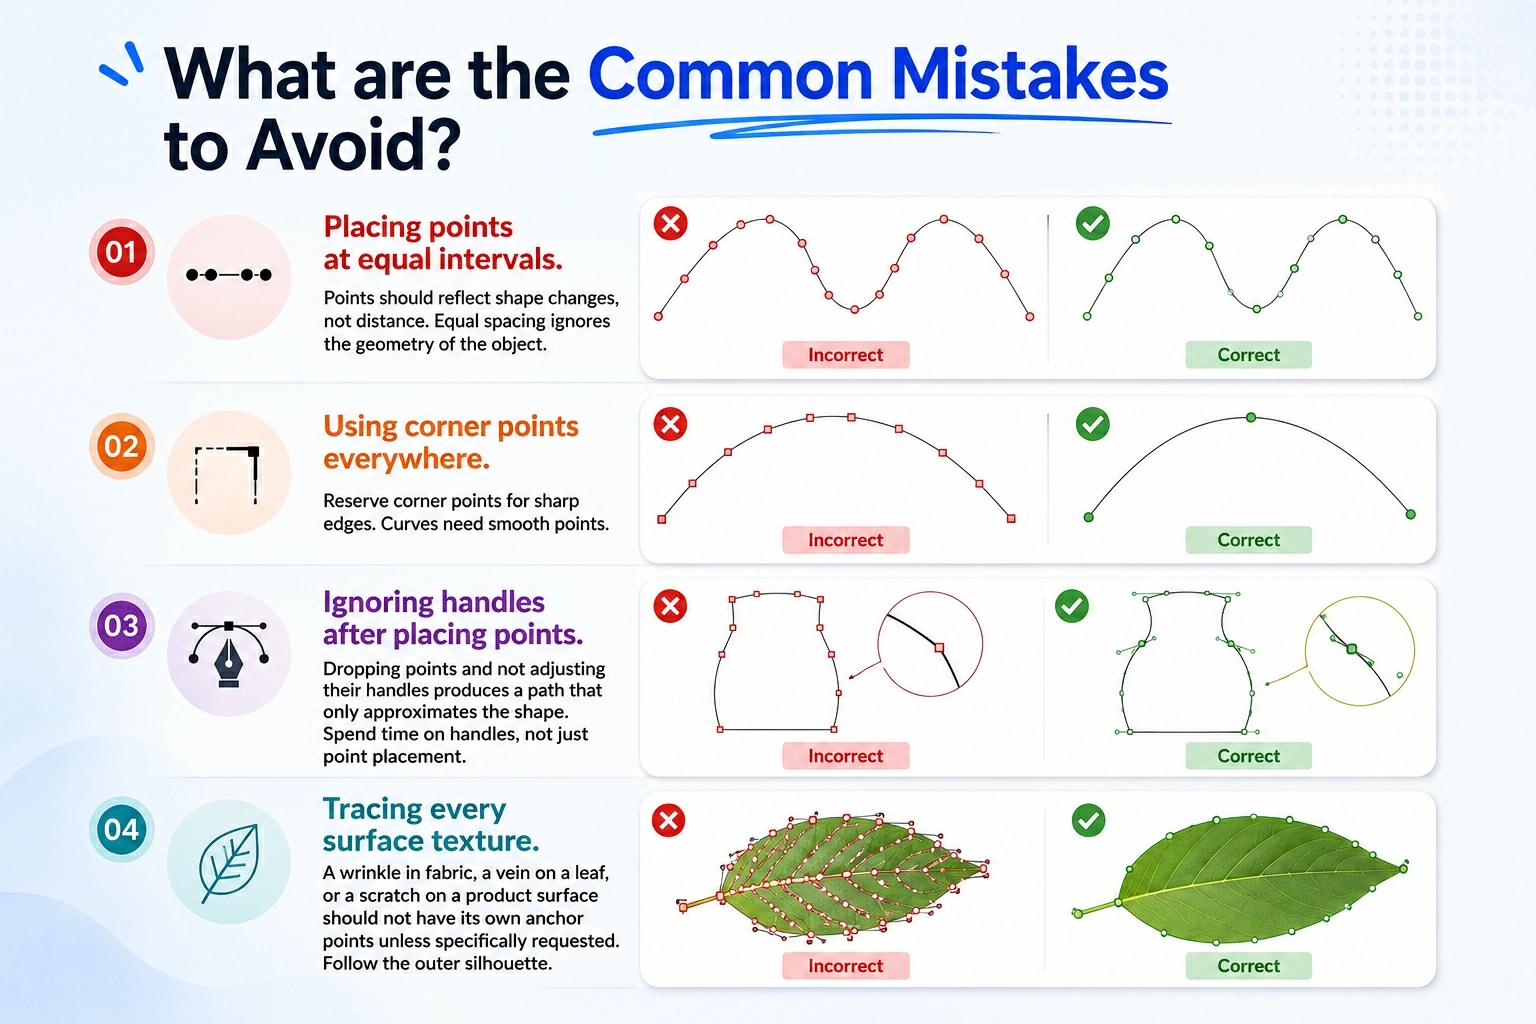
Placing points at equal intervals. Points should reflect shape changes, not distance. Equal spacing ignores the geometry of the object.
Using corner points everywhere. Reserve corner points for sharp edges. Curves need smooth points.
Ignoring handles after placing points. Dropping points and not adjusting their handles produces a path that only approximates the shape. Spend time on handles, not just point placement.
Tracing every surface texture. A wrinkle in fabric, a vein on a leaf, or a scratch on a product surface should not have its own anchor points unless specifically requested. Follow the outer silhouette.
Final Thought
There is no single correct number of anchor points for every image. The right count depends on shape complexity, the required output quality, and how the final image will be used.
The best clipping path editors develop a feel for this through practice. They know when a curve needs another point and when a well-adjusted handle is the better solution. They edit with economy, every anchor point earns its place.
Start with fewer points. Use handles well. Add points only where the shape genuinely demands them. That approach produces clean, editable, professional clipping paths every time.