How to Edit Winter Product Photos: Color Grading, Lighting, and Textures

“Edit winter product photos by fixing white balance first, then grade colors for a cool but clean look, balance light and shadows, and finish with texture work. Keep the product color true, protect the whites, and sharpen only key details.”
Winter changes how products look on camera. Snow reflects light. Cold air shifts color. Low sun adds long shadows. Raw photos often look flat, gray, or too blue. Good editing fixes these problems. It also helps your product stand out in a busy feed or store page. This guide shows each step to edit winter product photos in a clear order. You will learn color grading, lighting fixes, and texture work. Each step uses simple tools that most editors include.
Follow the steps in order. Small changes add up. By the end, your winter photos will look clean, inviting, and true to the real product.
What Makes Winter Product Photos Hard to Edit?
“Winter photos are hard to edit because snow reflects light, cold tones shift colors, and low sun creates harsh contrast. Cameras often misread white scenes and make them gray or blue. Fix these issues while keeping the product looking natural.”
Winter scenes mix very bright and very dark areas. A white coat on snow can lose all detail. Cameras often expose snow too dark, so the scene turns gray. Cold light also adds a blue cast to the whole image.
Texture adds another challenge. Wool, fur, and frost need fine detail. Too much sharpening makes them look rough. Too little makes them look flat.
Plan for these problems before you edit. Look at the histogram. Check the whites, the shadows, and the product color. Then fix each issue one at a time.
How Do You Prepare Your Photos Before Editing?
“Prepare your photos by shooting in RAW, sorting your best shots, and cleaning dust from the product. Then crop, straighten, and set a lens profile. These steps give you a clean base, so later color and light edits work better.”
Good prep saves time later. Follow these steps:
- Shoot in RAW when you can. RAW files hold more data.
- Pick your best shots. Skip blurry or badly framed images.
- Clean dust and fingerprints with the spot removal tool.
- Crop and straighten. Use a grid to keep lines level.
- Turn on lens corrections to fix edge distortion.
Do these steps on every photo in the set. A clean base makes the rest of the edit fast.
How Do You Fix White Balance in Winter Photos?
“Fix white balance by using the eyedropper tool on a neutral gray or white area. Then nudge the temperature slider until the whites look clean. Keep a slight cool tone if you want a winter mood, but avoid heavy blue.”
White balance sets the base for every other edit. Start with the eyedropper tool. Click a neutral spot, such as a gray label or a white box. The photo shifts to a natural look at once.
Next, move the temperature slider. Slide toward blue for a colder mood. Slide toward yellow if the snow looks too icy. Then adjust the tint slider to remove green or pink casts.
Stop when the whites look clean. Let the winter mood come from grading later, not from a wrong base.
How Do You Color Grade Winter Product Photos?
“Color grade winter photos by adding soft cool tones to shadows and warm tones to highlights. Lower saturation a little, then lift key product colors. Keep the grade very light so the product still looks true and appealing to shoppers.”
Color grading gives your photos a clear winter style. Use the color grading panel or the split toning tool. Follow these steps:
- Add blue or teal to the shadows. Keep it soft.
- Add a warm tone to the highlights. Soft gold or peach works well.
- Lower overall saturation by 5 to 10 points.
- Raise vibrance to protect important product colors.
- Use the HSL sliders to fine tune reds, blues, and greens.
Check the result on a phone screen too. Most shoppers browse on phones. If the grade feels heavy, cut it in half.
How Do You Fix Lighting in Winter Product Photos?
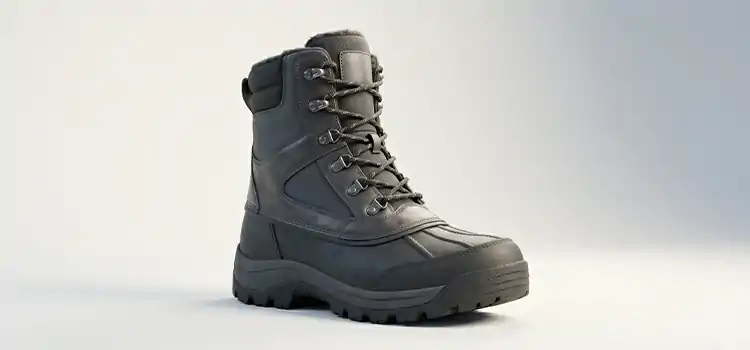
“Fix lighting by lifting shadows, lowering highlights, and adding a gentle gradient on the background. Use a local brush to gently brighten the front of the product. Aim for soft, even light that shows shape without hard, dark shadow edges.”
Lighting edits shape the product and guide the eye. Start with global changes. Raise exposure until the product looks bright. Lower highlights to save detail in the snow. Lift shadows to show folds and edges. Add a small amount of contrast to give depth.
Then use local masks. Brush light onto the face of the product. Darken the edges of the frame a little with a radial filter. This draws the eye to the center. Add a soft gradient on the background to remove flat patches.
Keep shadows gentle. Winter products look best in soft, even light.
How Do You Handle Snow and Bright Whites?
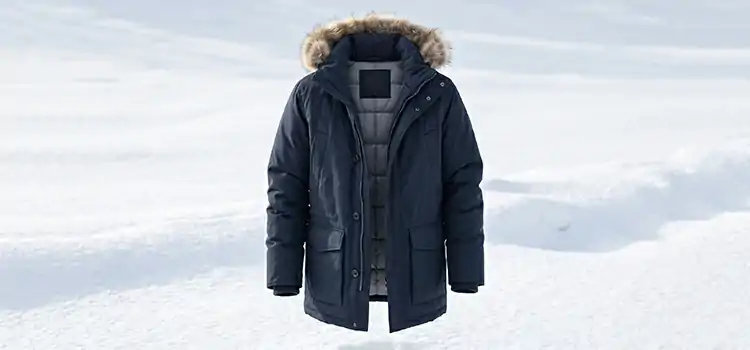
“Protect snow and white backgrounds by lowering the whites slider and checking the histogram. Pull highlights back until you see detail. Keep the background bright but not pure white, so the product edges stay clear and snow keeps its texture.”
Snow can ruin a good photo when it loses detail. Open the histogram. If the graph hits the right wall, the whites clip. Lower the whites and highlights sliders until the graph pulls back.
Remove gray or blue tint from the snow. Use a mask on the background and warm it slightly. Add a bit of texture to show soft grain. Do not paint the snow pure white.
Check the product edges. A white product on snow needs clear separation. Add a thin shadow or darken the background a little.
How Do You Edit Textures Like Wool, Knit, and Frost?

“Edit textures by raising texture and clarity slightly, then sharpen with a mask. Apply the mask only to the product, not the snow or skin. This brings out wool, knit, leather, and frost details without adding noise or rough look.”
Texture makes winter products feel real. Customers want to sense the knit or the frost. Follow these steps:
- Raise texture by 5 to 15 points.
- Raise clarity a little for mid tone contrast.
- Sharpen at 100 percent zoom. Hold the Alt key on the masking slider to see the mask.
- Mask out smooth areas such as sky and snow.
- Add light grain if the image looks too smooth.
Use a brush for fine control. Paint extra texture on wool, leather, or metal. Keep skin and soft backgrounds smooth. Reduce noise first if you shot at a high ISO.
How Do You Keep Product Colors Accurate?
“Keep colors accurate by comparing your edit to the real product or a color card. Check key brand colors like reds and blues first. Avoid heavy color filters, since shoppers expect the photo to match what arrives at their door.”
Accurate color builds trust. Shoppers return items that look different from the photo. Winter grading can shift colors without you noticing.
Place the real product near your screen. Compare it to your edit. A gray card or color chart in the shot helps even more. Check reds, blues, and brand colors first.
Turn your grade off for a second, then turn it back on. If the product color changes a lot, soften the grade. Cool tones should shape the mood, not change the product.
Which Tools Work Best for Winter Photo Editing?
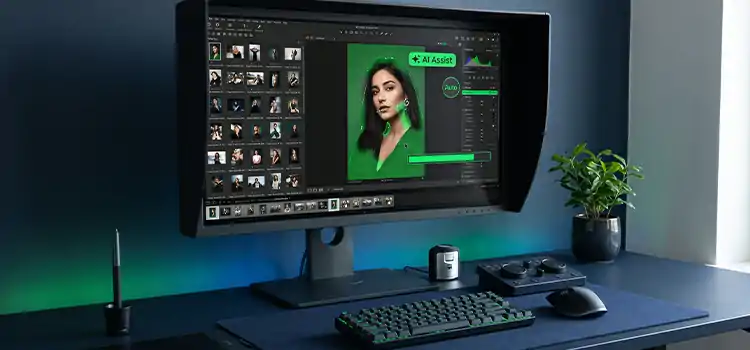
“Adobe Lightroom works best for color grading and light fixes. Photoshop handles cleanup, masks, and detailed texture work. Free tools like Snapseed and Darktable also work well. Pick the tool that fits your budget, skill level, and total photo count.”
Pick a tool that fits your skill and budget. Adobe Lightroom gives you sliders, masks, and presets in one place. Photoshop handles complex cleanup and layers. Capture One offers strong color control. Snapseed, Darktable, and GIMP cost nothing and still do good work.
Beginners can start with Lightroom or Snapseed. Sellers who edit many photos should use presets and batch tools. Learn one tool well before you add another.
How Do You Finish and Export Winter Product Photos?
“Finish by checking the edit at full size, then export in sRGB for web use. Resize to your store’s needs and save a high quality JPEG or WebP. Keep your original RAW files and a layered copy for later edits.”
Check the final image before you export. Zoom to 100 percent and scan for dust, halos, and noise. View the photo at a small size too. Then compare it to the others in your set.
Export in sRGB so colors look the same on most screens. Set the long edge to 2000 pixels or more. Choose JPEG or WebP at 80 to 90 percent quality. Keep the RAW file and a layered copy. You can then redo your edits at any time.
What Should You Remember About Editing Winter Product Photos?
“Great winter product photos need clean whites, soft cool color, balanced light, and sharp texture. Edit in order, keep the product color true, and use light touches. Save a preset once you like the result, then reuse it across photos.”
Winter product photos need a clear process. Fix white balance first. Grade color with a light hand. Balance light and shadows. Protect the snow. Add texture where it matters. Check color against the real product before you export.
Practice on a few images. Save your best settings as a preset. Your edits will get faster, and your catalog will look more consistent. Start with your next photo today and apply each step in order.
What Are the Most Common Questions About Editing Winter Product Photos?
“Common questions cover white balance, color grading, snow, textures, tools, and presets. The answers below give short, clear steps you can use today to edit winter product photos faster and with better results. Use them as your quick editing checklist.”
-
What is the best white balance for winter product photos?
Aim for neutral whites first. Use the eyedropper on gray or white to set a clean base. Then add a small cool shift if you want a winter feel. Check the product color against the real item so the final look stays honest.
-
Should I shoot in RAW for winter photos?
Yes. RAW files keep more detail in bright snow and dark shadows. You can fix white balance and recover highlights without losing quality. JPEG files lock in many choices, so edits look harsher and fall apart sooner. Shoot RAW whenever your camera allows it.
-
How do I stop snow from turning gray?
Raise exposure a little and lift the white slider. Then check the histogram. The graph should reach the right side without clipping. Use a soft brush on the background if the snow still looks dull. Cameras often underexpose snow, so this fix works in most cases.
-
What colors work best for winter color grading?
Soft blues, teals, and cool grays suit winter. Add warm tones in the highlights to keep the product friendly. Keep skin and product colors natural. Avoid strong tints, since they hide true color and can lower trust. Warm reds and golds also add a cozy touch.
-
How much texture should I add?
Add a little. Raise texture by 5 to 15 points and sharpen with a mask. Check at 100 percent zoom. If the image looks crunchy or noisy, reduce the amount. Wool, knit, and leather need more care than metal or glass.
-
How do I fix harsh shadows in winter photos?
Lift shadows with the shadows slider. Then use a soft brush to brighten dark areas on the product. Lower contrast a little. If the shadow has a hard edge, paint it lighter and blur the edge for a natural look.
-
Which software is best for beginners?
Lightroom is a good choice because it has simple sliders, presets, and masks. Snapseed is free and easy on a phone. Both give good results. Start with one tool, learn the basic steps, and then add other tools only when you need them.
-
Can I use one preset for every winter photo?
Yes, as a starting point. A preset saves time and keeps your catalog consistent. But lighting changes from photo to photo. A preset rarely finishes the job alone. Adjust exposure and white balance after you apply it, and check each product color.
-
How do I keep edits consistent across a product catalog?
Use one preset, one background tone, and one crop rule. Sync settings across similar photos, then fine tune each image. Compare images side by side in a grid. Review the full set before you export. Consistent photos build trust and make your store look professional.
-
What export settings work best for online stores?
Export in sRGB with a long edge of 2000 pixels or more. Use JPEG at 80 to 90 percent quality, or WebP for faster pages. Keep file size small so your store loads quickly. Check each platform’s size rules before you upload.