See-through Effects and Remove Clothes using GIMP [Tutorial]
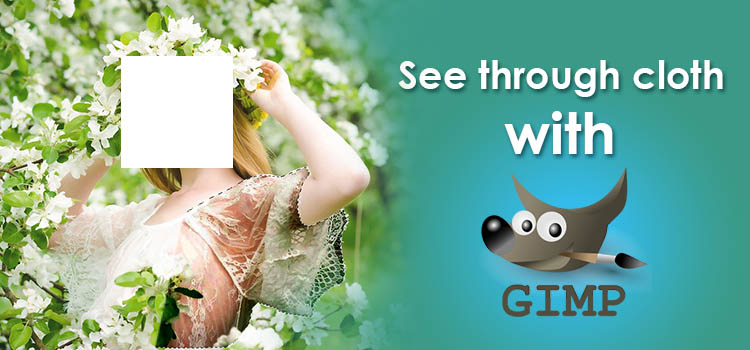
Earlier in our other tutorial, we have shown Sneaky See-Through Clothes Effects in Photoshop. But Photoshop is not the only tool you can use for getting a see-through effect. Moreover, Photoshop is paid tool. But, GIMP is an open-source free tool that also can be used to get your desired X-Ray Vision.
With this sneaky technique, you can see through the cloth of your favorite model or any other persons’ undergarments or even bodies. To do that, you first need to get GIMP on your PC, and also you’ll need a suitable image that has hidden pixels. By hidden pixels, we mean pixels that are blended with clothes and skin. If the clothe’s pixels are solid, getting the see-through and x-ray effect will not be possible. The clothes and skin blending ratio is also important to get your desired effect.
By reading this step-by-step tutorial, you will be capable to unveil the hidden pixels and enable your x-ray vision. If you have a worthy image and GIMP, then go over this tutorial for quenching your desires.
1. At the very first moment run your GIMP photo editing tool and open your selected photo on which you want to work.

2. You have to zoom in on your image proportionately so that you can create a path properly. For zooming, select the Zoom Tool and click on your image.

3. Once you have zoomed your photo as a requirement, you have to select the Path tool and create a Clipping Path around the cloth you want to see through. You can do the same thing with Scissors Select tool, FreeHand tool, etc. But, the Path tool is cooler to use, and that is why we have used here it.

4. Now, you should transform the path into a selection. So, double click on the Path tool icon and you will get a popup box. Here, you’ll get Selection from Path option. Click on it and you can see blinking and move dashed around the path you have created.

5. Then, click on the Colors option from the top menu bar and go to Levels & click on it.

6. Then, move the slide of Levels as long you are not satisfied with the result. See our experimental image.

7. If you are satisfied, you can quit here. But, for the further results, you can do more. Go to Colors and select Hue-Saturation or Brightness-Contrast, select, move their slides as your necessity.

8. We have here applied Brightness-contrast for making a more realistic skin color.
The above cool technique will give you the liberty to see-through cloth anybody. You can also use this method for your creative image-enhancing job or any other photo editing service. Try it yourself or if you cannot work perfectly, you can send us for a free trial and we will work for you professionally. You will get other image editing services like background removing, clipping path, image restoration, color correction, image masking, eCommerce product photo retouching, and many more. If you want to know more, feel free to contact us.

However, the two images below are the before and after images. Notice, there are hidden pixels in the first image which we have worked on and the last one is the result of our work. If you can try with suitable images, you can also DIY at home.


If you want to do it fast, just workaround with the Level tool in GIMP to see to what extent you can have the see-through effect. This will help you to judge if the image is a good match for this tutorial. If you find a good match, go in deeper. Into this tutorial, of course.
The above cool technique will give you the liberty to see-through cloth anybody. You can also use this method for your creative image-enhancing job or any other photo editing service.
Try it yourself, because usually “We Don’t Provide Such Image Editing Services”. But, don’t worry!! You will get other image editing services like background removing, clipping path, image restoration, color correction, image masking, eCommerce product photo retouching, and many more. If you want to know more, feel free to contact us and take our Free Trial service.
Disclaimer: This content has been written for sharing a photo editing technique by GIMP. It is just tutorial content. We do not provide such a photo editing service.