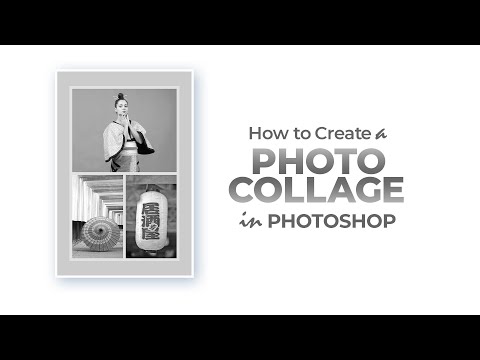
How to Create a Photo Collage in Photoshop (Easy Tutorial)

If you aren’t aware of what a photo collage looks like, this tutorial will come in handy for you. A photo collage assembles multiple photos together to create an artistic effect. You can also create a photo collage to display related images together or highlight a subject through multiple photos. In this tutorial, we will walk you through how to create a photo collage in Photoshop. The tutorial will be long but won’t be monotonous. You will enjoy every bit of it.
Learn: How to Create a Photo Collage in Photoshop
Well! We’ve prepared this Photoshop collage tutorial, as well as a video tutorial at the end, in an easy-to-follow format so that every beginner can learn it easily. Let’s get started….
Step 1: Open a New Document

First off, open a new document in your Photoshop window. Then, go to the menu bar and click the View tab. From there, select “New Guide Layout”.
Step 2: Set the New Guide Layout Parameters

After that, a window will pop up where you have to select 2 columns and 2 rows. Make sure the preset is set to “Custom” and then hit the “OK” button.
Step 3: Create 1st New Layer and Select Rectangular Marquee Tool

Now, go ahead and create the 1st new layer. After that, select the Rectangular Marquee tool to mark the top-left area.
Step 4: Fill the Top-left Quadrant With a Color

It’s time to fill the top-left quadrant with a color. For that, select any color for the foreground. Then, right click on your mouse and select “Fill” to apply the color on the top-left quadrant.
*You can also read about the Color Theory.
Step 5: Create 2nd New Layer and Fill the Top-right Quadrant With a Different Color

Move on and create the 2nd new layer on the layer panel. Mark the top-right area with the Rectangular Marquee tool. Fill the top-right quadrant with a color. For that, select another color for the foreground. Then, right click on your mouse and select “Fill” to apply the color on the top-left quadrant.
Step 6: Create 3rd New Layer and Fill the Bottom-left Quadrant With a Different Color

Next, create the 3rd new layer on the layer panel. Mark the bottom-left area in a similar way. Fill the bottom-left quadrant with a color. For that, select another color for the foreground. Then, right-click on your mouse and select “Fill” to apply the color on the bottom-left quadrant.
Step 7: Create 4th New Layer and Fill the Bottom-right Quadrant With a Different Color

Afterward, create the 4th new layer on the layer panel. Mark the bottom-right area in a similar fashion. Fill the bottom-right quadrant with a color. For that, select another color for the foreground. Then, right click on your mouse and select “Fill” to apply the color on the bottom-right quadrant.
Step 8: Create 5th New Layer and Select Elliptical Marquee Tool

At this point, create the 5th new layer. After that, select the Elliptical Marquee tool to mark the central area. A circular area will show up in the center.
Step 9: Fill the Circle With a Color

Go ahead and fill the circular area with a color. For that, select any color for the foreground. Then, right click on your mouse and select “Fill” to apply the color to the circular area.
Step 10: Create 6th New Layer and Apply Stroke around the Circle

Proceed and create the 6th new layer to apply a circular stroke. Press the right button on your mouse and select “Stroke”. Set the width according to the shape of your circle.
Step 11: Create 7th New Layer and Apply Vertical and Horizontal Strokes

Finally, create the 7th and last new layer. Once the layer is created, apply vertical strokes centrally on the canvas.
Step 12: Make a Selection Around the Circle

Now, select the 5th layer and right-click on it. From there, click “Select Pixels” to apply selection around the circle.
Step 13: Apply Stroke on the Entire Canvas

It’s time to apply stroke on the complete canvas. For that, select the 7th layer followed by the Rectangular Marquee tool. Mark the entire area and apply stroke in a way shown earlier.
Step 14: Add 1st Photo and Create Clipping Mask

At this point, select your 1st photo of the photo collage, drag and drop it on the 5th layer. Create a clipping mask on the photo.
Step 15: 1st Photo After Adjustments

After creating a clipping mask, apply “Free Transform” on the photo to fit it inside the circle.
Step 16: 2nd Photo With 1st Photo After Adjustments

For the second photo, follow the same process as shown in the previous step to bring out the intended output.
Step 17: 3rd Photo With the Previous Ones After Adjustments

For the 3rd photo, follow the same technique as shown earlier and you will get the desired output.
Step 18: 4th Photo With the Previous Ones After Adjustments

For the 4th photo, it’s the same process you have to follow as showcased before.
Step 19: 5th Photo With the Previous Ones After Adjustments

It’s the last photo and will make the photo collage complete for this tutorial. And you can fit it inside the designated area as showcased earlier.
Step 20: Creating a Photo Collage-Final Output

Finally, the photo collage is done and dusted for this tutorial with 5 photos combined together.
Video Tutorial on Making a Photo Collage in Photoshop
That’s it for this tutorial. Hopefully, you enjoyed this long but exciting tutorial right from scratch. Thank you for your patience!
You may also read: Best Photoshop Tools You Need to Master in 2023