Top 10 Photoshop Tools That You Need to Master Photoshop
Adobe Photoshop is the most popular image editing software in today’s world. We are now using it for both personal and commercial uses. It helps in a good number of ways to restore glorious memories, beautify personal photos, glamour retouching, background removing, image enhancing, and many more.
The flaws of regular photographs are reduced by it. Most of the designers think of it as a revolution in the history of image manipulation. Digital image editing has experienced a complete change after Photoshop has been popularized.
You will be capable of performing any kind of photo editing by using its powerful tools & options. If you want to be a professional graphic designer, you must have a sound knowledge of some of the most useful tools such as:
1. Selection Tool 2. Masking Tools 3. Brush Tools 4. Adjustment Layers 5. Clone Stamp Tool 6. Layer Tool 7. Blend Modes 8. Transformation Tool 9. Liquify Tool 10. Crop Tool
Top 10 Best Photoshop Tools and Their Functions
Photoshop has been popular among the crowd of Image editing software designers because of its plenty of multi-tasking tools and options that allow you to make ordinary images outstanding.
In this article, we have taken the advantage to discuss the widely used tools & options of this mega software.
1. Selection Tool
As the first step to the Photoshop program, a beginner gets introduced to the concept of making a selection. Selection is done for a great number of reasons. But for all of those, a correct and appropriate selection is important. Actually, the selection in this program means the choice of some specific pixels.
We may also say that a group of pixels is picked or sorted out by means of selection. One can do a lot of things by this selection of pixels- moving those pixels, changing their colors, resizing them, and so on.

Photoshop provides two selection tools viz Path Selection and Direct Selection Tool. These tools offer different tasks. Suppose, you have created a path with Pen tool or any other path-creating tool.
Now you want to move the path. In this situation, you can use this Path Selection which means this tool is used to move the path here and there.

Again, if you need to select a path or anchor point for readjustment, you have to use the Direct Selection Tool. Understand from the image below.

2. Masking Tools
Many experts believe that before doing image masking it is important to understand what the masking is. When we command Photoshop to show or hide pixels, we do actually masking.
Placing black onto a mask hides pixels behind the mask. The opposite happens in the case of showing pixels. At that time we placed white onto the masks so that it shows up. Anyway, there are a few types of masking such as Layer masking, Alpha Channel masking, etc.
1. Simple Masking
In this stage, we will apply a simple masking technique to add new background. For this purpose, open your image in Photoshop.

Then, open another image that you want to place in the background. And copy it by pressing Ctrl+A and Ctrl+C.

Come to the first image, take a new layer, and paste the image you copied. Go to the layer panel and drag the second layer under the first layer.

Next, select the first layer and click on Add a Mask from the bottom of the layer panel. See the below image.

Now, click on the mask, select the brush tool from the toolbar, and drag on the background. It will make visible the background erasing the top background. See the below image and continue dragging.

In this way, you can change the background. The below image is the result of our experiment. If you work patiently, you must get the highest result.

2. Layer Mask
It is another important tool that will capable you to create high-quality images. You can use the tool for various tasks, here we are going to show you to remove and replace the image background.
For using a layer mask, let’s open an image in Photoshop and unlock the layer by double-clicking the lock icon.

Select the Pen tool to create a path around the image. To do that properly, firstly zoom the image and you should create a path of 1 or 2 pixels inside from the edge. Here, we have selected a spinner image for our experiment and going to create a path.
Here, firstly we create a path around the preset spinner, then inside the three round holes where the white background is available.

We press Ctrl+Enter to make the path selection and hit the Delete button to remove the backdrops. For the three holes, only we make the path selected and hit the delete, but to select the main background, we press Ctrl+Shift+I to inverse and press the Delete button.

Then, what we have got is shown by the below image. We get a background-free image. Now, we want to replace a new background.

For this reason, we take a new layer, place it under the main image layer, select the foreground color, and finally apply it by the paint bucket. In this stage, we have achieved an image that we wanted earlier.

3. Alpha Channel Masking
It is another masking technique that is used for many important image editing services, but it is mostly applied for removing background from the soft edge image such as hair, thin cloths, fur, and many more.
To work with Alpha channel masking, firstly open your image in Photoshop and unlock it. Duplicate the layer from the layer palette.

Go to channel, select the most contrast image with the background and make invisible another channel. Duplicate the channel.


Ensure the duplicated channel is visible when others are invisible.

Press Ctrl+I from the keyboard to invert the channel. See and match if your image looks like the below one.

Now, press Ctrl+L to get level, move the slide to make the background fully black removing the white glare.

Then take Pen tool or Lasso tool and create a path around the flesh or body & face area. Ensure white color in both the foreground and the background. Next, press Ctrl+Enter to make a selection and Ctrl+Delete to fill the selected portion with white color.

Pressing Ctrl+D to deselect the selection and select Dodge tool, select Highlight from the top. See the image below.

Drag on the area that the Pen tool cannot select. Then go to the channel, click on the RGB to select the first four channels, and keep un-selected the last one. See the image below.


Now, go to Select from the top bar, click on the Load selection, select Blue Copy from the drop-down, and press OK as shown in the image. This process will make your image selected.


Then, come back to the Layer tab, select the first layer and click on Add a Mask from the bottom of the Layer Palette.

At last, click on the eye icon of the first layer/Layer 0, and you will get a background removed image. Now, you can change the background as you want.


3. Brush Tools
Hearing about brushes, the first thing that occurs in the mind of common people is painting. Though Photoshop is not conventionally related to that, it can be termed as an amazing digital painting application. For several types of image manipulations, the brush tool works wonderfully. For masking and adjustment layers, the brush tool has been one of the most useful things.


There are several types of Brush tools for different works such as Healing Spot Brush, Brush tool, History Brush, and many more. Besides, you can load your own brush under these tools that will enable you to work with more outstanding brushes.
1. Healing Brush Tool
Let’s see working with Healing brush To work with this tool, select an image that has spots like the below image.
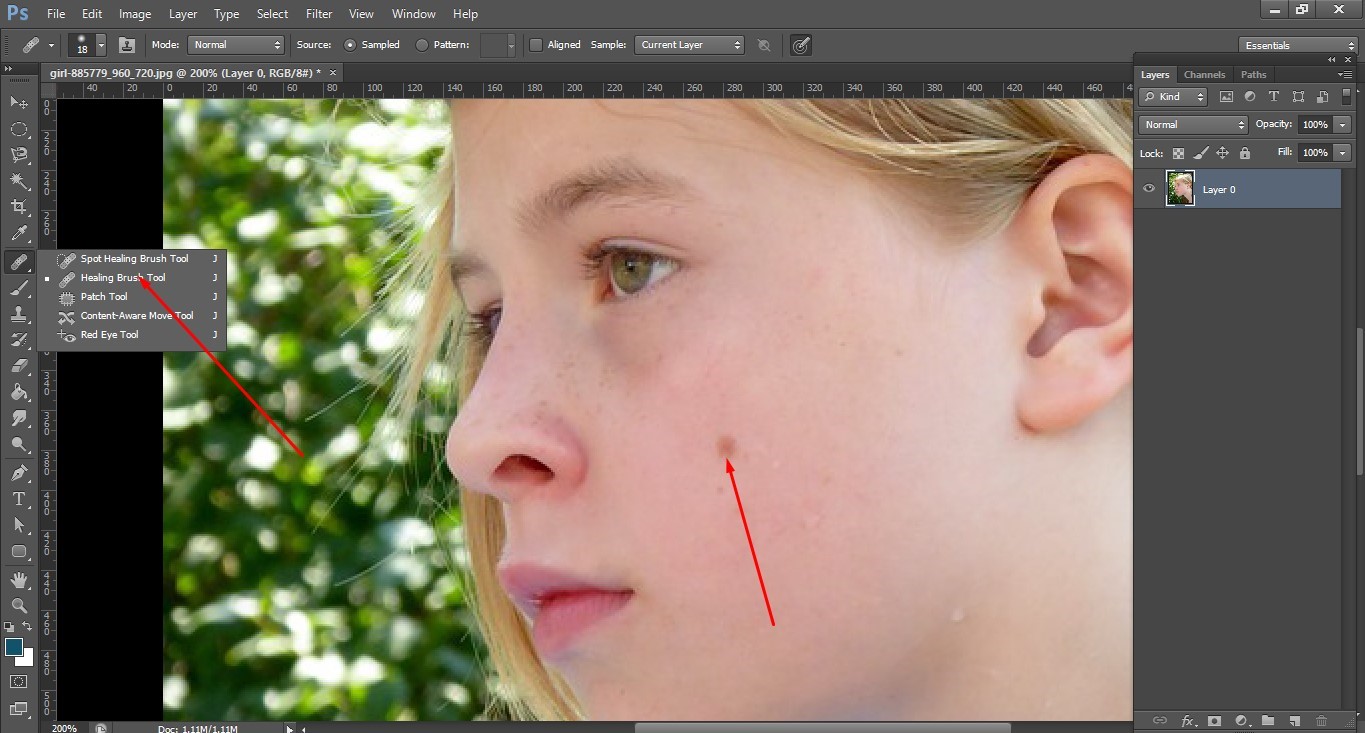
Press Alt and click on the fresh skin so that it can copy the fresh area. Then, click on the spot. In this way, you can remove spots from an image using a brush tool.

2. History Brush tool
The name of this tool itself says how it works. This tool is used to bring back the spots that you have removed from any image. Sometimes, it may happen that you have used the brush tool in an inappropriate place, or used it too much, then you can use the History Brush tool to undo like Ctrl+Z.

4. Adjustment Layers
Adjustment layer is a vital tool of the Photoshop program that is used for various purposes. To make changes to pixel’s color, tone, brightness, or contrasts. Even to convert the image black and white adjustment layers work nicely. In a word, Adjustment layer helps the designers to add any effect in various layers at a time. See the work process-

How to do Adjustment Layer
For using this tool, firstly, you have to open some images in different layers on the same canvas as the below image is showing.

Now, select the top layer. Here the top layer is layer number 4. Click on the Adjustment Layer and you can see a lot of options here. Choose one that you like to apply to your images. We are taking the Hue/Saturation option and doing work with that.


While clicking on the Adjustment layer, we get a Hue/Saturation panel and an Adjustment layer just above layer number 4 because we selected this layer.

As we want to apply some effect on each and every layer together, we select the top layer, but if you want to apply the same effect on layer numbers 1 and 2, then select layer 2 and take the adjustment layer here.
It means the adjustment layer works on the layers under it.
However, working with the adjustment layer, we have changed the color of the cars. We just have moved the Hue/Saturation slides and the color got changed altogether in all layers.

There is another advantage of the Adjustment layer and that is if we want to get back the earlier color or raw image, we can just invisible the layer or delete the Adjustment layer.

Again, if you want to apply the created effect, leaving one or two layers, you can just move the Adjustment layer dragging under those layers because this tool works layers below it. Follow the below image. The cars of layers 3 and 4 are unchanged because the Adjustment layer is under these two layers.

5. Clone Stamp
For editing or retouching photos, the clone tool is something that comes as the first priority. Its main and basic job is to allow the designers to sample pixels from one part of an image and paint those pixels onto another part of the same or different image.
One can use this tool to remove spots and blemishes from a photo or even to delete objects from a photo altogether.

Clone Stamp Tools
How Clone Stamp Tool Works
There are a bunch of works that we can do using Clone Stamp Tool. Here, we are gonna show two works- spot removing and object removing.
For spot removing, using Clone Tool in Photoshop is pretty much easy. Just, open your image in Photoshop and duplicate the layer so that if one is destroyed, you can use another.

Then, select the clone tool from the toolbar and click just beside the spot pressing Alt from your keyboard so that it can copy that area. Now, click on the spot and notice, nicely it has gone away. Beware of copying the same looking area or beside the spot area and pressing second brackets from the keypad to increase or decrease the circle created by the tool same as the spot.

In this way, we have worked on every spot and got the below image to entail.
In our second experiment, we will remove objects from an image using the Clone Stamp tool.
Again, open an image where there are unnecessary objects. Here, we will work on the below image. The method we applied to remove the spots with this tool before, the same technique will also be applied to remove the object. See the before-after image below.

6. Layers
The most organizational tools of Photoshop are the layers. Due to layers, the designers enjoy the freedom of non-destructive image editing. These are like sheets stacked one after another.
Layers are also like the pages of a book. They h Adjustment Layerselp designers to organize all of the PSD files in such a way that makes sense to anyone watching it. Layers are so important during making any creative photo compositing.
See the below screenshot where we have created layers, one onto another. Layer 1 is the transparent layer which has now a background. You can see through the layer anything behind it. Layer 2 has a fill color background white background. The rest 2 layers are of two images that are stacked. You can resize, reduce opacity, apply shadow, etc. Everything you can do as required for your project.

7. Blending Modes
Blend modes have great uses for Photoshop experts. By using this tool one can easily blend more than layers together in an interesting way. This option has the benefit of applying different behaviors to the layers. By setting the blending mode, the color, tone, and contrast can be changed to the ordered way.
Let’s have a look at a small, but funny work of blend mode.
For this experiment purpose, we have taken the below two images.

We open these images in Photoshop into two different layers for blending two layers. Drag the texture below the main image that means what you like to keep in the background, drag it under the main subject.
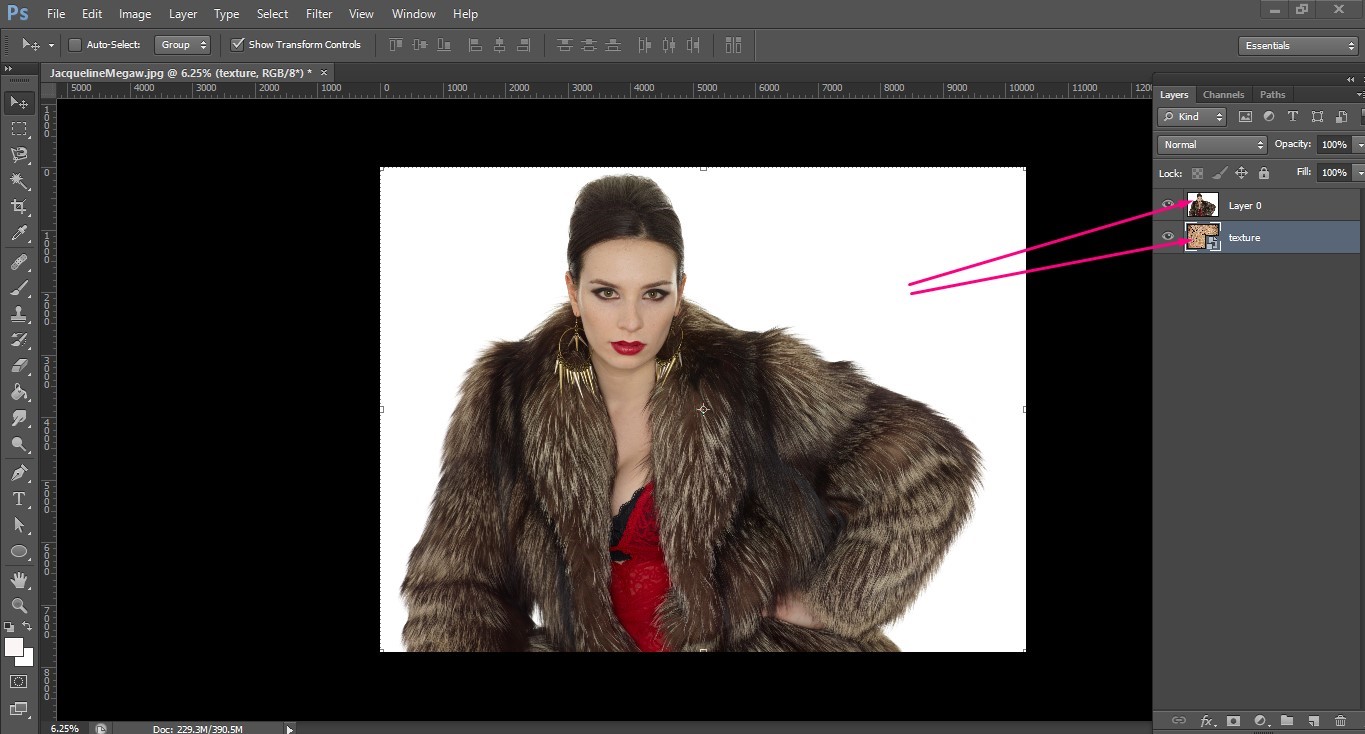
Now, it is time to apply blend mode. Keep selected your main subject. For this composition, we have selected the girl image and kept it on top.

We click on the blend mode option and got a dropdown. We select Hard Light for this image composite. You can apply all blend modes from the dropdown and then select one result that suits you best.

After applying what result we have got is the below. There are also many ways to use blending modes for getting the best quality photos. Here is the simple one to make you sense.

8. Transformation Tools
There are some tools that make the work of image editing simply wonderful. These powerful tools help to resize, distort, transform, and warp the images. These transformation tools, in fact, push pixels around and move them into place.
This tool will help you to resize or reorganize all the layers that you are using for photo editing or creative image compositing. Look at the image below you can find many points. Just press the Shift key or Ctrl key and drag the clicking on the pointer. Your layers will get transformed into different sizes.

By using this transformation tool you can rotate your layers. It will also enable you to make your layers polygonal shapes. To rotate, go to the corner pointer. You will find a curved shape sign and drag it up & down to see the rotation. And also to have your layers in uneven shapes, press Ctrl and drag holding any pointer and see the changes.

9. Liquify
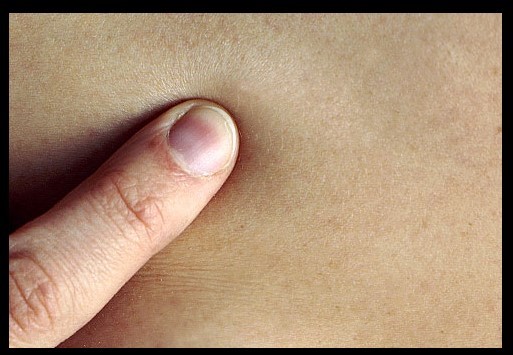
Many retouch experts highly depend on liquify tools. By this tool, the pixels are pushed around on a screen. It is very common to make some drastic edits to a photo using it. The importance of liquefying lies in its utility in model photography and some other cases where the shape verifies with the expectation.

Body Slimming by Photoshop Liquefy
10. Crop Tool
Cropping images is probably the most popular work in Photoshop. In this feature, the edges of a photo are trimmed. It is done in both ways- keeping the ratio constant and with a changed ratio. Here, the thing that actually happens is that some unnecessary pixels of the photo are omitted to make the main subject in a closer focus.

For photoshopping or image-enhancing work, experts mostly depend on personal interest and creativity. In the case of Photoshop, this happens even more crucially. As a result, anybody can barely say that knowing the usage of the above-mentioned tools is enough to be an expert in Adobe Photoshop.