101 Most Useful Photoshop Tricks
“These Photoshop tricks help you work faster, edit more accurately, protect image quality, improve masks, control color, manage layers, retouch portraits, export files, and handle complex tasks with less effort. Use them to build a cleaner, more efficient editing workflow.”
Photoshop tricks teaches far more than basic cropping, color correction, and retouching. Many useful features stay hidden inside menus, shortcuts, layer settings, masks, and adjustment tools.
Learning a few small tricks can save a surprising amount of editing time. They can also reduce mistakes and make your files easier to revise.
These techniques can help photographers, designers, eCommerce businesses, professional retouchers, and teams that provide AI photo editing services. The goal is simple. Work faster while keeping control over every important part of the image.
How Can You Navigate Photoshop Faster?
“Photoshop becomes easier when you control navigation, zoom, view rotation, windows, colors, and layer movement. Small workspace habits reduce wasted clicks and help you stay focused. These tricks make every day editing smoother before you even start advanced retouching or compositing.”
Navigation can consume more time than editing when you work on detailed images. These shortcuts help you move around large documents and locate important layers quickly.
-
How Can You Use Bird’s Eye View?
Hold the H key while you work on a zoomed image. Photoshop gives you a wider view of the canvas. Move toward another area and release the control. Photoshop quickly returns to a detailed view at that location.
-
How Can You Find a Layer’s Content Quickly?
Hold Alt on Windows or Option on Mac. Then click the layer thumbnail. Photoshop can focus the view on that layer’s visible content. This helps when a document contains many small elements.
-
How Can You Rotate the Canvas While Painting?
Hold the R key to activate Rotate View temporarily. Rotate the canvas until the brush direction feels comfortable. Release R and continue painting. This makes detailed masking and retouching easier.
-
How Can You Reset a Rotated View?
Press Escape after using Rotate View. Photoshop returns the canvas to its normal orientation. You do not need to manually rotate the document back into place.
-
How Can You Compare Two Views of One Image?
Open Window, then Arrange, then New Window for the current document. Place both windows beside each other. Keep one view enlarged and the other zoomed out. Changes appear in both views immediately.
-
Why Should You Keep One View Zoomed Out?
A close view helps with detail, but it can hide unnatural edits. Keep a second window zoomed out. You can then judge whether skin work, cleanup, sharpening, or other changes still look natural.
-
How Can You Flip the View Without Flipping the Image?
Use the horizontal flip option under View when you need a fresh perspective. Photoshop changes only your view. The document itself stays unchanged. This can help you notice balance, brightness, and retouching problems.
-
How Can You Increase the Recent File List?
Open Photoshop Preferences and find File Handling. Increase the number of recent files Photoshop remembers. A longer recent list makes older projects easier to locate without searching through many folders.
-
How Can You Lock a Layer’s Position?
Use the position lock in the Layers panel when you need to paint on a layer without moving it. This protects retouching layers from accidental movement while still allowing brush edits.
-
How Can You Switch Foreground and Background Colors?
Press X to exchange the foreground and background colors. This becomes especially useful during masking because you can move between black and white without opening the Color Picker.
How Can You Create Cleaner Masks?
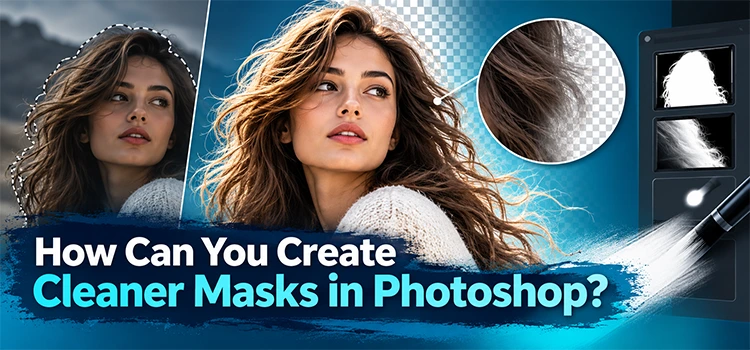
“Good masking depends on speed, visibility, and control. Photoshop gives you several ways to create, inspect, soften, contract, and repair masks. These methods help you isolate subjects cleanly, avoid rough edges, and make local adjustments without damaging your original image.”
Masks give you local control without permanently deleting pixels. Good masking methods also make future revisions much easier.
-
How Can You Create a Black Mask Immediately?
Hold Alt on Windows or Option on Mac while clicking the Add Layer Mask button. Photoshop creates a black mask. You can then paint with white only where you want the effect to appear.
-
How Can You Use a Group as a Second Mask?
Place a masked layer inside a group. Add another mask to the group. You now have two separate levels of control without changing the original layer mask.
-
How Can You Create a Negative Group Mask?
Hold Alt or Option while adding the group mask. Photoshop creates a black mask. Paint with white on the group mask to reveal the adjustment only in selected areas.
-
How Can Mask Density Help You Find Missing Areas?
Select a mask and lower its Density value in Properties. Hidden areas become partly visible. This makes missed sections easier to identify. Fix them, then return Density to 100 percent.
-
How Can You Smooth a Rough Mask?
Apply a small amount of Gaussian Blur to the mask. Then use Levels to restore edge definition. The blur removes small irregularities while Levels helps bring back a cleaner boundary.
-
How Can Feather and Contrast Improve a Mask?
Open Select and Mask. Increase Feather until rough bumps become smoother. Then add Contrast to restore edge strength. This method can work well with products and subjects that need clean rounded edges.
-
How Can You Contract a Mask With Minimum?
Select the mask and open Filter, Other, Minimum. Use a small radius. The filter pushes the mask inward. This can remove thin background halos around extracted subjects.
-
How Can You Fix a Halo Only in One Area?
Make a selection around the problem area before applying Minimum. Photoshop then contracts only that selected part of the mask. This gives you more control than changing every edge.
-
How Can the Smudge Tool Repair a Mask Edge?
Select the mask and use the Smudge Tool at a low strength. Push an unwanted edge inward carefully. This works well when only a small section needs correction.
-
How Can You Paint a Straight Line on a Mask?
Click once with the Brush Tool. Hold Shift and click another point. Photoshop connects both points with a straight brush stroke. This is useful for products with simple straight edges.
How Can You Retouch Photos More Naturally?

“Retouching works best when corrections stay controlled. Use tools that let you fade edits, compare views, protect layer positions, and target blemishes precisely. These tricks help you keep skin natural, reduce mistakes, and maintain detail while working quickly on portraits.”
Good retouching should improve an image without making the editing obvious. Small controls often matter more than aggressive corrections.
-
How Can You Reduce an Overdone Patch Tool Edit?
Use the Patch Tool and complete the correction. Before doing anything else, open Edit and choose Fade. Lower the opacity until the correction looks natural. Fade affects only the most recent action.
-
Can You Fade a Healing Brush Stroke?
Yes. Apply the Healing Brush stroke first. Immediately use the Fade command. Reduce its opacity to blend the result with the original texture.
-
How Can You Patch Several Blemishes Together?
Create the first Patch Tool selection. Hold Shift and add more nearby selections. Drag the combined selection toward a clean source area. Photoshop processes several selected areas in one step.
-
How Can You Create a Blemish Scan Layer?
Add a Black and White adjustment layer. Adjust the red and yellow values until skin marks become easier to see. Use this layer only as a temporary visual guide while retouching underneath it.
-
Which Healing Brush Sample Setting Helps Retouching?
When you retouch on an empty layer, use Current and Below where appropriate. Photoshop samples image information from lower layers while placing your correction on a separate editable layer.
-
Why Should You Protect a Retouching Layer From Movement?
Detailed blemish work can take time. An accidental layer movement may misalign every correction. Lock the layer’s movement before you begin. Unlock it later only when you actually need to reposition it.
-
How Can Two Windows Improve Portrait Retouching?
Keep one document window close and another at normal viewing size. Retouch in the close view. Check the second view often. This prevents you from making corrections that look good only at extreme magnification.
-
How Can High Pass Sharpening Stay Selective?
Create a duplicate layer, desaturate it, and apply High Pass. Use an appropriate contrast blend mode such as Overlay. Add a black mask and paint white only where additional detail is useful.
-
Can You Use Several Levels of Sharpening?
Yes. Use separate sharpening layers for broad details, facial features, and very fine areas. Each layer can use a different High Pass setting and mask. This gives you better control than one strong sharpening effect.
-
How Can Frequency Separation Help With Detail?
Frequency separation divides texture from broader color and tone. When you use it carefully, you can make local corrections while protecting important skin texture. Keep every change subtle so the portrait remains natural.
How Can You Improve Color and Tone?
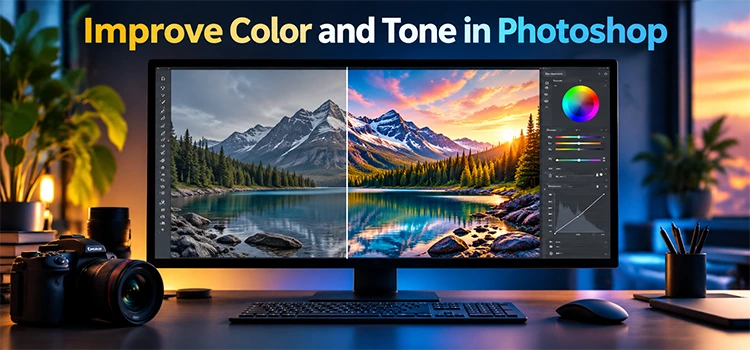
“Color work becomes more accurate when you separate brightness, hue, saturation, and local color changes. Photoshop offers tools for white balance, selective color correction, gradients, curves, and blend modes. These tricks help you fix color while protecting texture and detail.”
Color correction becomes easier when you know which part of the image you want to change. Sometimes you need brightness. Sometimes you need only color.
-
How Can Curves Add More Pop?
Add a Curves adjustment layer. Bring the dark and light endpoints closer to the useful tonal information. Watch the image carefully so you do not remove important detail. This can add contrast quickly.
-
How Can You Protect Colors While Adding Contrast?
Create the contrast with Curves. Then change the Curves layer blend mode to Luminosity. Photoshop applies the tonal change without adding the same amount of color saturation.
-
How Can Blend If Protect Shadows?
Add your contrast adjustment. Open Layer Style and use the Underlying Layer controls. Move the dark slider so the effect leaves deep shadows. Split the slider for a smoother transition.
-
How Can You Split a Blend If Slider?
Hold Alt or Option while dragging one side of a Blend If slider. Photoshop separates the slider into two parts. Increase the distance between them to soften the transition.
-
How Can Blend If Reduce Color Grading on Skin?
Open Blend If and choose the Red channel when appropriate. Adjust the Underlying Layer values so the grading leaves important skin areas. Split the slider to avoid harsh transitions.
-
How Can You Test Random Color Grades?
Create a Gradient Map adjustment. Open the gradient settings and use a Noise gradient. Lower Roughness and use Randomize to explore different color combinations. Reduce layer opacity or change the blend mode afterward.
-
Can You Combine Several Gradient Maps?
Yes. Duplicate a Gradient Map or create another one. Use different settings and lower their opacity. Layering subtle grades can create more controlled results than applying one strong color treatment.
-
How Can You Calculate a Better Neutral Color?
Duplicate the image and select several areas that should appear neutral. Apply Average Blur to those selected areas. Use the resulting averaged color as a more stable reference when setting white balance.
-
How Can Camera Raw Average White Balance?
Open Camera Raw and use the White Balance tool. Drag across a suitable neutral area when the tool supports area sampling. Photoshop can use a broader sample instead of relying on one tiny pixel.
-
How Can You Target a Specific Color With Hue and Saturation?
Use the targeted adjustment hand in Hue and Saturation. Click the problem color. Narrow or expand the selected range. Then adjust Hue, Saturation, or Lightness until the local color looks more natural.
How Can Smart Objects Make Editing Safer?

“Smart Objects and transform tools let you experiment without locking yourself into decisions. You can revisit filters, raw settings, perspective changes, blur, and warping later. These tricks help you build flexible files that remain easier to revise during editing projects.”
Editable workflows reduce the cost of mistakes. Smart Objects make many filters and transformations easier to change later.
-
Why Should You Convert Layers to Smart Objects?
Convert important layers before applying filters that you may want to change. Photoshop can store many filters as Smart Filters. You can reopen their settings instead of rebuilding the effect.
-
How Can You Create a Smart Object Shortcut?
Open Edit, Keyboard Shortcuts. Find the command for converting to a Smart Object. Assign an unused shortcut that fits your workflow. This can save time if you create Smart Objects frequently.
-
How Can You Open a Raw File as a Smart Object?
Open the raw image in Camera Raw. Use Open as Object instead of opening it as a normal pixel layer. Photoshop keeps access to the original raw adjustments.
-
How Can You Return to Camera Raw Settings?
Double click the thumbnail of a raw Smart Object. Camera Raw opens again with the earlier settings available. Adjust exposure, highlights, temperature, and other controls without starting over.
-
How Can Perspective Warp Change Building Perspective?
Convert the image to a Smart Object first. Open Perspective Warp. Define planes that match the building surfaces. Switch to Warp mode and adjust those planes until the perspective suits your composition.
-
How Can You Straighten Perspective Warp Lines?
While working with Perspective Warp, use the available straightening controls or Shift based alignment options where applicable. These help align important horizontal or vertical edges more accurately.
-
How Can Perspective Crop Straighten a Flat Object?
Choose the Perspective Crop Tool. Mark the four corners of a painting, document, sign, or similar flat object. Photoshop crops the area while correcting its perspective.
-
Why Does the Transform Reference Point Matter?
The reference point controls where scaling and rotation originate. Move it toward the part of the object that should remain visually anchored. Transforming from the correct point gives you much better control.
-
How Can You Move the Transform Reference Point Faster?
During Free Transform, use the appropriate Alt or Option interaction to place the reference point where needed. You can then rotate or scale around that new point.
-
Why Should Liquify Use a Smart Object?
Convert the subject to a Smart Object before opening Liquify. Photoshop can store Liquify as an editable Smart Filter. You can return to the settings if the result needs further adjustment.
How Can You Make Better Selections and Cutouts?
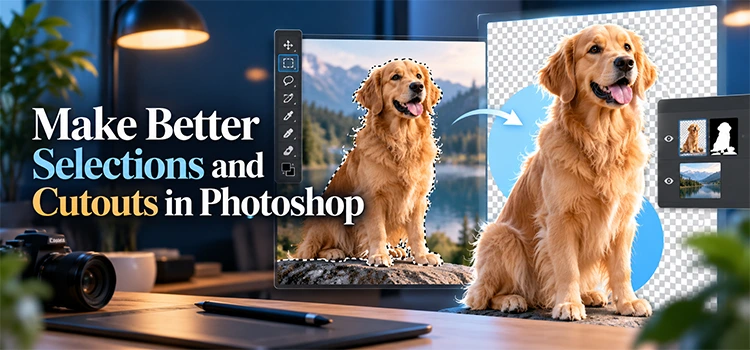
“Selections and extraction tools work better when you combine automation with control. Photoshop can find subjects quickly, but clean results often need mask refinement, edge correction, and local adjustments. These tricks help you isolate products, people, hair, and objects accurately.”
Automatic selection tools provide a useful starting point. Professional results still require careful inspection of the edges.
-
How Can Select Subject Save Time?
Choose a supported selection tool and click Select Subject. Photoshop analyzes the image and creates an initial subject selection. Refine it afterward when hair, fabric, or small product details need more attention.
-
When Should You Use Remove Background?
Use Remove Background when you need a fast first cutout. Photoshop creates a mask automatically. Inspect the result against a contrasting background before considering the extraction finished.
-
Why Should You Add a Dark Test Background?
A black or dark test background can reveal pale halos around a cutout. A light test background can expose dark contamination. Test both when you need a clean professional extraction.
-
How Can Multiply Help With Bright Color Fringes?
If dark hair contains a bright background fringe, create another copy of the subject and test Multiply blend mode. It can darken problematic edges. Use masking so the effect stays near the edge.
-
How Can You Protect the Rest of the Subject From Multiply?
Place a normal subject copy above the Multiply version. Add a mask to the upper copy. Reveal the Multiply layer only around the areas where it improves the edge.
-
Why Should Select and Mask Output to a Layer Mask?
A layer mask gives you more control after leaving Select and Mask. You can continue painting, softening, contracting, or repairing edges without permanently deleting image information.
-
How Can You Find Areas That Select Subject Missed?
Lower the mask Density temporarily. The partly visible background makes missing pieces easier to detect. Use a brush to restore those areas, then raise Density back to 100 percent.
-
How Can You Separate a Selected Subject Quickly?
Create a clean selection first. Press Ctrl or Command J to copy the selected pixels onto a new layer. Keep the original layer underneath until you confirm the result.
-
How Can a Group Add More Control to a Cutout?
Place the extracted subject inside a group and add a group mask. Use that second mask for broad visibility changes while keeping the detailed subject mask untouched.
-
Why Should You Inspect Edges at Different Zoom Levels?
A mask can look perfect at one magnification and poor at another. Inspect important edges closely, then zoom out to normal size. Both views matter when judging a final extraction.
How Can You Create Better Photoshop Effects?

“Creative effects look stronger when you build them from editable layers and simple controls. Photoshop can create shadows, soft focus, patterns, vignettes, sharpening, and texture effects without flattening files. These tricks help you explore styles while keeping each effect adjustable.”
Effects become easier to improve when you separate their main components. Keep shadows, blur, texture, and color on editable layers whenever possible.
-
How Can Knockout Create Hollow Text?
Place the text and the layer you want to cut through inside a group. Open the text Layer Style. Set Knockout to Shallow and reduce Fill to zero. The text can create a transparent opening through the group.
-
What Does Deep Knockout Do?
Deep Knockout can cut through content beyond the immediate group until it reaches the protected background structure. Use it carefully because its effect reaches farther than Shallow Knockout.
-
How Can You Move a Drop Shadow Visually?
Open the Drop Shadow settings. Instead of changing only Angle and Distance numerically, drag the shadow directly on the canvas when Photoshop allows it. This gives you a more visual way to position it.
-
How Can You Create a Long Shadow?
Duplicate the object and create a dark version underneath it. Convert it to a Smart Object. Apply Path Blur and adjust the direction, length, taper, and speed until the stretched shadow looks suitable.
-
How Can Curves Create a Custom Vignette?
Add a Curves adjustment and darken the image. Paint a large black area in the mask where you want brightness to remain. Transform the mask shape and add Feather until the transition becomes soft.
-
How Can You Keep a Vignette Away From Bright Lights?
Open the Curves layer’s Blend If settings. Reduce the effect on bright underlying pixels. Split the slider to make the transition smooth. Bright lights can then remain cleaner.
-
How Can Iris Blur Create Soft Focus?
Duplicate the image and convert the copy to a Smart Object. Open Blur Gallery and choose Iris Blur. Place the sharp region over the main subject and increase blur outside it.
-
How Can You Control Iris Blur Points Separately?
Hold Alt or Option while moving certain Iris Blur transition points. This can let you adjust individual sides instead of changing every point together.
-
Can You Use More Than One Iris Blur Area?
Yes. Add another blur pin when another part of the image needs more focus. Adjust each area separately so the blur follows the composition instead of using one uniform setting.
-
How Can Pattern Preview Help Create Seamless Patterns?
Open Pattern Preview before drawing the pattern. Photoshop repeats your work around the canvas while you edit. You can see where edges connect and correct visible seams before defining the final pattern.
How Can You Export and Manage Files Faster?

“A fast editing workflow also needs efficient export and file handling. Photoshop includes tools for batch processing, quick export, PDF presentations, asset generation, and documents. These tricks reduce repetitive tasks and help you deliver files in the right format consistently.”
Saving files one at a time can slow down a large project. Photoshop includes several tools that automate routine delivery tasks.
-
How Can Image Processor Export Many Open Images?
Open File, Scripts, Image Processor. Choose the open images or a folder. Select the destination and output format. Photoshop can process multiple files without requiring separate export commands.
-
Can Image Processor Run an Action?
Yes. Image Processor can apply an action while processing files. This can combine resizing, editing, naming, and export into one automated workflow when the same treatment applies to many images.
-
How Can You Change Quick Export Settings?
Open Photoshop Preferences and find Export. Choose the preferred Quick Export format and quality. You can also control where Photoshop saves quick exports.
-
Can You Assign a Shortcut to Quick Export?
Open Keyboard Shortcuts and find the Quick Export command. Assign a shortcut that does not conflict with an important existing command. This can turn repeated exporting into a much faster action.
-
How Can You Make a PDF Presentation in Photoshop?
Open File, Automate, PDF Presentation. Add open documents or browse for additional files. Arrange their order, choose the presentation option, and save the final PDF.
-
How Can Generator Create Image Assets?
Enable the Generator feature when available. Turn on Image Assets. Photoshop can create separate files based on specific layer names. This can help when a design contains many assets that require individual exports.
-
How Can Layer Names Control Generator Formats?
Add an output extension such as PNG or JPEG to a supported layer name. Generator can create the corresponding asset. You can define more than one output from the same source layer when supported.
-
How Can Generator Create Different Asset Sizes?
Add supported percentage or size information to the layer’s asset naming instructions. Photoshop can create smaller or larger versions automatically. This is useful for interface graphics and multiple delivery sizes.
-
How Can Photoshop Record a History Log?
Open Preferences and find History Log. Enable detailed logging and choose where to save the information. Photoshop can record useful information about actions performed during editing sessions.
-
How Can You Open a Large PSD as a Flat Image?
When you only need a composite preview from a large layered file, Photoshop offers a method for opening the composite instead of loading every layer. The source workflow uses Shift with Alt or Option while opening the file.
How Can Shortcuts Improve Photoshop Speed?

“Photoshop becomes much faster when you customize shortcuts and use workflow controls. You can reduce clicks for color picking, Smart Objects, exports, zooming, transforms, and layer navigation. These tricks save time across repeated tasks and help you build consistent habits.”
A useful shortcut should remove repeated work. Do not assign dozens at once. Start with commands that you use every day.
-
How Can You Create a Foreground Color Picker Shortcut?
Open Edit, Keyboard Shortcuts. Find the foreground Color Picker command in the tool shortcuts. Assign a key that you do not need for another important feature.
-
Why Should You Customize Smart Object Shortcuts?
Many professional workflows convert layers to Smart Objects repeatedly. A custom shortcut removes several menu clicks every time and encourages you to keep more filters editable.
-
Why Should Quick Export Have a Shortcut?
If you create many previews or client samples, a Quick Export shortcut can save time. Combine it with a fixed export location when that setup suits your workflow.
-
How Can History Snapshots Save Variations?
Open the History panel and create a Snapshot at an important stage. Make another version and create another Snapshot. You can switch between them while the document remains open.
-
Can You Create a New Document From a Snapshot?
Photoshop lets you create a separate document from a History state or Snapshot through the History panel controls. This helps preserve a version before you continue experimenting.
-
How Can Arrange Commands Help Compare Versions?
Open several related documents. Use Window and Arrange to place them vertically or horizontally. Matching views make differences in color, layout, or retouching easier to judge.
-
Why Should You Use Spring Loaded Tools?
Some Photoshop shortcuts temporarily activate another tool only while you hold the key. Rotate View with R is a useful example. Release the key and Photoshop returns you to the previous tool.
-
How Can Bird’s Eye View Speed Large Retouching Jobs?
Use the H based navigation method when you work deep inside a high resolution image. It lets you move to a distant area without repeatedly zooming out and back in.
-
Why Should You Learn Layer Thumbnail Navigation?
Large PSD files can contain many layers outside the current view. Focusing on a layer’s content from its thumbnail can save time when the object is difficult to locate manually.
-
How Can You Make Shortcuts Safer?
Do not replace an existing shortcut until you know you rarely use its original function. Build a small personal shortcut system and keep it consistent across your regular Photoshop workstations.
Which Advanced Photoshop Tricks Give You More Control?
“Advanced Photoshop work often combines simple features in smart ways. Blend If, Liquify, Puppet Warp, frequency separation, multiple masks, sharpening layers, and generator tools can solve difficult problems. These tricks help you gain more control without making the workflow complicated.”
Advanced tools become useful when you understand why you need them. Use them to solve a clear problem instead of adding complexity for its own sake.
-
How Can Face Aware Liquify Help Portrait Editing?
Open Liquify and use Face Aware controls when Photoshop detects a face. You can adjust features through sliders instead of pushing pixels manually. Keep changes small if you want a natural result.
-
How Can the Face Tool Make Liquify Easier?
Choose the Face Tool inside Liquify. Photoshop shows interactive controls on the detected face. Drag those controls directly to adjust supported facial dimensions while watching the related settings change.
-
How Can Reconstruct Reduce Liquify Edits?
Open the Reconstruct control inside Liquify. Lower the amount to reduce the strength of the changes you already made. This works like a gradual recovery control rather than a complete undo.
-
How Can Puppet Warp Reposition Part of a Subject?
Separate the subject and convert the layer to a Smart Object. Open Puppet Warp. Add pins around important joints and stable areas. Move selected pins to adjust the pose or shape.
-
How Can You Rotate a Puppet Warp Pin?
Select the appropriate pin and use the Alt or Option based rotation control described by the tool. Rotate carefully around the joint instead of dragging the entire body area.
-
Why Can 16 Bit Editing Reduce Banding?
Images with heavy gradients or strong tonal editing may show visible steps in 8 bit mode. Working in 16 bit during demanding adjustments can provide more tonal values and reduce visible banding.
-
How Can Global Light Keep Shadows Consistent?
Layer effects can share a Global Light direction. Enable the shared setting when several objects need shadows from the same apparent light source. Changing the global direction can update related effects together.
-
How Can Pattern Fill Scripts Create More Variation?
Create a new layer and open the Fill command. Choose a pattern and explore available scripted pattern options when your Photoshop version supports them. These controls can change spacing, layout, and randomness.
-
Can a Photograph Become a Layer Mask?
Yes. Copy a grayscale or photographic texture. Enter the mask view and paste the image into the mask. Adjust its contrast to control which parts of the target layer appear.
-
How Can You Reposition an Image Without Moving Its Mask?
Unlink the layer thumbnail from its mask. Select only the image thumbnail and transform or move it. The mask stays in place while different parts of the image move underneath it.
FAQ
Most Photoshop questions come down to speed, quality, safety, and control. The best approach depends on the image, final use, and your skill level. These answers explain how to apply the tricks responsibly and choose methods that fit editing work.
-
What Photoshop tricks should a beginner learn first?
Beginners should start with layers, masks, selections, adjustment layers, Smart Objects, Brush controls, and basic shortcuts. These skills support almost every advanced Photoshop technique. Learn how to protect the original image first. Then add faster tools such as Quick Export, Select Subject, and custom shortcuts.
-
Why are nondestructive Photoshop techniques important?
Nondestructive editing lets you revise a decision without rebuilding the entire image. Smart Objects, adjustment layers, masks, groups, and Smart Filters preserve more flexibility. This becomes especially useful when a client requests changes after you have already completed several stages of a complex edit.
-
Should I use automatic selection tools for professional work?
Automatic tools can provide an excellent starting point, especially for clear subjects. You should still inspect important edges yourself. Hair, transparent objects, soft fabric, reflective products, and low contrast boundaries often need manual refinement before you can consider the extraction ready for professional delivery.
-
Are Photoshop shortcuts worth learning?
Yes. Shortcuts become valuable when they remove actions that you repeat many times. Do not try to memorize every Photoshop command. Start with navigation, brush controls, masks, transforms, layer duplication, saving, and exporting. Add custom shortcuts only when they solve a frequent workflow problem.
-
How can I avoid making portrait retouching look unnatural?
Check the image at several magnifications. Keep skin texture where possible. Reduce strong healing or patch corrections with Fade. Use separate layers for retouching. Compare a close view with a normal viewing size. Stop when the correction begins attracting more attention than the original issue.
-
When should I use Smart Objects?
Use Smart Objects when you expect to transform a layer repeatedly, revisit Camera Raw, apply editable filters, use Liquify, or experiment with effects. They can increase file size, so you do not need them for every simple layer. Use them where future flexibility has real value.
-
How can I make Photoshop masks look cleaner?
Start with the best selection you can create. Then inspect the mask against different background colors. Use Select and Mask, Feather, Contrast, Density, Minimum, brush cleanup, or local Smudge corrections when needed. The correct method depends on whether the edge should appear hard, soft, detailed, or transparent.
-
What is the best way to speed up repetitive Photoshop work?
First identify the steps you repeat most often. Use shortcuts for common commands. Use actions for repeatable editing sequences. Use Image Processor for batches. Configure Quick Export for routine outputs. Keep reusable layer structures where suitable. Workflow speed usually comes from reducing repetition, not rushing individual edits.
-
Can Photoshop AI tools replace manual editing?
AI tools can speed up selection, color recreation, object generation, cleanup, and other tasks. They do not remove the need for visual judgment. Editors still need to inspect edges, texture, color, realism, resolution, and consistency. Human review remains especially important for professional commercial images.
-
How should professionals combine AI with traditional Photoshop tools?
Use AI for suitable starting points and time consuming repetitive tasks. Then use masks, layers, blend modes, retouching tools, Curves, selections, and manual inspection to refine the result. A controlled hybrid workflow lets editors gain speed while keeping quality, consistency, and client requirements in focus.
How Should You Use These Photoshop Tricks in Real Work?
“The best Photoshop tricks are the ones you can use repeatedly without slowing down. Learn a few at a time, practice them on real images, and keep your workflow editable. Consistent practice will improve speed, accuracy, confidence, and image quality.”
You do not need to use all tricks on every project. Start with the techniques that solve your most common problems.
A product editor may focus on masking, edge cleanup, batch processing, and export. A portrait retoucher may use Fade, multiple views, Liquify, sharpening, and color correction more often. A designer may depend more on Smart Objects, patterns, shadows, transforms, and knockout effects.
Build a workflow that matches your actual work.
Photo editing companies offering AI photo editing services can also use these traditional Photoshop methods for final quality checks, detailed corrections, and consistent output. Automation can save time, but careful editing decisions still determine whether the finished image looks professional.
Practice a few techniques each week. Keep the ones that genuinely improve your work. Over time, these small Photoshop tricks can create a faster, cleaner, and more reliable editing process.