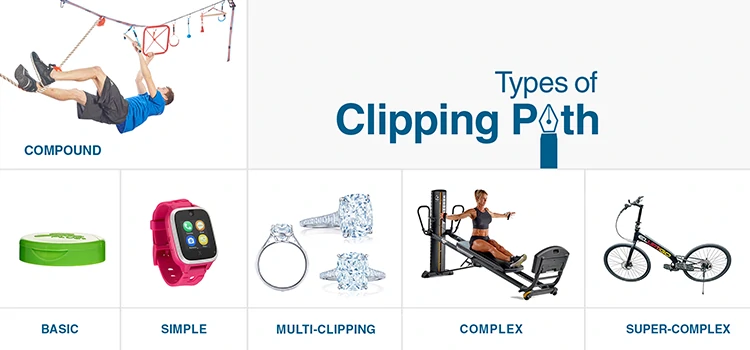
Types of Clipping Path: Basic to Super Complex Explained
In professional product photography, clipping path service is the foundational element of image quality improvement. Whether you are managing an e-commerce company’s inventory or retouching a single hero shot for a luxury brand, understanding the different types of clipping path is essential for photo editing budgeting, product listing scheduling, and achieving overall technical excellence.
As professional photo editing service provider, we do not look at a product and simply see a cutout. We see a hierarchy of geometric complexity. Misclassifying a project can lead to missed deadlines and blown budgets. Missing of product photo quality enhancement on the right time can push the brands to massive disruptions.
This guide provides an exhaustive technical breakdown of clipping path categories or types, the logic behind their classification, and how the USA market is shifting toward hybrid workflows in 2026.
-
Why Do Clipping Path Categories Matter?
Clipping paths are vector shapes created using the Pen Tool, where complexity depends on anchor points and Bézier curves. Industry categories standardize workflows, helping define effort, time, and skill required to achieve precise, natural edges in professional image editing.
Clipping path, a process of selecting product image from its background, is a closed vector shape created with the Pen Tool in Adobe Photoshop. The complexity of a path is determined by the number of anchor points and the behavior of the Bézier curves required to trace the object.
The industry standardizes these into categories to streamline communication between clients and photo editing studios. When we talk about types of clipping path, we are effectively discussing the time to complete and the technical skill required to maintain a natural edge.
-
What is Basic Clipping Path (Single Path)?
Basic clipping path is used for simple objects with smooth edges and no holes, using a single continuous path. It typically requires 5 to 10 anchor points and is widely used for high volume eCommerce listings focused on speed and cost efficiency.
The basic clipping path is the entry point of image editing. It involves objects with smooth, straight, or slightly curved edges and no holes (embedded transparency).
- Characteristics: Usually involves 5 to 10 anchor points.
- Common Objects: Smartphone cases, books, simple boxes, ball ornaments, or basic framed mirrors.
- Technical Logic: The Pen Tool follows a single, continuous outer edge without interruptions.
- Market Usage: This is the most common path for high volume Amazon or eBay listings where speed and cost efficiency are the primary drivers.
-
What is Simple Clipping Path?

Simple clipping path handles objects with moderate curves using 10 to 20 anchor points. It requires precise Bézier control to avoid edge errors, commonly used for footwear, bottles, hats, basic jewelry, and solid electronics with predictable shapes.
The simple clipping path is a step above basic. It involves objects with more curves and perhaps a few minor indentations, but it still follows a relatively predictable silhouette.
- Characteristics: 10 to 20 anchor points; involves more frequent changes in curve direction.
- Common Objects: Simple footwear (loafers), bottles, hats, basic jewelry (plain wedding bands), and solid body electronics.
- Technical Logic: While still a single path, the photo editor must be more precise with handle placement on Bézier curves to ensure the path does not eat into the product or leave a halo of the background.
-
What is Medium Clipping Path?
Medium clipping path requires advanced skills to handle complex shapes with multiple anchor points and embedded paths. Common for items like handbags or shoes, it ensures correct transparency by managing compound paths, separating holes from solid areas accurately.
This is where the skill of a senior professional photo editor becomes apparent. A medium clipping path involves multiple holes (anchor points inside the object) or a significantly more complex outer silhouette.
- Characteristics: 20 to 50 anchor points; multiple embedded paths (holes/windows).
- Common Objects: Handbags with straps, shoes with laces, simple chairs, or a group of three basic products in one frame.
- Technical Logic: The editor must manage compound paths. This means the software needs to understand that the holes (like the space between a handbag handle and the bag) should be transparent, while the bag remains opaque.
-
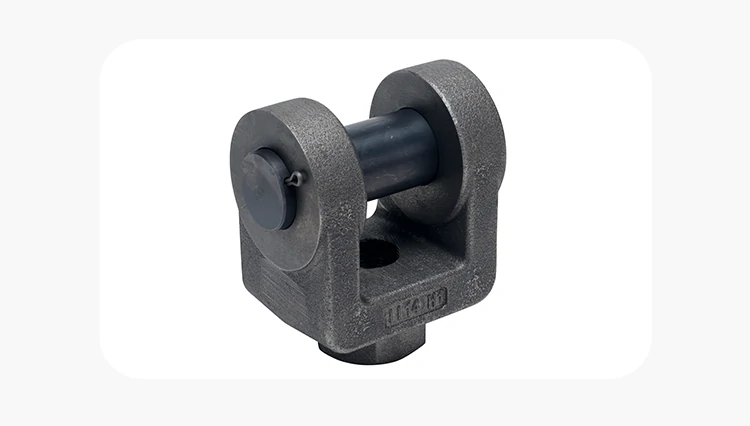
What is Complex Clipping Path?
A complex clipping path is used for intricate objects with detailed edges, holes, or textures, requiring 50 to 100+ anchor points and manual precision. Common examples include jewelry, bicycles, and ruffled apparel, where careful path placement ensures smooth, natural looking edges.
A complex clipping path is reserved for items with intricate edges, many small holes or a non-solid silhouette. These images require a deep understanding of path logic and patience.
- Characteristics: 50 to 100+ anchor points; numerous nested paths.
- Common Objects: Chain-link jewelry, intricate furniture (slatted chairs), bicycles, or apparel with ruffles and textures.
- Technical Logic: The complexity arises from the sheer volume of turns the Pen Tool must make. Each anchor point must be placed manually to ensure the vector line does not look jagged or robotic.
-
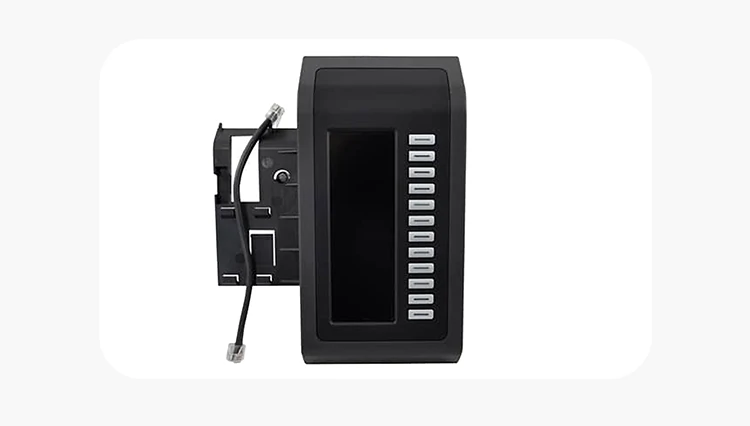
What is Super Complex Clipping Path?
Super complex clipping paths involve intricate images with hundreds of anchor points, internal holes, and inconsistent edges. Common in jewelry, machinery, and wire objects, these require hours of manual work, as AI still struggles to accurately distinguish fine details from backgrounds.
In the hierarchy of clipping path types, the super complex (or extra complex) path is the pinnacle. These images can take an image editor several hours to complete a single frame.
- Characteristics: Hundreds of anchor points; dozens of internal holes; inconsistent edges.
- Common Objects: Fine jewelry with mesh designs, heavy machinery with exposed gears, wire baskets, or complex gates/fences.
- Technical Logic: The editor is essentially mapping a labyrinth. In 2026, even the most advanced AI tools often fail here, as they cannot distinguish between a thin wire of the product and a thin shadow in the background. Human intervention is a mechanical necessity for these files.
-
What is Multiple Clipping Path (Color Path)?

Multiple clipping paths enable editing different parts of a single object separately, allowing precise color correction for materials like leather, buttons, and fur. Demand is growing as brands use one image to create multiple variations in virtual photography workflows.
While the previous types focused on complexity, the Multiple Clipping Path focuses on utility. This involves creating separate paths for different parts of the same object.
- Why use it? If a fashion brand has a jacket with gold buttons, a leather body, and a fur collar, they need to color-correct each material separately.
- The Workflow: The editor creates Path 1: Leather, Path 2: Buttons, and Path 3: Collar.
- Market Prediction: The demand for multi-paths is increasing as brands move toward Virtual Photography, where a single photo is used to generate dozens of color variations for a website.
-
What are Data and Market Trends? 2025–2026 Analysis
The image editing market is shifting toward complex manual paths, growing 12% annually. While AI handles basic tasks, quality gaps remain. High resolution displays expose errors, making 98% accuracy insufficient. Premium brands prioritize precision over cost, especially for complex and super complex edits.
The USA market for image editing has undergone a shift. According to industry research, while AI handles roughly 60% of basic paths, the demand for complex and super complex manual paths has grown by 12% annually.
The Quality Gap
As high resolution 8K displays and retina mobile screens become the standard, the human eye has become more sensitive to Selection Artifacts. An AI-generated path that is 98% accurate is now considered a failure for premium brands.
Cost Efficiency vs. Quality
| Category | Time (Avg) | Cost Range (Market) | AI Accuracy |
| Basic | 2-3 Mins | $0.30 – $0.50 | 99% |
| Medium | 10-15 Mins | $1.50 – $3.00 | 85% |
| Super Complex | 60+ Mins | $10.00 – $25.00 | < 40% |
-
What is The Bézier Curve Logic?
Clipping path in Photoshop uses cubic Bézier curves with anchor points and control handles. Basic paths rely on smooth, minimal curves, while super complex paths require short segments and precise, often sub-pixel adjustments to accurately follow intricate, irregular edges.
To truly understand types of clipping path, you must understand the math. Paths are defined by Cubic Bézier curves in Adobe Photoshop.
- P0 & P3: Anchor points (where the line starts and ends).
- P1 & P2: Control handles (which determine the strength and direction of the curve).
In a basic path, the editor uses long, sweeping curves with minimal handle adjustment. In a super complex path, the editor must use very short curve segments, often adjusting handles at a sub-pixel level to follow the organic chaos of the object’s edge.
-
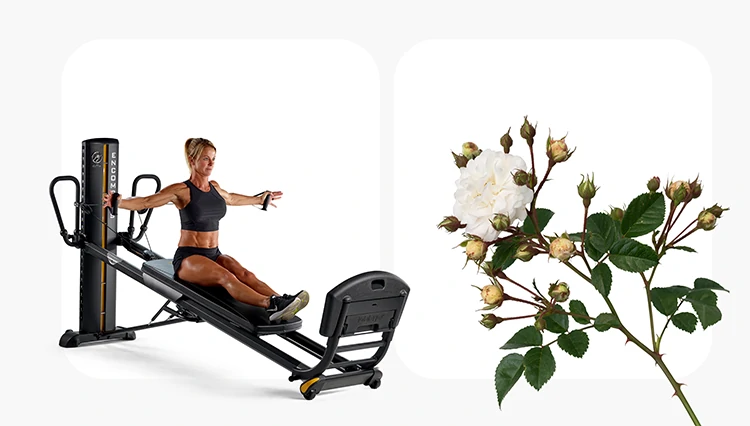
Industry Use-Cases: Real-World Instances
Clipping path complexity varies by industry: fashion ranges from simple to complex, automotive requires separating elements for accuracy, and jewelry demands highly detailed paths due to reflections and intricate textures.
E-commerce Fashion
For a standard t-shirt on a ghost mannequin, a simple to medium clipping path is used. If the shirt has intricate lace sleeves, it immediately jumps to complex.
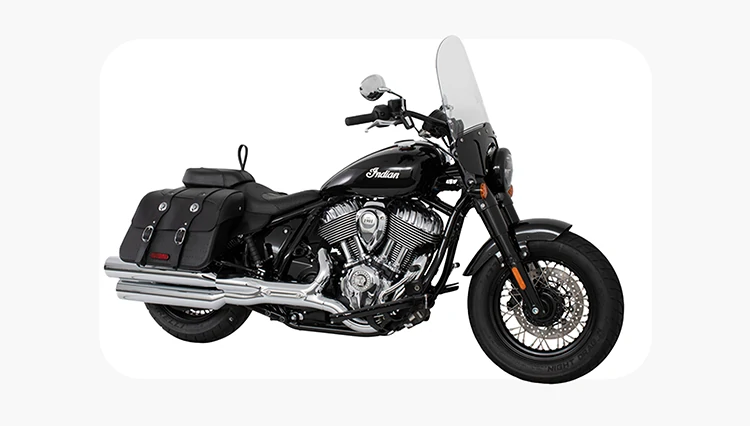
Automotive Industry
A car silhouette is a medium clipping path. However, the wheels (rims) and the grill are super complex. Most automotive retouchers will separate the car body from the wheels to treat the different textures and reflections independently.
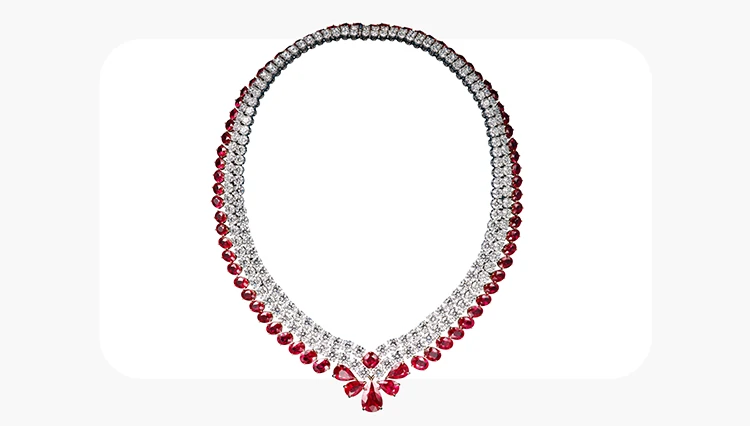
Jewelry & Luxury Goods
Jewelry is almost exclusively complex to super complex. Because gemstones reflect their environment, the path must be drawn with extreme care to include the glow of the stone while excluding the distraction of the studio.
-
The Hybrid Era: AI + Human Paths
In 2026, the industry is shifting to a Human-in-the-loop model where AI creates initial paths and human editors refine them, ensuring precision and quality. This approach reduces costs for complex clipping paths while maintaining high U.S. standard image editing quality.
As we move through 2026, the industry is adopting a Human-in-the-loop (HITL) model.
- AI Pass: An AI model generates an initial vector path.
- Human Refinement: A professional editor cleans the path, fixing Bézier handles and ensuring the 1/1.5-pixel-inside rule is followed.
How to create a clipping path in Photoshop [Step by step]?
Creating a professional clipping path in Photoshop involves precise setup, careful Pen Tool use, and the 1-pixel inset rule for clean edges. Manual paths remain the gold standard in the USA for accuracy, refinement, and high-quality background removal, especially for luxury e-commerce products.
Creating a professional clipping path is an accurate, step by step photo editing process. In the e-commerce market, hand-drawn paths are the gold standard because they provide a level of crispness that AI cannot yet fully replicate for high-end luxury goods.
Here is the experienced-based workflow for creating a manual clipping path in Adobe Photoshop.
Step 1: Setup & Tool Configuration
Before you click your first point, you must configure the tool for Path Logic.
- Launch & Open: Open your image in Photoshop (Ctrl+O).
- Select the Pen Tool: Press P on your keyboard.
- Set Mode to Path: In the top options bar, change the dropdown from Shape to Path. This ensures you are creating vector coordinates, not a solid colored shape.
- The Rubber Band Trick: Click the gear icon in the options bar and check Rubber Band. This allows you to see where the next line will fall before you click, which is vital for accuracy.
- Zoom for Precision: Zoom into the edge of your product to at least 300% or 400%. You cannot draw an accurate professional path at 100% view.
Step 2: Drawing the Path (The “1-Pixel” Rule)
The goal is a clean cut. If you follow the exact edge, you might pick up fringe (remnants of the old background).
- Starting Point: Click on a straight or slightly curved edge of the object to place your first Anchor Point.
- The 1-Pixel Inset: Always place your anchor points 1 pixel inside the edge of the object. This ensures that when the background is removed, the object looks perfectly integrated into its new environment.
- Creating Curves (Bézier Curves):
- Click the next point, but do not release the mouse.
- Drag the mouse to extend the direction handles.
- Watch the Rubber Band line curve to match the product’s silhouette.
- Handling Sharp Corners: If you reach a sharp corner, hold the Alt (Windows) or Option (Mac) key and click the anchor point you just made. This “breaks” the leading handle, allowing your next line to be a sharp angle instead of a curve.
- Closing the Path: Continue around the entire object until you return to your starting point. Hover over the first anchor point; a small circle symbol will appear next to your cursor. Click it to close the loop.
Step 3: Finalizing and Saving
A path is not active until you define it in the Paths panel.
- Name the Path: Go to the Paths Panel (Window > Paths). You will see a Work Path. Double-click it and rename it (e.g., Path 1 or Product Cutout). Crucial: If you do not rename it, Photoshop will overwrite it the next time you use the Pen Tool.
- Refining the Path: If you see a point that is slightly off, hold Ctrl (Windows) or Cmd (Mac) to activate the Direct Selection Tool (the white arrow). You can now click and nudge individual anchor points or handles without redrawing the whole thing.
Step 4: Converting to Selection & Background Removal
Once the path is perfect, you can use it to isolate the product.
- Make Selection: With the path selected in the panel, press Ctrl + Enter (Windows) or Cmd + Return (Mac). You will now see marching ants around your object.
- Apply Feathering: Go to Select > Modify > Feather. Use a radius of 5 pixels. This microscopic softness prevents the edge from looking unnaturally sharp (the sticker effect).
- Create Mask: In the Layers panel, click the Add Layer Mask The background will disappear, leaving your product perfectly isolated on transparency.
Frequently Asked Questions about the Types of Clipping Path.
-
What is a clipping path in photo editing?
A clipping path is a vector based outline created using the Pen Tool in software like Adobe Photoshop. It is used to separate an object from its background with high precision. Unlike automatic selections, clipping paths are manually drawn, ensuring clean and sharp edges. This makes them essential for professional image editing, especially in eCommerce and advertising.
-
How many types of clipping paths are there?
Clipping paths are generally categorized into Basic, Simple, Medium, Complex, Super Complex, and Multiple Clipping Paths. Each category is defined by the number of anchor points and the complexity of the object’s edges. These classifications help editors estimate time, cost, and skill required. They also standardize communication between clients and editing teams.
-
When should I use a basic clipping path?
A basic clipping path is ideal for objects with simple shapes and smooth edges. It works best for products like boxes, books, or items without holes or intricate details. This type requires fewer anchor points and can be completed quickly. It is commonly used in high-volume eCommerce where speed and cost efficiency are important.
-
What makes a clipping path complex?
A clipping path becomes complex when the object has intricate edges, multiple curves, or internal holes. These images require a higher number of anchor points and careful placement of Bézier curves. Editors must work manually to maintain natural edges without distortion. Complex paths are often used for items like jewelry, furniture, or textured apparel.
-
What is a super complex clipping path?
Super complex clipping paths are used for highly detailed objects with irregular edges and numerous internal gaps. Examples include fine jewelry, machinery, or wire-based products. These require hundreds of anchor points and can take hours to complete manually. Even advanced AI tools struggle to handle such complexity accurately, making human expertise essential.
-
What is a multiple clipping path?
A multiple clipping path involves creating separate paths for different parts of a single image. This allows editors to adjust colors, brightness, or textures independently for each section. It is widely used in fashion and product photography for color variations and material-specific edits. This method is especially useful in virtual photography workflows.
-
Can AI replace manual clipping paths?
AI has significantly improved and can handle basic and some simple clipping paths efficiently. However, it still struggles with complex edges, fine details, and consistency across large batches. Small inaccuracies become very visible on high-resolution displays. For premium-quality work, manual editing or hybrid workflows are still required.
-
What is the Human-in-the-loop (HITL) model?
The Human-in-the-loop model combines AI automation with human expertise. AI generates an initial path, and a professional editor refines it to ensure accuracy and quality. This approach speeds up production while maintaining high standards. It is becoming the industry standard in 2026 for balancing cost and precision.
-
Why are clipping path categories important?
Clipping path categories help define the level of effort, time, and expertise required for a project. They allow clients and image editing teams to communicate clearly about expectations and photo editing pricing. Misclassifying a project can lead to delays and poor results. Proper categorization ensures better planning and consistent quality.
-
Which industries use clipping paths the most?
Clipping paths are heavily used in industries like eCommerce, fashion, automotive, and jewelry. These sectors rely on clean, high-quality product images to drive conversions and brand perception. Each industry has different complexity requirements based on product type. For example, jewelry requires highly detailed paths, while basic retail products may need simpler edits.
Final Thoughts
Understanding these clipping path categories is about more than just knowing technical terms, it is about communication. If you send a super complex project to a team and budget it as a basic project, you will receive a result that ruins your brand’s aesthetic.
- Always audit your products before requesting a quote.
- Request Hand-Drawn paths for anything above the Simple category.
- Use Multi-Paths if you plan on doing significant color correction or Ghost Mannequin
The clipping path is the skeleton of your image. If the skeleton is broken, the final photo retouching, no matter how beautiful the lighting or color, will fall apart.
Related posts


Clipping Path Synonyms Antonyms and Multilingual Words