How to Remove Black Spots from Face in Photoshop

Honestly most “quick fix” photo retouching to remove black spots from face will leave you with plastic skin, smeared pores, and a face that looks like it was airbrushed in past decades.
If you want to remove black marks from face fast in Photoshop while keeping texture believable, you need two things:
- A non-destructive face retouching workflow (so you can back out anytime)
- The right tool for the right spot (pimples are not the same as freckles, and neither are the same as PIH)
Before we jump into Photoshop, here is the real-world context of getting spots: a lot of what clients call black spots from face is actually post-inflammatory hyperpigmentation (PIH) or acne-related marks. A survey published in 2024 reported 15% of people reported PIH. Acne is also common globally (some analyses cite 9.4% globally, others report higher depending on sampling and age mix). And dermatology guidance is clear: in real skin, dark spots often take months to fade (not days).
That is why Photoshop retouching exists: you can remove dark spots in minutes for photos, even if skincare cannot cure dark spots that quickly in real life.
What “Black Spots” Usually Are (So You Retouch Them Correctly)
Most people request to treat dark spots in photos fall into these categories:
- Active acne / pimples (raised bumps, redness, and new blemishes) – you want to get rid of pimples without flattening pores.
- Acne marks / PIH (flat, darker patches after a breakout) – you need gentle tone correction, not heavy cloning.
- Blackheads / black dots on face (tiny dark plugs) – detail-level cleanup with texture preserved.
- Freckles, moles, birthmarks – do not remove by default; many clients want these kept (or reduced, not erased).
The Fast, Pro Workflow (Non-Destructive)
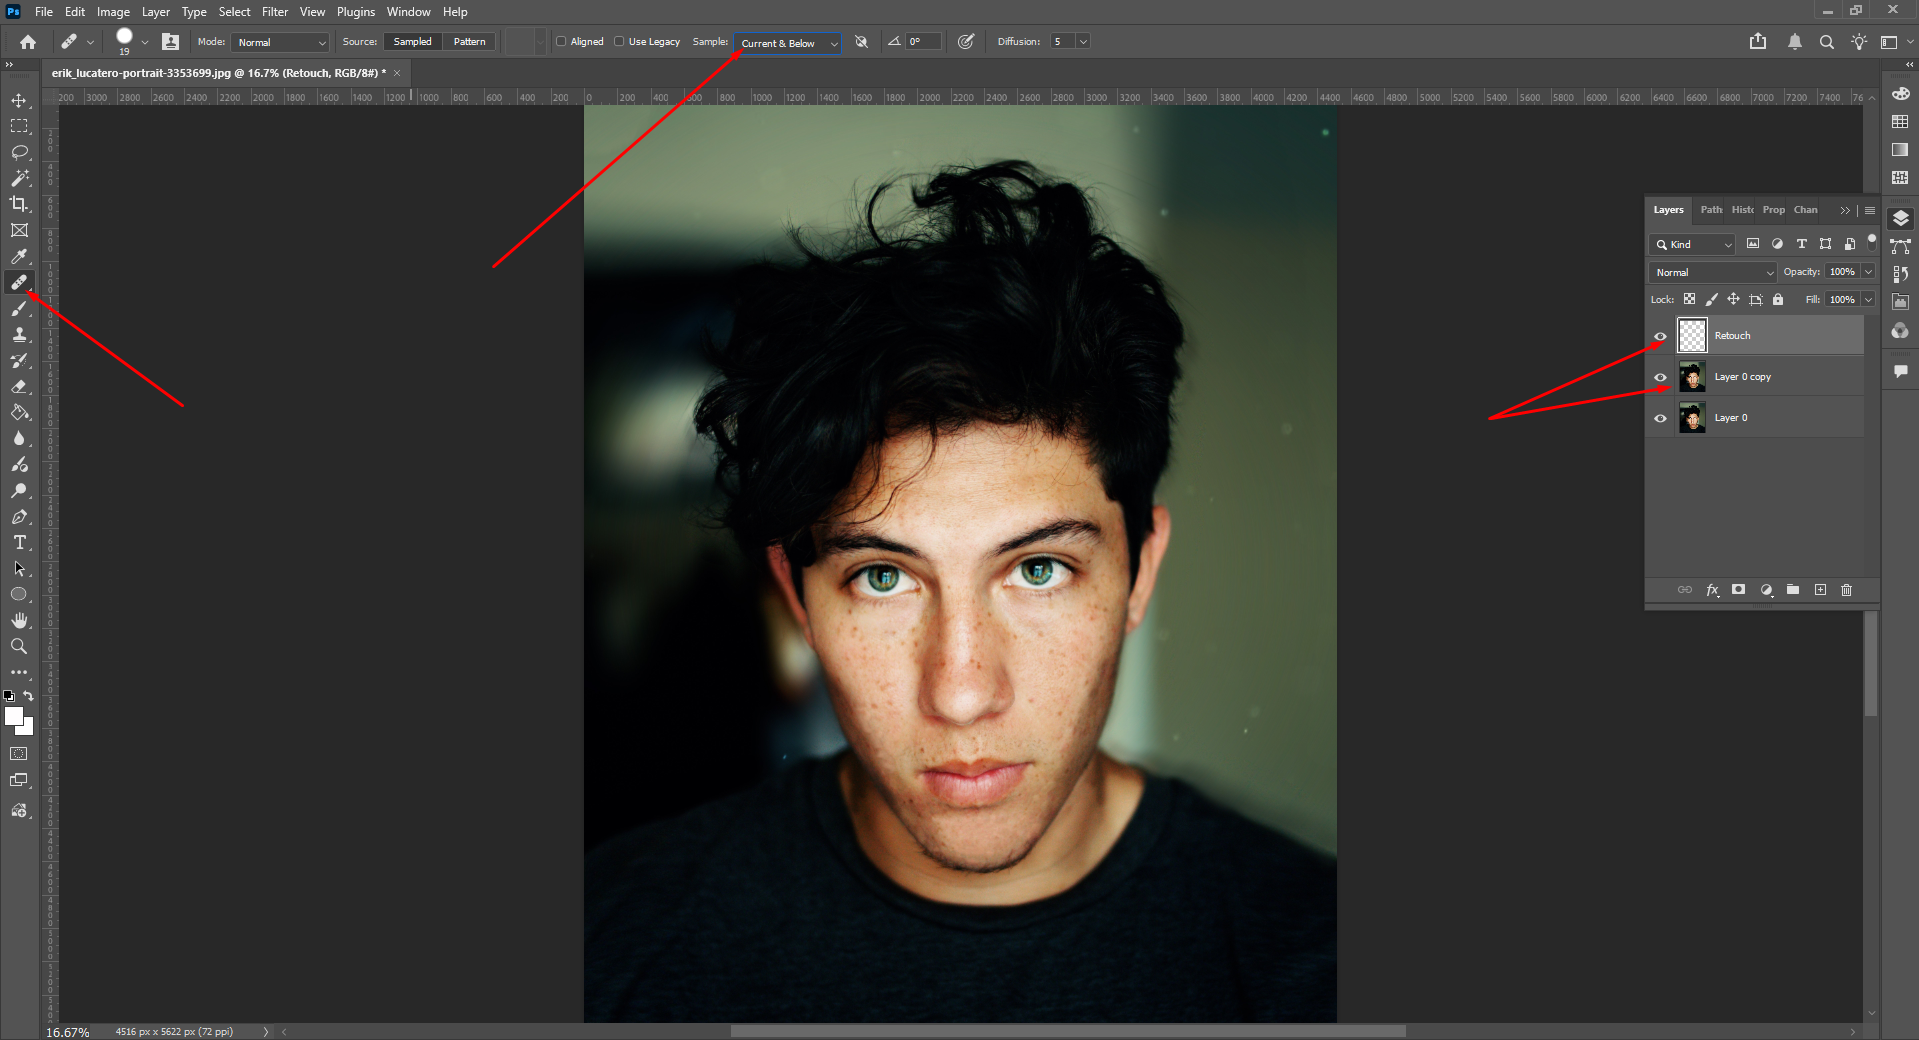
Step 1: Set up the retouching layers (30 seconds)
- Duplicate your background layer (Ctrl/Cmd + J).
- Create a new empty layer named “Retouch”.
- 3. Select your healing tools and set Sample: Current & Below.
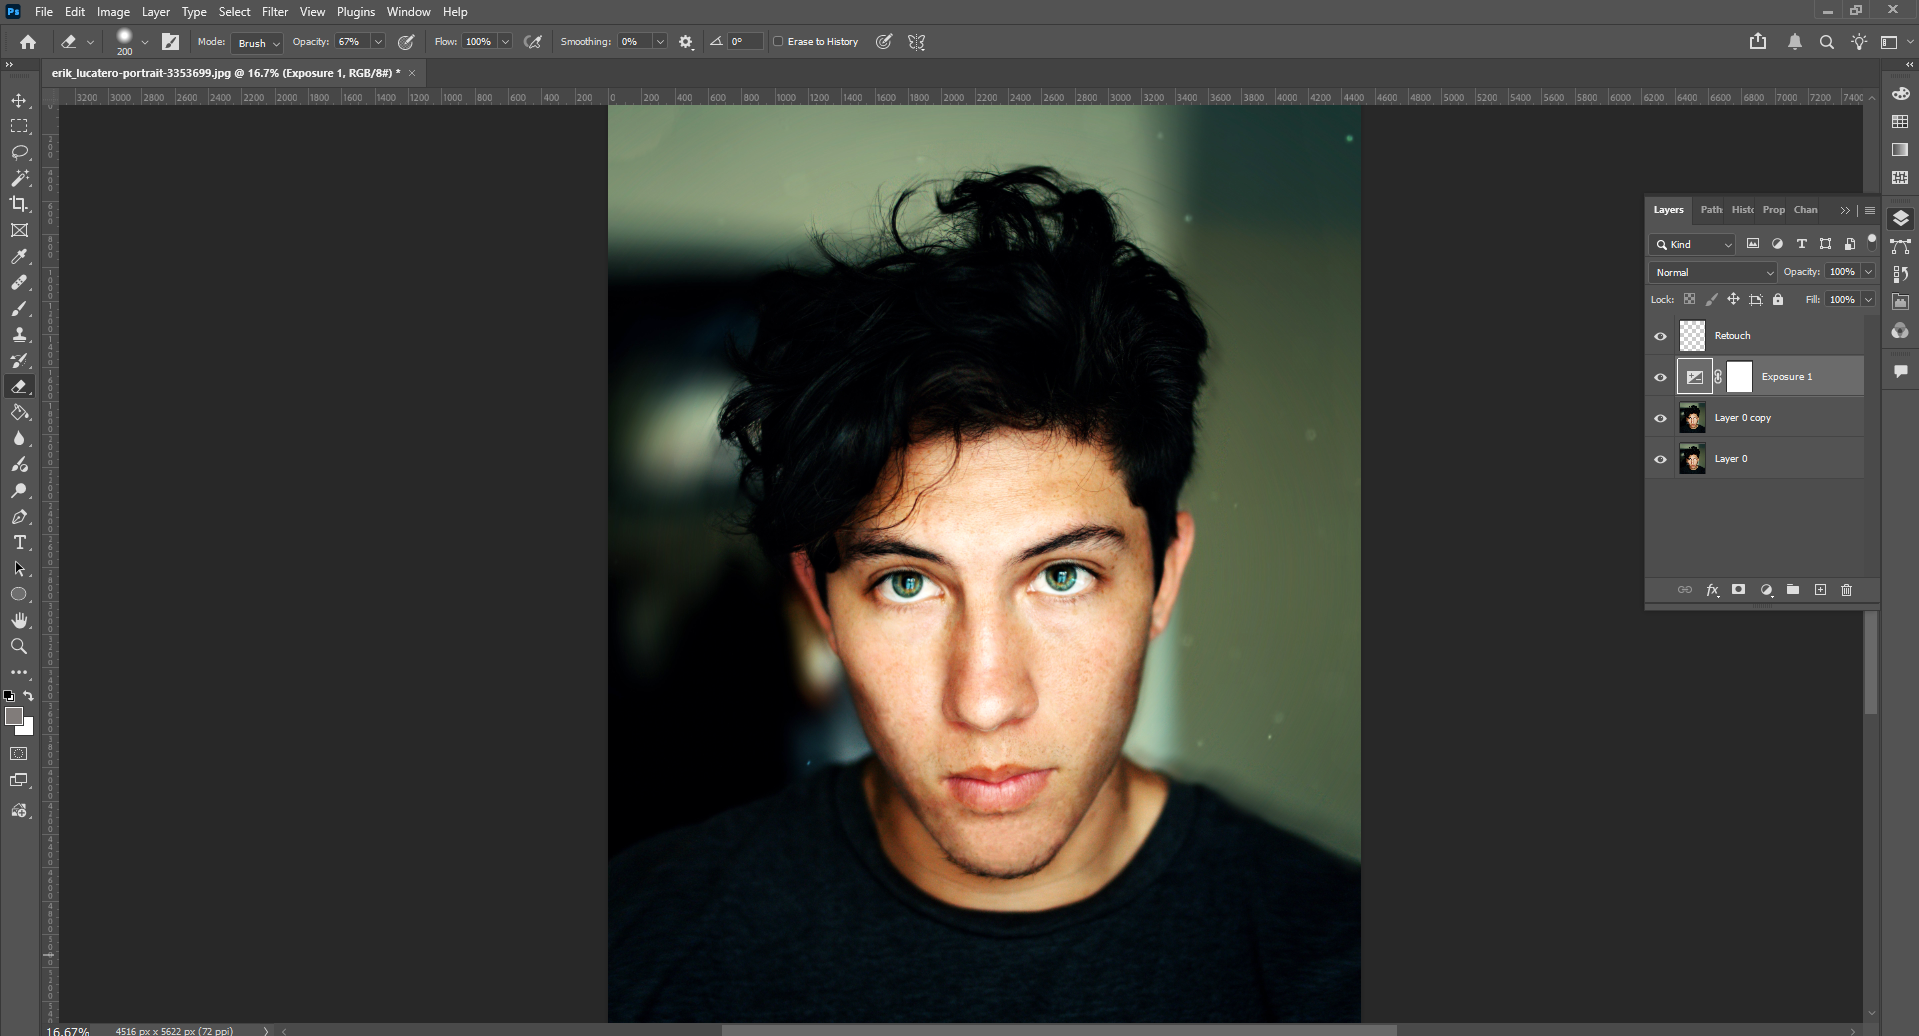
- Optional but recommended: create a 50% gray dodge/burn layer:
-
- Layer – New Layer – Mode: Soft Light, check “Fill with 50% gray”.
This keeps everything editable and prevents “baked-in” damage.
Step 2: Use Spot Healing Brush for the obvious stuff (1-3 minutes)
- Tool: Spot Healing Brush (J)
- Type: Content-Aware
- Hardness: 60-85% (avoid soft mush)
- Size: just slightly bigger than the spot
Click once per blemish. Do not scrub.
When this works best
- Fresh pimples
- Tiny black marks
- Small black dots on face
When it fails
- Near edges (nostrils, lips, eyelashes)
- On strong gradients (cheek highlight)
- Over textured areas (beard stubble)
Step 3: Switch to Healing Brush for controlled results (2–6 minutes)
- Tool: Healing Brush (J)
- Alt/Option-click a clean texture source near the spot
- Paint lightly over the blemish
Healing Brush is what you use when you want speed and control.
If you are trying to get rid of black spots that are flat (PIH/dark marks), heavy healing in Photoshop can smear pores. This is where most beginners ruin skin. Instead, if you want to remove spots maintaining texture, follow the steps below:
Step 4: Fix tone using dodge & burn (best for PIH)
Use the Soft Light gray layer you created.
- Tool: Brush (B)
- Soft brush, Flow: 2-6%
- Paint white to lift dark marks, black to reduce overly bright patches
This is the cleanest way to remove dark spots while keeping pores intact.
Why this works: PIH is primarily a luminance/color issue, not a texture problem. That matches what skin literature describes: pigmentation sits in layers and takes time to fade naturally, which is why “spot removal” often is not realistic outside images.
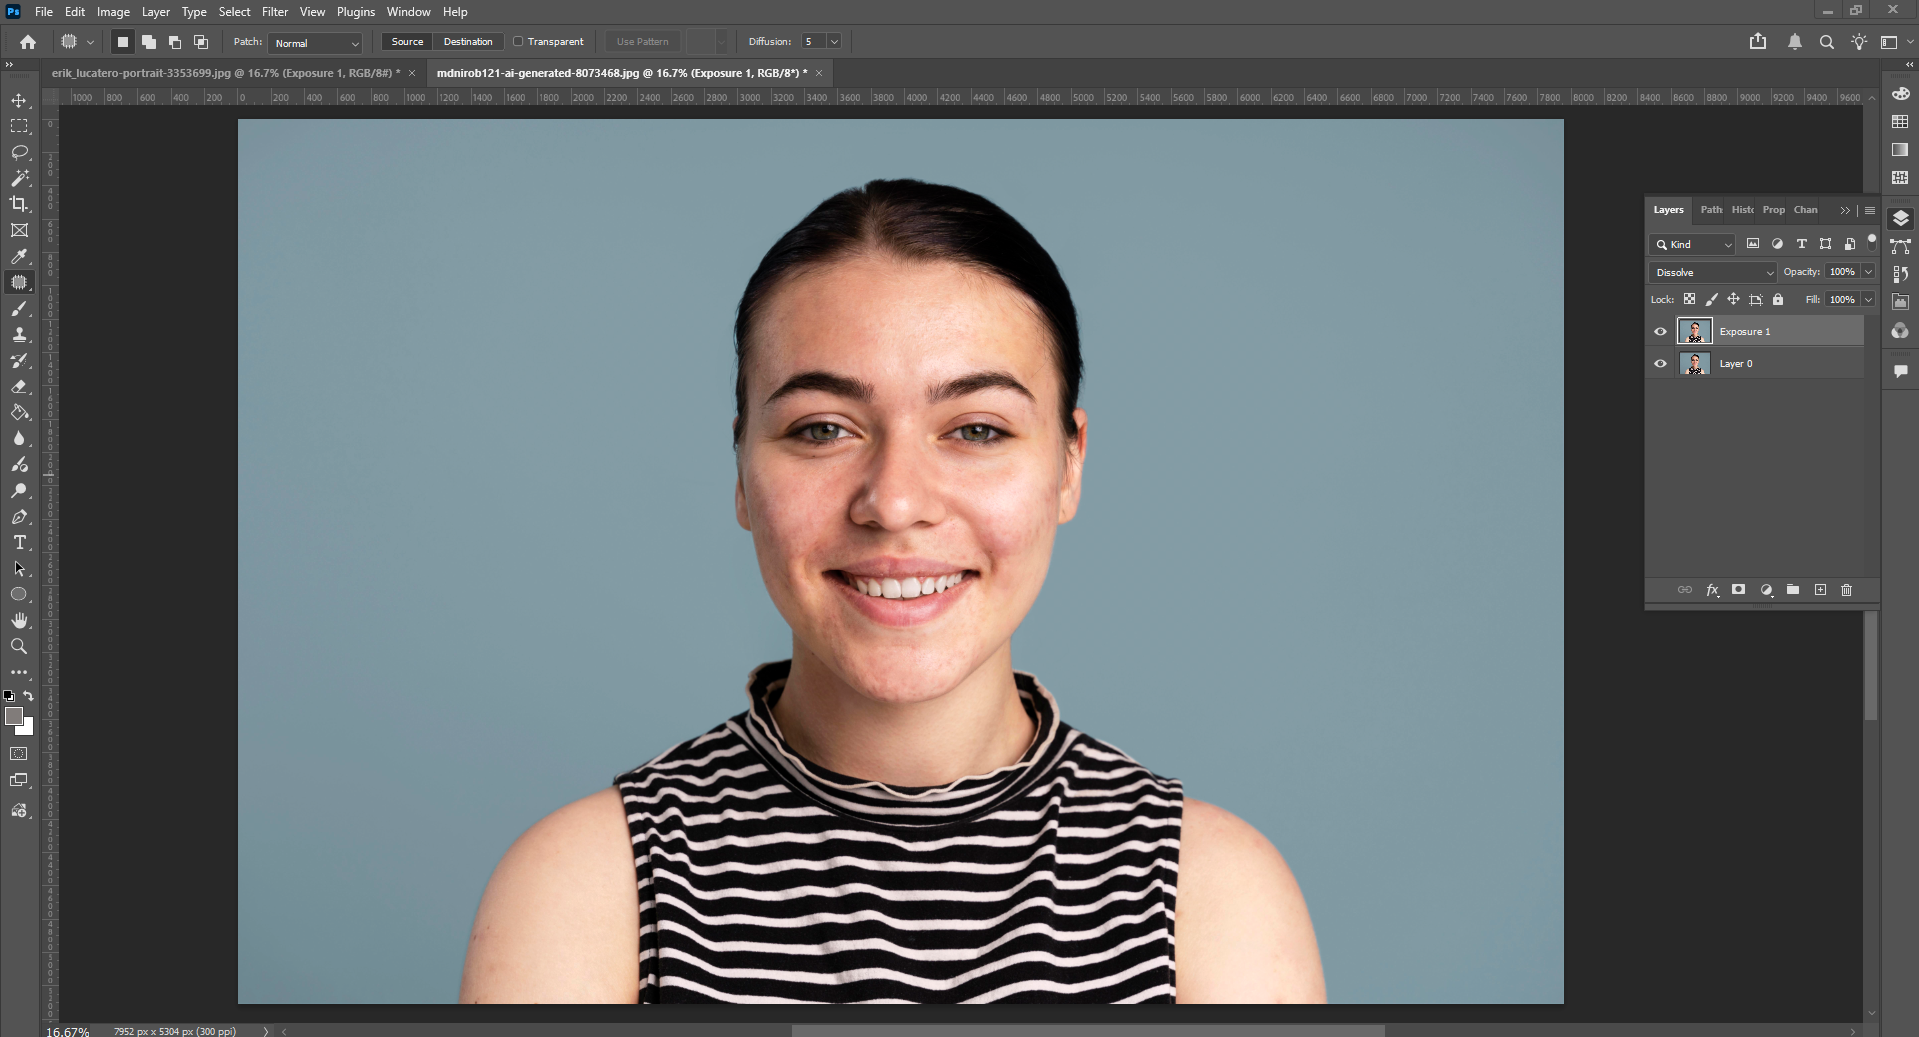
Step 5: Patch Tool for medium areas (fast + clean)

- Tool: Patch Tool
- Mode: Content-Aware (if available)
- Draw around the mark, drag to clean skin
Great for clusters of black spots on face (like cheek areas).
Step 6: Clone Stamp only when you must
- Tool: Clone Stamp (S)
- Opacity: 10-25%
- Flow: 10-20%
- Sample: Current & Below
- Align: On
Use clone like seasoning, not sauce. If you rely on it too much, skin repeats and looks fake.
The Best Tool for Each Problem (Quick Decision Table)
| Problem clients mention | What it usually is | Best Photoshop tool | Why it looks natural |
| “Get rid of pimples” | active acne | Spot Healing – Healing Brush | removes bump/spot quickly without repainting skin |
| “Black dots on face” | blackheads / tiny plugs | Healing Brush (small) | preserves micro texture better than scrubbing |
| “Dark marks / black marks” | PIH | Dodge & Burn | corrects tone while keeping pores |
| “Black spots from face” | PIH clusters / sun spots | Patch Tool + D&B | patch cleans area, D&B restores gradient |
| “Treat/cure dark spots” (photo request) | pigmentation | D&B + subtle color correction | avoids plastic blur and banding |
Retouching Reality Check
A lot of people think dark marks should disappear quickly in real life. Dermatology guidance does not support that expectation: mild hyperpigmentation can take 6-12 months to fade, and deeper discoloration can take longer. That is a big reason clients lean on editing portraits.
Make It Look Premium: 5 Retouching Rules Pros Don’t Break
- Never blur skin as your main method. Blur destroys pores, and pores are what make skin look real.
- Work zoomed out 70% of the time. If it looks good only at 300%, it will not look good in a feed.
- Match surrounding gradients. Cheeks and forehead have smooth light falloff. That is where D&B shines.
- Leave some reality. Removing every mark makes faces uncanny. Reduce, do not erase.
- Ask before removing identity features. Freckles and moles are often intentional.
The “Quick” Retouch That Still Looks Real
If your goal is speed and quality:
- Pimples: Spot Healing – Healing Brush
- Dark marks/PIH: Dodge & Burn
- Clusters: Patch Tool + D&B
- Only use Clone Stamp when healing fails
Final Thought
The fastest way to remove black spots from the face using Photoshop is not just by applying one magic tool. In fact, it is all about determining the right Photoshop technique for the right kind of the skin problem.
For instance, a pimple, a black dot on the face, or a dark spot have different characteristics and Photoshop allows you to be very precise with each treatment without affecting the skin texture. If you apply the treatments properly, Photoshop tools such as the Spot Healing Brush, Healing Brush, Patch Tool, and Dodge & Burn will help you to get rid of black spots on the face swiftly while keeping the natural skin features like pores, highlights, and gradients unchanged.
This non-destructive technique is actually what distinguishes the professional retouching from the over, edited, artificial two, dimensional photos. What makes Photoshop so powerful is that it can help you reduce visual distractions but without removing the realism completely?
Therefore, instead of heavy blurring or aggressive cloning which attempt to “heal dark spots”, subtle tone correction and texture, preserving retouching will get rid of black spots and pimples in the way that still looks real when viewed on high, resolution screens or in print.
In brief, if you want to get both the speed and quality, then Photoshop is still the most dependable answer to fixing dark spots, black marks, and black dots on the face, rendering fresh, looking and natural results quickly when the right methods are used.