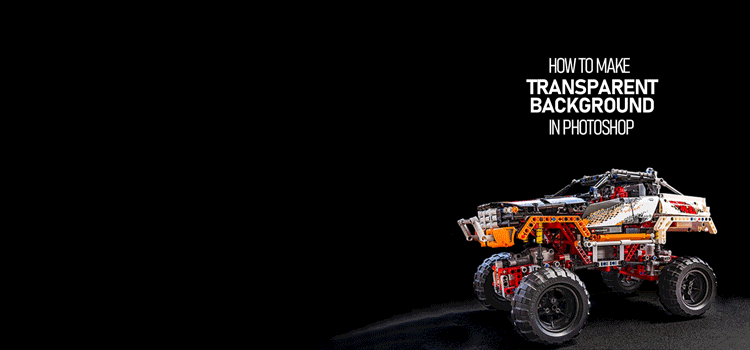
How to Make Image Background Transparent in Adobe Photoshop?
Making image background transparent in Photoshop is not so much tiresome work. You can do transparent image background by yourself at home, but here condition is applied. You have to learn Photoshop and its background-erasing tools. Different types of tools and options of Photoshop are applied to remove backgrounds from different types of images. It varies in image nature and complexity.
You cannot use the same tool without changing settings on soft-edge images and hard-edge images. Achieving perfection in producing transparent background of an image depends on many inescapable Photoshop tool settings like brush size, opacity, color adjustment, tolerance, your patience working, etc.
In this tutorial, we have tried to clarify how to make the color background transparent in Photoshop using the background eraser tool just changing some settings professionally. If you patiently go through the content up to the bottom, you must be able to remove background from any image whether it is a soft margin image, rough edge image, or hard edge photo. It is a cool Photoshop technique you must say ‘wow!’
Transparent Background with Background Eraser Tool
- Open an image in Photoshop and make it duplicate. You can select any image for removing the background and getting a transparent backdrop. It is better if you select a contrasting image background, but don’t worry. Our technique of making the image background transparent is applicable to any type of image.
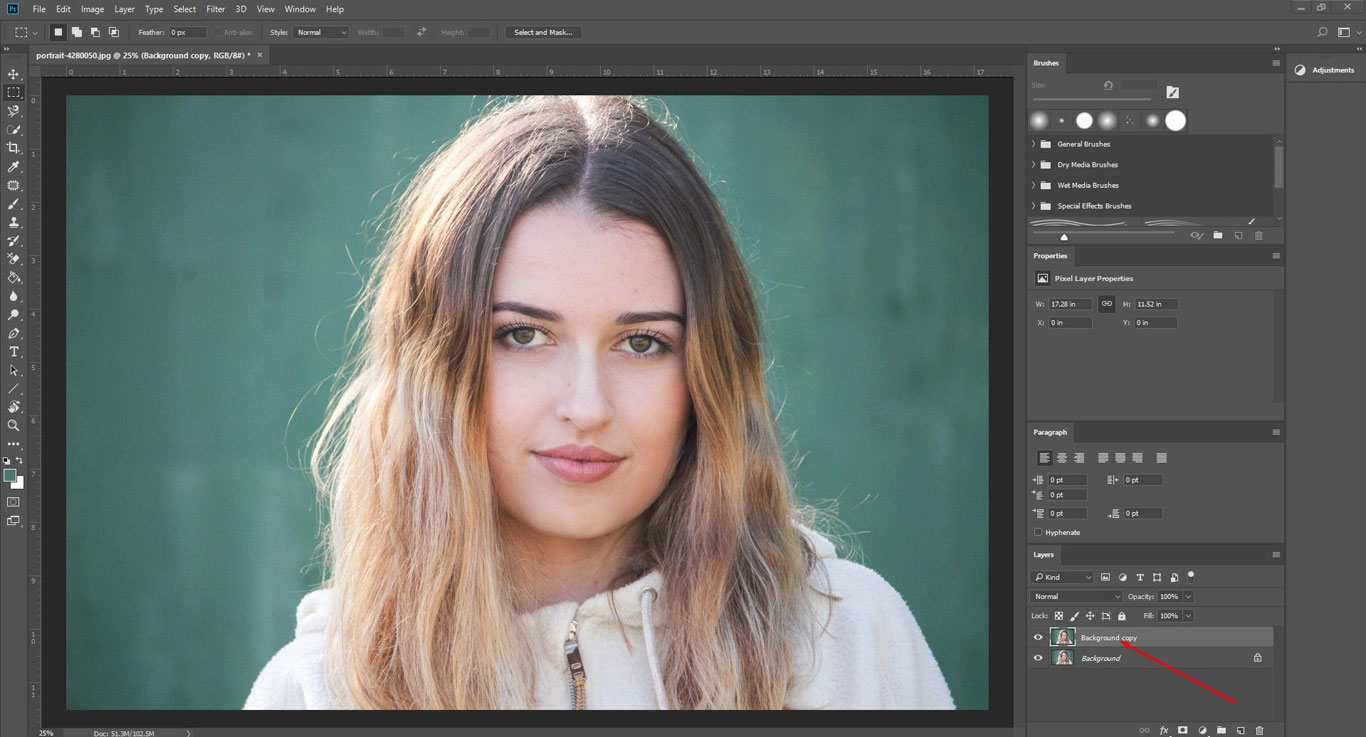
- Go to Create New Fill or Adjustment Layer from the bottom of the layer panel and take Solid Color. Choose solid color as you require. The color should be contrasting with your subject’s soft edge. Finally, place the layer under the image layer that you work with to remove the background.


- Choose the Background Eraser tool and do the settings as we have shown in the below snapshot. The setting can vary depending on your image requirement.


- Then Utilize the Background Eraser tool just around the soft edge to remove the background. Do it softly so that you do not lose the soft edge of your subject like stray hair, fur, etc.

- Finally, remove the rest of the background by using a pen tool or you can use the Eraser tool and place a transparent background layer. Look at the below snapshot. It is not perfect, because it is a hasty experimental work.

Make an Image Background Transparent with Pen Tool
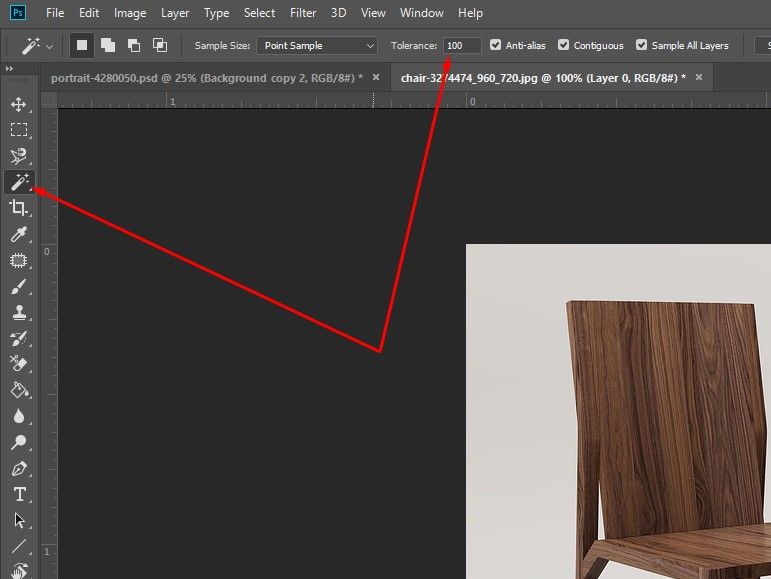
- Open an image you like to work on. We have selected a furniture image with a hard terminal because the pen tool works best on the image with that type.

- Duplicate the image to avoid any damage and hide one layer.
- Now create the path around the subject. Here we are creating a path on the edge of the chair.
- Press Ctrl + Enter to make a selection. It will select the object, we mean the chair image only.
Transparent Background with Magic Wand Tool
- Open your image in Photoshop and select the Magic Wand Tool. If your image subject contains a hard edge, increase the Tolerance up to a hundred percent.
- Click on the image and you can see that it will be selected automatically and that is why it is called the Magic wand tool.

- To invert the selection, press Ctrl + Shift + I. This technique will select the background instead of the only product.

- Hit the Delete Button from the keyboard and remove the background. Now you can see the transparent image background.
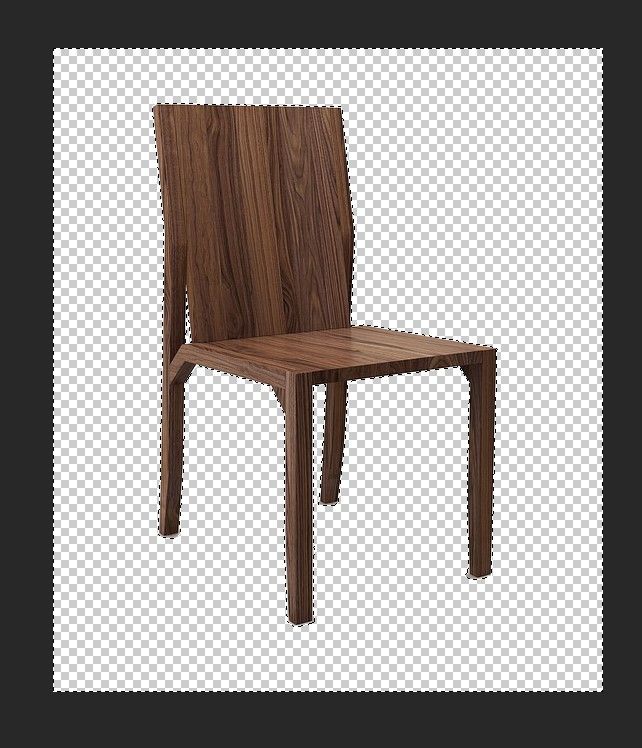
- Press Ctrl + D to withdraw the selection marks and save the final transparent background product image.


6. Press Ctrl + Shift + I to invert the selection. That means it will select the background apart from the chair.
7. Finally hit the Delete Button and see, that the background has turned transparent. If you are satisfied, press Ctrl + D to vanish the moving selection dashed.

Transparent Background with Magnetic Lasso Tool
- Firstly open your image in Photoshop.

- Select the Magnetic Lasso tool.

- Click on the image edge and keep dragging around the edge of your subject.
- Once you will reach the starting point, you will get the image selected.

- Press Ctrl + Shift +I to invert the selection from image to image background.
- Press Delete from the keyboard and get your image background transparent.

Transparent Image Background with Color Range
- Open your image in Photoshop. Go to Select and from the dropdown click on the Color Range option. You will get a window.


2. You will get a color picker. If you want to select the background, click on the background, or if you want to select the main object, click on it. Here, black is selected. So what you like to select, transform it into black by moving the slide.
3. Look at the above image, the background is selected. Your object is white which means it is not selected what we want. Anyway, deed the background, it is not perfectly black which means it is not perfectly selected. So now, you have to select the color picker with a plus (+) sign and click on the place where the background is not thickly black. Thus make your image background fully black.

4. Press Ok. You will get your image background selected with a long blinking dashed around your main object.

5. If your main object gets selected a lot or a little bit, then take the Quick Selection tool and click on the selected area so that it gets removed.
6. Then, Press Ctrl + Shift + I or go to Select and click on the Inverse from the dropdown. As a result, the background will be selected.

7. Finally, press the Delete button from the keyboard to remove the background and press Ctrl + D to deselect the product.

To sum up, we cannot but confess that the background removal technique is applied to create an image background transparently. Usually, the editors remove the photo background and replace another one, but to keep the background transparent, they don’t replace another background like image background replacement. This is the only difference between creating a transparent background.
Here we have shown five ways to create transparent image background after removing the background. We are sure they will work for you and help you to get a clear idea of making transparent photo background.
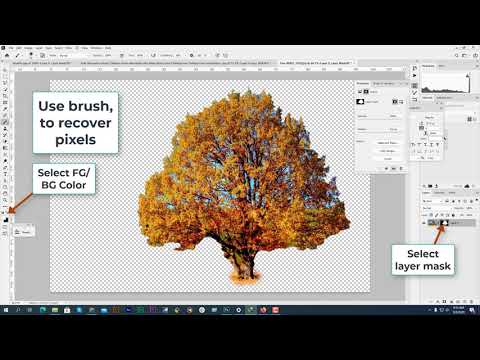
Image manipulation is not an easy task. To have professional-quality images, you should have appropriate skills and enough patience to practice and work. If you have a lot of images and you need a transparent background, contact us. We are a professional image manipulation company. We have been offering almost all the necessary photo editing and retouching services for the last 30 years at the best prices.
You may also read: Learn to Make a Logo Background Transparent in Photoshop