How to Edit Your Ecommerce Product Photos Fast in a Tight Deadline

As an online store owner, finding professional product photographers for your ecommerce product photography is a challenge. Also, it’s not easy to edit your product photography either. But editing ecommerce product photos is as important as shooting to make your online product photos stand out.
Regardless of the niche, your online store’s products will have many variations and types. Some of these products are likely to have subtle details that demand touch-ups for proper display in the store.
Here, we will share with you actionable ecommerce product photo editing tips to notch up professional results that help grip your store visitors.
Suggested Article-
Editing Ecommerce Product Photography Fast
Tons of tactics are at hand to edit ecommerce product photographs. But some of them are complex while others aren’t worthwhile due to inefficiency. The techniques we have put together below will help you edit your ecommerce product photography easily & efficiently.
Map Out a Detailed Plan

Like any type of photo editing, your product photo editing should kick off with a comprehensive plan. This will help you make out you are on the right track.
First up, decide what types of photos you require for your ecommerce platform. Don’t hesitate to collaborate with an apt product photographer to have a better understanding of your requirements.
A photographer can also brief you about key factors like how to adjust lighting and shoot at different angles for better results.
You can also research your audience and discover what people expect to see in product photos. Apart from that, consider product styling tips to match current trends.
To add a professional look to your product images, you have to make use of high-grade photo editing software. Luckily for you, you have a wide range of options available, so go for the one that comes with all the required features & tools.
Photo retouching programs like Photoshop or Lightroom are at hand on a subscription basis, while others like Snapseed, Canva, Photoshop Express, BeFunky, and Fotor are entirely free.
Tap into Photoshop Shortcuts for Quick Outputs
Photoshop shortcuts are primarily a combo of keys or mouse actions pressed at once that trigger a specific command, which a user could also prompt by going through a series of multiple menu items within the software.
Not only it speeds up the process, but also minimally drains your mental power. Photoshop shortcuts are easy to pick up and remember. You only need from a few hours to a day to train yourself on these shortcuts and then you can use them on a subconscious level. It’s like flying on autopilot, isn’t it?
Instead of going for clicking a series of submenu items which are infamously fine-print and, your fingers just press a known key combination.
Here are some common Photoshop shortcuts we have put together for your benefit that will help you edit your ecommerce product shots easily —
P: Used for selecting the Pen tool
A: Used for selecting the Direct Selection tool
H: Used for selecting the Hand tool
Alt + click for PC or OPTION + click for Mac on point: Used to create a corner at a point as you draw with the Pen tool
CTRL+ = for PC or COMMAND + = for Mac: To zoom in
CTRL + – for PC or COMMAND + -: To zoom out
SHIFT + CTRL + N for PC or SHIFT + COMMAND + N: To create a new layer
SHIFT + F5 for PC or FN + SHIFT + F5: To fill the layer with color
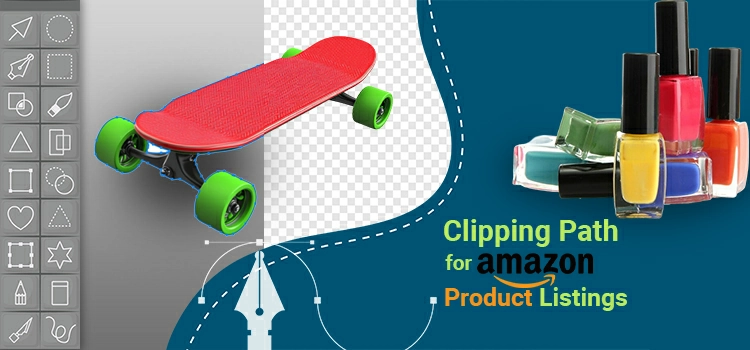
Take Away the Product Photo Background

One of the initial edits you should apply to your ecommerce product images is to remove their backgrounds. Even if your product photos look clean and crisp on display, eliminating backgrounds will bring out better scopes to display your product imagery.
So, always click on a white background, which will simplify the background removal process later on. In addition, the image background removal will minimize the file size and make the loading speed of your online store pages faster.
The background elimination helps minimize minor flaws like hairs or threads protruding. Once the background disappears from your product images, you may either leave it transparent or swap it with a solid background of any complementary color.
Of course, you should pick the background color based on your store’s theme color. Aside from that, you can leverage a transparent background to underscore solely the item, preventing all sorts of distractions.
Perform Batch Edits to Apply Color Correction, Formatting, Resizing & More
Batch edits can be another efficient way to save you considerable amount of time in editing. This method is super handy if you’re dealing with a series of images that require similar adjustments.
For example, batch edits can apply to a series of images captured with the same light in a studio with a model, or people strolling in the same weather conditions.
In these cases, you are likely to apply the same adjustments to all the images. Tweaking the size, formatting, correcting exposure, white balance, clarity, grain, calibration, and sharpening, all are going to be the same for the entire series due to similar ambient conditions.
Batch editing and batch color correction methods let you employ the same set of edits to a collection of chosen images. So once you’ve notched up the right result, you can just apply the edits in bulk to the whole selection.
Different photo editing software programs have different methods of applying batch editing actions. In Photoshop and Lightroom, you’ll need to create presets for example but the basic principle is the same for all.
Repair Flaws & Imperfections

While shooting product photos, it is impossible to keep an eye on all elements in the composition. Apart from that, things like dust particles are difficult to control, so you need to get an exemption from them during product photo editing.
You have many tools for that but Adobe Photoshop is the best one for detailed image processing. It offers an array of tools to retouch image defects effortlessly.
For instance, the Healing Brush automatically matches colors and values, so you only required to pick a texture you like, and the software will do the rest.
The Clone Stamp Tool will help you select a part of a picture and then “paint” on the other area of a photo with the clone selection as a brush. This is the best method for navigating imperfections located at the edges of a photo.
On top of that, the Patch Tool functions like the Clone Stamp but it makes a selection that can be blended over another area. As it is aimed at blending, it would be better off using smooth surfaces.
Leverage AI Tools for Basic Actions only
The AI-powered photo editing tools can expedite your online product photo editing process too. AI photo editors perform exceedingly well in making basic product photo edits.
As for advanced product photo editing like adding or removing elements, you’ll need to apply manual edits after getting outputs from the AI tool.
Well-trained robots can edit basic photos like background removal flawlessly. Likewise, you can go for this option if you need to edit product photos with simple silhouettes shot in the studio with fixed lighting conditions and minimal shadows.
Using AI tools is time-saving, but you’ll always need to manually review and make further adjustments if required.
Although AI is making strides rapidly, there’s a consensus till now that AI can’t replace some highly nuanced creative jobs.
Add Shadows where Needed

Image shadows are required to make your product photos look realistic on display. Shadows come in various types, including natural, drop, and reflection shadows.
Natural shadow is the one typically created by an object when it is placed in direct light. The best part of adding such a shadow is that it creates a natural look for products.
Drop shadows are perfect provided you want to produce the illusion that a product was photographed from above. With a drop shadow added to any of your product photos, it will create an impression that direct sunlight is hitting the item from a height.
Drop shadows work optimally for furniture pieces, helping buyers visualize how a specific item will look in their house. Besides, this type of shadow is perfect for taking shots of footwear.
Reflection shadows are used to inject a bit of extra charm into the frame. It is an elegant shadowing effect that creates a reflection effect on a product without physically doing so. You should add this type of shadow to the images of sunglasses, watches, and jewelry to spice up them.
Make Sure to Set Image Profile to sRGB to Preserve Colors
Many times, the item color becomes one of the primary reasons for online shoppers to purchase particular items. Imagine how pissed off a person would be if they receive an item and spot that the item’s shade is imperfect.
For your information, PC screens and web browsers feature various color profiles, so the same color may differ on a smartphone and PC screen.
Pro product photographers consider this and convert their .jpeg files to the SRGB color profile. As the browsers are adapted to decipher sRGB colors, photos in sRGB will be clearer in comparison with the non-adapted Adobe RGB photos.
So, make sure to convert your files into sRGB to keep the shades in pictures intact and maximize customer satisfaction.
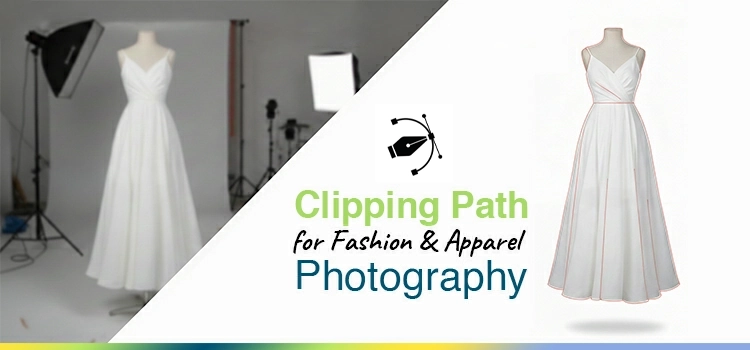
Take Away Mannequins & Apply Ghost Mannequin Effects

Mannequins assist in showing the exact size and shape of your products, so prospective buyers can have a better understanding of what they will receive. Needless to say, by shooting clothes on mannequins, you will get professional and realistic product photos.
However, mannequins can also be a cause of distraction, so it is better to create ghost mannequin effects. With the effect applied in your product photos, you will snag the accurate dimensions and shapes in photos, but without any distraction.
The ghost mannequin effect, otherwise known as the invisible mannequin effect is a photo editing tactic that is often used for streamlining the appearance of online clothing items.
Its primary objective is to showcase apparel photos comprehensively, with minute details in focus. Thus, you can take countless pictures of a product on a model/mannequin, merge images, and eliminate the model or mannequin with special photo editing tools.
Capture a 3D Product Photo to Show with Complete Visibility

The downside of an online store is that shoppers don’t get a tactile feeling. That means they can’t touch products and explore them from all aspects. 2D photographs minimally convey the volume of an object and don’t allow a buyer to feel it.
This is where 3D product shots come into play. To capture 3D product photos, you have to rotate a product 360º and click on different positions to get a detailed view. 3D product photos will let people envision that they are holding a tangible item.
A 360° photograph is a bunch of images of an object shot at different angles. To shoot this type of photo, you don’t need to rotate your camera around the object. All you need is to place the camera steadily on a tripod.
What you need to rotate is the product itself as mentioned above. Once you take photos of a particular product from different positions and angles, import them into a specialized program and integrate them into one 360°picture.
We suggest using Adobe Bridge for this task. Select all images, right-click on the menu, and pick “Open in Camera Raw …”. An editor window will show up. Re-select all the images and drag the Contrast and Light slider a little rightwards, tapping into the right panel.
You have to find such a position so that the backdrop vanishes and the colors in the image remain lifelike. First off, decide what 3D photo resolution you require for your online store. For example, you can choose 500px by 300px, which means a 5:3 ratio.
Once you have shot and edited your product photos, upload them to a program called 3D Photo Maker, to convert regular 2D images into an interactive 3D model. Once done, you can deploy all your product images in your online store.
Make Use of Mirror Effects for a Killer Result
While editing product pictures, you always have to make tweaks that don’t impact a realistic look. Of course, images must captivate people to pump money on the items showcased. The product images have to be eye-soothing, but this has nothing to do with misrepresentation.
The best method to produce that “eye-catching” look is to inject a mirror reflection into the frame. If you can’t do it during your photoshoots, you can apply a mirror effect at the image editing stage.
While in most cases a mirror effect adds depth and strength to a picture, sometimes it can make your photos totally out of place. To make out whether it is fitting for a particular photo, just imagine that there is a mirror reflection produced by your product.
If the imagination appears realistic, don’t hold back from applying it. If not, go for other creative edits. Along with that, you can equip a mirror-reflective surface for the next photo session to get a graceful effect straight away.
Outsource All your Edits to a Professional Photo Editing Service Provider
You can always outsource your photo editing tasks to any prominent photo editing studio with a sizable fleet of retouchers, who have proven track records. Depending on your needs, you can outsource partial or complete ecommerce photo editing tasks to a professional company.
If appears reliable, you can contact us too for your ecommerce photo editing tasks. We have a pool of pro photo editors who can execute all your editing actions with perfection.
Depending on your needs, we can apply multiple edits to provide you with the best-in-class ecommerce product photo editing service.
Don’t Forget to Optimize Your Photos for Faster Loading
Once done with your ecommerce photo editing, you need to optimize your pictures for your online store. In most cases, the resulting files end up being large. So, uploading them to your website will augment your site’s load time.
But people don’t like to wait longer after landing on a website. Within a few seconds, if your page doesn’t load, they will bounce from your site.
So, before uploading a photo to a web store, you have to check the required file size. This is a value that will determine what image size can be used on a website without creating loading issues.
Typically, the smaller the photo size, the higher the loading speed, and the lower the bounce rate. To be on the safer side, leverage pictures of 1-2MB in size.
Furthermore, ecommerce product photos should be at least 2000px on the longest side so that users can zoom in on a picture if required and you can share them on popular online marketplaces without facing issues.
It’s Your Turn
Editing or retouching product photos helps highlight specific parts, fix color issues, adjust exposure, and refine images holistically. This of course hooks online shoppers and pitches them to make purchases of their desired items.
Various tools and techniques are at hand nowadays to do that. But for fast editing or retouching your ecommerce product images, you need efficient photo editing tools and techniques. That’s what we have cataloged in this write-up.
By following the tips above, you can edit your product photos yourself and bring a professional look. But don’t hesitate to reach out to us for any professional help.