How To Create Ghost Mannequin Effect

Who doesn’t expect to showcase their products online in the most interactive way? Ghost mannequin is no doubt a powerful method to attract customers whether you are going to sell apparel and fashion products. It creates an amazing environment to visualize products in a unique and professional way. Today, we will try to focus all the things to clarify the ghost mannequin effect, its importance, tips to achieve the best result, and the method to create it perfectly.
Table of Contents
Why We Are Using Photoshop for Ghost Mannequin Effect?
Ghost Mannequin Photography Tips
Invisible Ghost Mannequin Vs Mannequin Neck Joint Effect
How to Create Ghost Mannequin Effect
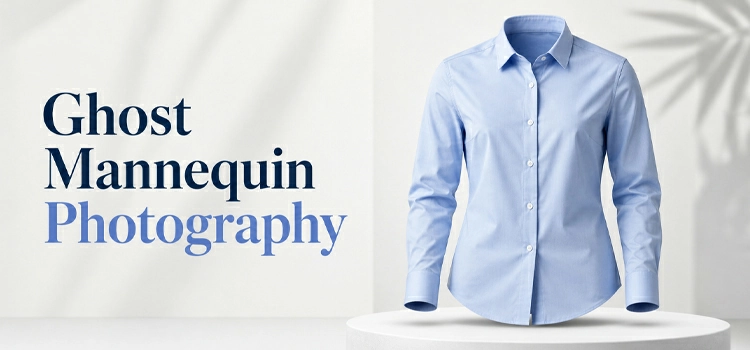
What is Ghost Mannequin?
Ghost mannequin is also defined as an invisible mannequin that refers to the task where designers remove the mannequin from a particular garment product like shirts, jeans, jackets, tops, etc. The purpose of this specialized service is to show off both the outer and inner parts of the apparels. It lets customers know how it may feel after wearing the product. That’s why the importance of this service has been increasing than before while the fact is about selling products online.
Why We Are Using Photoshop for Ghost Mannequin Effect?
To create ghost mannequin effects for the fashion and apparel items, Photoshop is the most comprehensive tool used by the professionals. The question may arise- why Photoshop? Well! Let’s go through the points mentioned below to be clarified.
- The procedure starts with setting up layers and Photoshop in this case gives you the best solution. It lets you apply different adjustments to the particular layers. Also, you can modify them as per your needs.
- Magic Wand tool is one of the essential parts in Photoshop that gives a wide range of solutions in image editing. It allows selecting particular areas of images and replacing them with appropriate background or color.
- Limitless manipulation is possible through this tool which is important in the procedure of creating ghost mannequin effect. Photoshop offers a pixel-level editing facility for the designers.
- Changing the background is a common task in ghost mannequin effect in some cases. And, Photoshop offers a friendly and easy solution to make it done in a few clicks that no other tools can do in such a way.
- Photoshop is not complex so far to learn for the beginners and saves money and time in the ecommerce industry. That’s the reason, it’s the most used software in the photo editing industry along with the invisible mannequin effect. Also, you will find many Photoshop online resources to learn it for your personal and professional purposes.
- It’s a popular photo editing software that has a variety of tools that every photographer would need to make a perfect editing and retouching job. Each time of its new release, it introduces something new and interesting to the professionals.
Ghost Mannequin Photography Tips
Mannequins are being used widely in the clothing industry for several years. It requires skilled hands to pick the photographs wisely so that they create an appeal to the customers. In these circumstances, we come with some of the essential tips for ghost mannequin photography.
Choose Appropriate Mannequins
Choosing mannequins should be the first step to start ghost mannequin photography. You must pick those according to your needs. Find a shape that suits the clothing materials you will be selling. Choose the right size and color of the mannequin so that the elements look real and attractive.
Pick Photography Equipment
Before starting photoshoot, you must bring the right gear to have the best shots of your products. Basically it requires a high-quality camera, lighting softboxes, background, and a tripod. The whole thing together will make a proper environment in getting a perfect ghost mannequin photography.
Try Different Poses
Showing off different poses in clothing photography make it more unique and appealing. In this case, professionals prefer static poses over dynamic. People expect to see products in multiple ways before purchasing them. That’s why it plays an important role in the entire sale.
Concentrate on Lighting Setup
In mannequin photography, lighting is one of the most crucial parts and the best method is to use natural sunlight. It brings the maximum contrast and showcases apparel items more professionally. Apart from this, you can prepare the lighting setup manually according to your needs and budgets. Make sure the placement of the necessary gear is perfect.
Photo Editing
The process from photoshoot to creating ghost mannequin effect is a time-consuming task. It has to maintain a lengthy procedure to separate the mannequins from images. That’s why you may need professional ghost mannequin service to do this job done properly so that you can concentrate on your fashion and apparel business.
Invisible Ghost Mannequin Vs Mannequin Neck Joint Effect
Invisible Ghost Mannequin Vs Mannequin Neck Joint Effect may seem kind of close variant, tricky, and confusing. You have been already familiar with the definition of invisible ghost mannequin from the earlier discussion in this content. In general, it actually refers to the method of removing mannequin from an image. On the other hand, the mannequin neck joint effect is a particular type in this service where the neck part of a clothing product is resolved by joining the back of the neckline maintaining the consistency of the shape, size, and color issues. As a result, it brings the appeal and creative hollow look so that audience can get the real feel.
How to Create Ghost Mannequin Effect
Now, the time comes up to describe the way to create the invisible mannequin effect using Photoshop. Let’s go through our ghost mannequin effect tutorial the steps below!
-
Step 1
The working process starts with opening the image in Photoshop where we will try implementing the ghost mannequin effect. In this case, the mannequin should be picked wisely. It must be high-quality.

-
Step 2

Unlock the layer from the marked portion.
-
Step 3

Select the Pen Tool from the given red box for clipping.
-
Step 4

Make selection from path (CTRL+ENTER)
-
Step 5

Now, add a mask and remove the background.
-
Step 6

Select the neck part with the Pen tool.
-
Step 7

Then, select the mask and fill it with black color (ALT+DEL).
-
Step 8

Now, switch to 2nd image file.
-
Step 9

Here, apply lens correction from the filter menu.
-
Step 10

Now, place this image to the t-shirt image.
-
Step 11

Work on adjusting the size. Press CTRL+T and start the process.
-
Step 12

Set the layer 1 to layer 0 and select WARP.
-
Step 13

Apply layer style and inner shadows from the red marked box below.
-
Step 14

Save the final file.
Let’s go through the video where we have presented the entire procedure in a few minutes.
To Wrap Up
In the fashion and apparel industry, ghost mannequin effect service has been a must way to attract customers by giving them a real and flawless look. Whether you are planning to increase sales both online and offline, this technology should be implemented in the most convenient way. To do so, we provided a way to learn how to create ghost mannequin effect in Photoshop like a pro. Besides this, we also introduced some essential tips to improve your photography skill in the area to produce high-quality images.
So, is there anything that I missed out for you? Let us know your findings so that we can come with some more interesting and helpful write-ups for you. Hope this tutorial may help you with understanding how to create ghost mannequin effect.