Transforming Your iPhone Into a Field Monitor: An Ultimate Guide

Struggling to view your spellbinding shots in the on-camera LCD? Perhaps, your stunning photos and videos look tiny and vague with low resolution on the LCD. Fret not! We have a cracking solution to this drawback.
By turning your iPhone into a field monitor, you can view all your marvelous shots and videos on the big screen of iPhone with high resolution.
Now, you must be wondering how to transform your iPhone into an external monitor, so you can enhance photo and video viewing experience. Well, that’s not a matter of concern whatsoever!
In this guide, we will show you the method of transforming your iPhone into a field monitor in the easiest and simplest method. We will cover the other relevant details related to these facts as well. Let’s crack on…
How to Transform iPhone into a Field Monitor?
Turning your iPhone into a field monitor for your camera can be a stunning as well as affordable way to enhance your viewing experience. Buying an external camera monitor can do the job too but it will cost an arm and a leg.
Let’s take a look at how to set up your iPhone as a monitor so that you can start shooting better photos and better from today!
Connect your iPhone and Camera
Connecting the phone and camera is a cakewalk. First, you need to connect your iPhone and camera using a USB cable or via Bluetooth.
Switch on the Wi-Fi Function of the iPhone
You have to make sure both the phone and the camera are on the same Wi-Fi network. Now, select "Connect" on the main screen. You will spot a catalog of cameras connected to your wireless network with their IP addresses displayed below their names.
If the IP address doesn’t show up, enter its IP address manually into iPhone’s field (You can get it from camera's manual).
And if you don't find any devices listed in your wireless network, ensure that they're turned on and connected directly to your router by an Ethernet cable. You can also turn on the hotspot on your phone to let your DSLR connect with it.
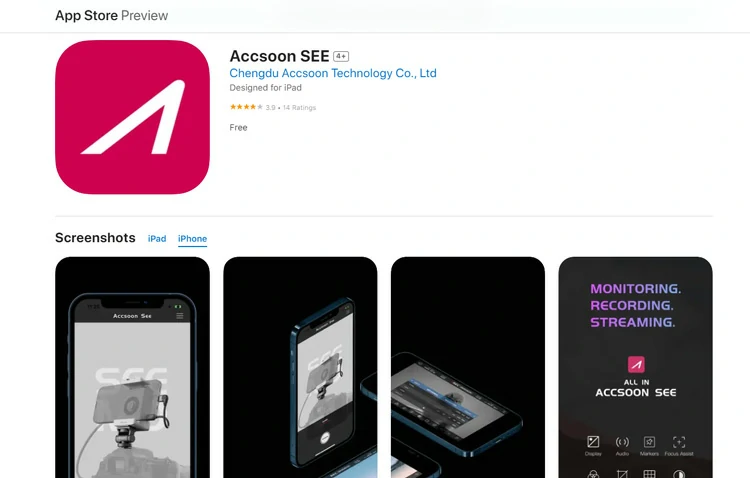
Download and Install the Accsoon SEE App
At this point, download the Accsoon SEE app (Apple App Store) from your phone's app store and install it thereafter. Once the app is installed, you can launch the app to get familiar with the app’s various functionalities.
Connect HDMI Cable between 2 Devices
Next up is connecting an HDMI cable between your camera and phone. Usually, digital SLRs have two HDMI ports for video out. Make sure you connect your phone to one of these ports only!
If everything is up to the point so far, congrats! Now let's move on to the next step which involves configuring each device individually as well as leveraging them all together in perfect consistency.
Accsoon SeeMo HDMI Adapter Explained

Accsoon SeeMo HDMI adapter is a tiny device that you have to connect to your iPhone using a custom Lightning-to-USB-C cable, and it connects to your camera easily via its HDMI input. Then, power it with a Sony-style NP-F battery, turn it on, and start the Accsoon SEE app. After that, guess what? The image will appear within seconds. It’s super simple, isn’t it? Yeah, and it functions smoothly and reliably too.
The specialty of Accsoon is its minimal lag due to getting the video signal via a cable connection into the phone. This lag is certainly low enough to enable you to use your iPhone as a field monitor to pull focus from.
Accsoon SEE APP- An Overview
We have dealt with the Accsoon’s HDMI adapter. Now let’s learn a bit about its app Accsoon SEE app. It’s entirely featured and boasts nearly all the bells and whistles you anticipate from a pro monitor.
You will get waveforms, focus peaking, anamorphic de-squeeze, pinch to zoom, and even external preview LUTs that can be loaded into the app. Stacks of LUTs are built-in for different log types for different manufacturers.
Now, obviously, there are limits– the image you will get is only 1080p with up to 60 frames per second. This means you can’t enjoy viewing your 4K captured image in your camera onto the monitor.
So, pinch in magnification is not that handy as you are zooming into a 1080 image, and not the 4K or whatever higher resolution your camera is recording.
On top of that, the app’s navigation is easy, simple, and straightforward. There is just one practical problem; while swiping across the toolbar, you can abruptly end up going to the home screen or swiping between apps.
An easy solution to the problem would be to move that toolbar onto the top of the screen and replace it with the toolbar that is currently there.
Accsoon SEE APP Recording and Streaming Features

In addition to the monitoring features, SEE app also comes with a recording feature built into the Accsoon See app that powers their SeeMo device. This is surely not swapping professional recorder monitors.
However, it’s a cool add-on for a monitor if you need to rapidly grab a video from your camera to work with on your phone or dispatch it to someone.
Apart from the monitoring and recording features, there is also a way to stream directly from the app. It’s massively useful as this basically makes all cameras with an HDMI port do live-streaming.
You will have to tap into stream keys for various platforms like YouTube and Facebook, so it’s not all automatic. But it’s simply great to have this option.
Hardware Requirements
The SeeMo device itself is actually just a tiny box which really is wondering if it can be put in a cable in the future. You can remove it from the phone mounting bracket and also use it distinctly or place it elsewhere on your rig.
The box itself doesn’t have any 1/4″-20 mounting point at the bottom or anywhere else, which means you’ll need to attach it with a velcro if you leverage it without the phone mounting bracket.
Only the phone bracket itself boasts a 1/4″-20 mount at the bottom, with an extra shoe mount on top which allows for attaching a microphone, provided you put this on top of your camera.
The build quality is also nothing to write home about – it’s totally plastic, and people must look after the SeeMo well to make this last for a long time. It does feel relatively solid, though, but you definitely wouldn’t want this to drop on the floor from a tripod level.
Alongside, there is also a power-out option with 5 Volts, which is cool to have, but too low to power the camera itself. Regretfully, you cannot charge your iPhone through the Lightning cable. This is a drawback as you will be draining your phone battery fast when tapping into it as a monitor.
We hope this is something that can be injected with a firmware update. So users don’t face any charging issues while using their iPhones as field monitors.
Camera settings for live view shooting
To start with, make sure that you've turned on the “Live View mode” on your camera. On some cameras, it's called "Live View" or "Live Screen," while others may have different names for it.
Next up, turn on your camera screen and set its brightness at the maximum level possible without impacting visibility in sunlight (or other harsh lighting conditions).
It's overly salient to do this as if you don't adjust your camera settings properly. And you won't be able to see what's being shown on the external monitor cleanly and crisply.
Then, make sure that Wi-Fi is turned on in both devices so they can connect with each other wirelessly and exchange information swiftly between them in real time. You can check whether Wi-Fi is enabled by opening up Control Panel > Network & Internet > Wireless as well.
This location will show whether Wi-Fi is enabled or not. Enable Wi-Fi Functionality on your iPhone device Settings! This Is crucial as without it you can't share images from camera to phone and vice versa!
Finding an App for Connecting your iPhone with a Camera
It’s not an easy job to search and track down an app that would operate for most camera manufacturers and is also compatible with your iOS devices.
This is because the app you choose must work with your camera, its firmware, and your iPhone set to create a smooth experience for users.
Some apps just function with a certain set of hardware and some just don’t. The optimal way to find if a particular app is the right one for you or not is to try it out. Trial and error! Yeah, that is what we would suggest here.
However, a number of apps on the app store promote themselves to be an end-to-end solution. But it’s not advisable to trust them blindly. Always opt for the trial version first, tap into it for a week or two, and then if it catches your fancy, pull the trigger and you may then consider picking up the “pro” version.
Bear in mind that whatever may happen, never pay before you actually see it working on your own set of camera and phone.
So, give it a try and see if you like it first. Always remember that not everything is for everyone. There may be umpteen other free apps but most of them just fluff to produce cracking results. We tried a few of them but most of them crashed very often on my setup, so cannot really recommend them.
Suggested Article

11 iPhone Photography Tips to Easily Master Mobile Photography
High-end vs. Low-end Cameras
As a photographer or filmmaker, it’s overly important to find a perfect camera for the shooting job. But it's also something that is getting tougher as time progresses as the photo and video quality between high-end and low-end devices continues to deteriorate.
When it comes to high-priced camera models from companies like Canon and Sony, the specialty they offer is extra features and functionalities. These features are intended to mirror the functionality of professional video cameras in anticipation of courting YouTube and streaming crowds.
Low-priced models, on the contrary, like the older Lumix G7 are more limited in features. But many of these cameras offer top-grade video and picture quality. They too have the ability to connect to smartphones as external monitors.
Having said that, high-end cameras have dedicated apps and many built-in functionalities that smoothen the workflow. But for entry-level cameras like Lumix G7, you have to do a little extra D.I.Y for smooth operation.
The bottom line is that, “consumer", "prosumer", and "professional" categories differ primarily in terms of features, functionalities, and appearance, but not entirely on quality.
Ready to Turn your iPhone into a Field Monitor?
Display size always matters when it comes to viewing images or videos. Smaller screens and built-in LCDs in cameras don’t give that optimum viewing vibe. This is where iPhone comes into play as it can act as a field monitor for your camera shots.
But it’s pivotal that you find the task of connecting your camera to your iPhone a piece of cake. That’s why we have crafted this content piece to make every aspect of connecting camera to iPhone smooth and hassle-free.
The write-up has deal with connecting procedures, required hardware & software, and all the other bits and pieces of transforming your iPhone into an external monitor.
So, are you up to turn your iPhone into a field monitor and maximize photo and video experience? Feel free to reach out to us if you have any queries about it!