How to Design Product Label in Photoshop

Every commercial product has a label and obviously, it is something designed by a professional. Ever wondered how a product label is designed? Definitely, heaps of tools exist that professionals can leverage to design product labels.
But the best tool that you can leverage for product label design is Photoshop. Photoshop isn’t just the best, it’s also the easiest way to design product labels. This tutorial will walk you through the simplest method of designing a product label in Photoshop.
We would show you how to design a water bottle label in this step-by-step tutorial. Even if you are new to Photoshop, you can learn and execute it easily without breaking a sweat. Without further ado, let’s get started.
How to Design a Product Label in Photoshop:
The best aspect of Photoshop is it produces an optimum result for product label design, unlike AI-powered tools. But surely, you must know the technique of crafting a product label design in Photoshop. That’s exactly what you will learn in this tutorial.
Set the Name and Dimension of your Document:
First up, open Photoshop and write your document name. Then, set the height and width of your document in inch. After that, set the color mode to CMYK color and finally create your document.

Draw a Rectangle on the Document:
Now, select the Rectangle tool from the toolbar, set the height and width of the rectangle, and draw a rectangle on the document. Move it to the left corner and drag it width-wise on top activating “free transform” by pressing Ctrl + T.

Duplicate the Rectangle:
Duplicate the rectangle and drag it to the bottom of the document. Make sure to position it well with respect to the top one.

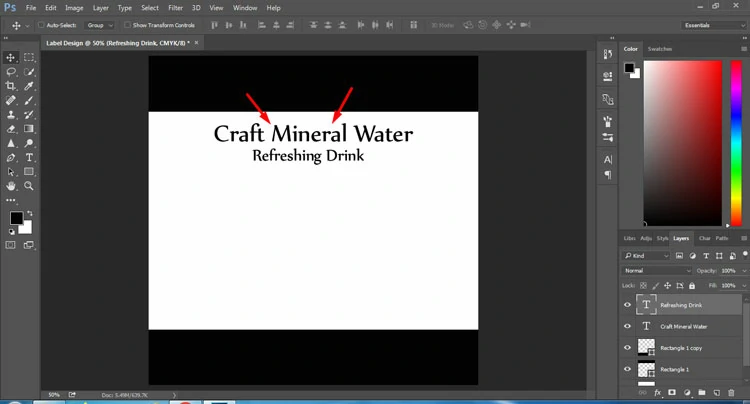
Write down your Heading and Tagline:
It’s time now to type your heading and tagline. Activate the “Text” tool and type the required text. Make sure to choose the perfect font for your text.
Import your Brand Logo into the Document:
Proceed to add your brand logo to the document as part of the product label. Resize the logo inside your document and position appropriately in order that it reflects well. Also, position the above text accurately and choose complementary text colors.
![]()
Add your Brand Name under the Logo:
Ideally, you should now add your brand name under the brand logo. So, type or import it if you have any saved version of your brand name. Make sure to enlarge the brand name to draw the attention of your prospects and clients.
![]()
Add Key Info your Product:
Now, go on to write down the important info about your product and brand on the label. We have just written some random text on the label just to give you an idea. Choose a cool font and make it readable.

Don’t Forget to Add the Ingredients Section:
At this point, list down all the ingredients used to manufacture your product and highlight them precisely with varying colors.

Final Output:
Last but not least, you can add a relevant visual on your product label to make your label visually appealing. In our label, we have added a visual of water splashes we have designed a water bottle label in this tutorial.
Once you are done adding the visual, technically, you are done with the product label design. Obviously, you can make more tweaks with colors, font, size, and other factors to spice up your product label design.

That’s how easily you can design a product label in Photoshop. You don’t have to be a pro; rather, with some basic knowledge of Photoshop, you can nail designing labels for any type of product in Photoshop.