iPhone Photography Tips: How to Take Professional Photos with Your Phone

The new buzzword in the world of photography is iPhoneography. And learning to take good photos with an iPhone is not difficult if you know what you’re doing. There are plenty of iPhone photography tips that can help you to improve your camera skills right away.
But all you really need are a few simple yet effective tips to master the art.
iPhone Photography Tips to Improve Your Photos

iPhone is taking the world by storm due to its convenience and quality of photos. Taking stunning photos with your iPhone doesn’t have to be a difficult process. So, here are the 11 tricks for those who want to get started taking great shots or are looking for an advanced guide to improving their technique.
1. Keep Your Photos Simple

When taking photographs with your iPhone, it is better to keep them simple. New photographers have a tendency to complicate their photos unnecessarily. But too many details may distract the viewers. A busy scene will not help you to create a beautiful composition.
To take great pictures, you just need one single subject. It is easier to create strong composition when you have only one subject. You should also not worry about having too much empty or negative space in your photo. This will make your subject stand out.
There may be distracting objects in the scene. Move or change your viewpoint to remove any unwanted objects in the photo.
2. Shoot From a Long Angle

Usually, people take iPhone photos from chest height as this is one of the most convenient camera shots for taking photos. But there can be more creative ways to take photos. Taking great photographs would involve thinking outside of the box. Shooting from a low angle will bring a new perspective to your photos.
There are some benefits of shooting from a long angle. First, your photo becomes more intriguing and shows the world from a new perspective. Second, there is only the sky in the background of the photos. This removes any kind of distractions or unwanted objects from the scene.
The third and most important benefit is that you can highlight different subjects in the foreground.
3. Add a Sense of Depth

Adding a sense of depth to your photos can make your photos look more appealing. It helps draw the viewer’s eye into the scene. This is especially important in the case of landscape photography.
There are several ways you can add depth to your photos. One of the most effective and powerful ways is to use leading lines in your composition.
Good examples of leading lines can be roads, paths, railway tracks, rivers, and fences. Compose your photos so that the line leads from the foreground into the distance. This draws the viewers in and makes the photos more engaging.
Another way to add depth to your photos is to include something in your foreground. On the other hand, you can include subjects in the foreground, middle ground, and background to make the photos more three-dimensional.
4. Take Details From Close-up Shots

It could be a great mistake to not take close-up shots of your subjects. This is especially important when you are photographing objects with intricate details. Shooting from far away will not allow you to capture the amazing details of your subject.
Close-up patterns, textures, and colors will bring life to your photos. Flowers, leaves, and water droplets look more vibrant when captured from a close distance.
Close-up shots are also a good technique in Portrait Photography. This will allow you to capture the emotions and facial features of your subjects. So there will be a greater impact on your photos.
Remember that your iPhone will not be able to focus if the lens is too close to the subjects. You can use an add-on macro lens for capturing extreme close-ups with tiny details.
5. Take Silhouttes Photos

Another great iPhone photography tip is to shoot silhouettes. Silhouettes are defined as the dark shape of an object against a bright background.
Silhouettes create stunning pictures which catch the attention of the viewers. And, it is actually very easy to achieve. To capture silhouettes, you just need an interesting subject and shoot toward the light. You just need to make sure that silhouettes appear dark. You can darken the exposure from the camera app by setting down the iPhone focus.
The best time to capture silhouettes is the golden hours of sunrise and sunset. With the sun being low in the sky, it is easy to put the light in the background behind the subjects. You can also take silhouettes whenever there is a light source behind the subject.
6. Capture Shadows on Your Photos

Adding shadows in your photos is another way to improve your iPhone photography. This will add a sense of mystery and intrigue to your images.
Shadows are often more interesting than the subjects themselves. They create fantastic visual effects in the foreground of the scene. Shadows can also create leading lines, such as shadows of trees in the forest.
The shadows become the longest when the sun is low in the sky. So capture during the golden hours of sunrise and sunset to get the longest shadows in your photos.
To make the shadows dark enough, you can adjust the exposure settings on your iPhone. You can also darken the shadows in post-processing apps.
7. Shoot Reflections

Reflections can be a wonderful subject for iPhone photography. Reflections appear on different surfaces like glass, metal, and ice. But water is the best surface for reflection photography.
Ripples and waves on the water’s surface add an extra dimension to your reflection photos. They create a distortion effect in the reflections which is visually appealing. If there are no waves, you can create them by moving your hand through the water.
In most cases, it is better to include both the subject and the reflection in your composition. Symmetrical compositions always have a very strong visual impact.
8. Use Symmetry

Using symmetry is a great way to create a striking image. Try to capture symmetrical scenes whenever you can. Then capture a shot that is identical or almost identical on both sides. Capturing reflections is an easy way to include symmetry in your photos. Place the line of symmetry across the center of your image.
But reflections are only one way to create symmetrical compositions. Architecture and other man-made objects are designed to be symmetrical.
Composition guidelines such as the rule of thirds do not allow the placement of subjects in the center. But sometimes it is okay to break the usual rules.
9. Use Diagonal Lines

If you are lacking in finding ideas for your photography, you should develop an eye for better composition. One of the best tips to create harmony in your iPhone photography is to add diagonal elements.
If you have two or three main subjects you can align them diagonally. This is an easy way to create balance in the composition and it encourages the viewers to gaze through the scene.
For moving objects, it is possible to change their position and place them diagonally. In other situations, you may not have any control over the position of your subjects.
For example, in landscape photography, the objects are usually static and too big to move. In such environments, you will need to move around the scene and find a perspective where subjects fall in the diagonal lines.
10. Use Portrait Mode for Portraits

In iPhone photography, “portrait” can mean two things. One meaning is the frame’s orientation. Another meaning can be the camera app’s settings. Selecting portrait mode makes your portraits more striking. You can find this setting just next to photo mode, above the shutter button.
These settings make the background blur so that photo’s subject pops out.
Suggested Article– Framing in Photography: A Complete Guide
11. Take HDR Photos

HDR ( High Dynamic Range) photos combine multiple shots taken simultaneously to produce a composite. You should use HDR when your photos have very bright areas and very dark areas at the same time.
The HDR photo will bring in a level of detail that was not possible otherwise. You can set the HDR on, off, or automatically by tapping the icon at the top of your screen in the iPhone camera app settings.
How to Take Professional Photos with iPhone

Improve your iPhone photography by enabling the Grid and Level tools in settings for better composition using the Rule of Thirds. Tap your subject to lock focus, adjust the sun icon for exposure control, and use natural light instead of digital zoom.
If you’re not doing these things, you’re leaving serious photo quality on the table.
Most people think they need a better camera.
The truth?
They just don’t know how to use the one in their pocket.
Your iPhone camera is far more powerful than most people realize. But great photos don’t come from megapixels. They come from settings, light, and technique.
In this guide, you’ll learn:
- The essential iPhone camera settings you should turn on right now
- Simple composition and lighting tricks professionals actually use
- Practical shooting techniques that instantly upgrade your photos
No extra apps. No expensive accessories. Just smarter camera use.
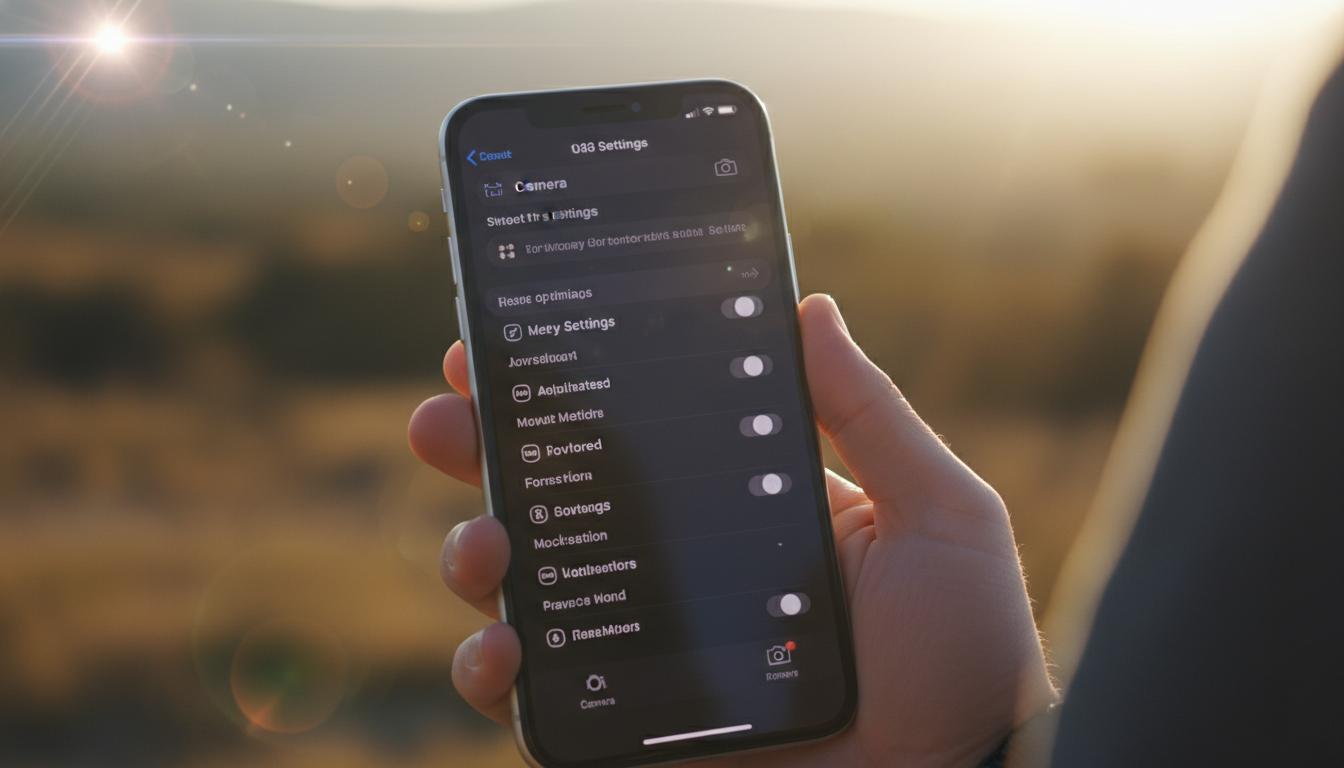
Essential iPhone Camera Settings You Should Enable
Let’s start with settings — because this is where most people get it wrong.
-
Turn On Grid & Level
Go to Settings > Camera and enable both Grid and Level.
The 3×3 grid helps you apply the Rule of Thirds by positioning your subject slightly off-center. This makes your photos look more balanced and natural.
The level tool shows a crosshair when your phone is perfectly straight. This alone can fix crooked horizons and tilted product shots — one of the most common beginner mistakes.
-
Use ProRAW & Resolution Control (Pro Models Only)
If you’re using a Pro iPhone, turn on ProRAW and set the format to JPEG XL.
This gives you:
- More detail
- Better dynamic range
- Greater editing flexibility
If you care about image quality and post-processing control, this is essential.
-
Enable Mirror Front Camera as iPhone Photography Tips
Turn on Mirror Front Camera so your selfies appear the same way you see yourself on screen.
No more flipped text. No more awkward face alignment.
-
Turn On Preserve Settings
Enable Preserve Settings to keep your preferred camera mode active (such as Portrait mode).
Otherwise, your camera resets to default Photo mode every time you reopen it.
Small adjustment. Huge time saver.
Lighting & Composition Tips That Instantly Improve Photos
Lighting matters more than the camera itself.
Master this, and your photos improve immediately.
Control Exposure Manually
Before taking a photo, always tap your subject.
Then drag the sun icon up or down to adjust brightness.
Never let the camera fully decide exposure — especially in backlit or high-contrast scenes.
Lock Focus and Exposure (AE/AF Lock)
For consistent lighting, long-press your subject until AE/AF Lock appears.
This is especially important for:
- Portraits
- Product photography
- Video clips
- Moving subjects in changing light
It prevents your phone from constantly readjusting brightness and focus.
Use Natural Light First
Natural light is still the best light.
Shoot:
- Near windows
- Outdoors
- In open shade
Avoid harsh overhead indoor lighting whenever possible. It creates unflattering shadows and uneven skin tones.
Use Golden Hour
The hour after sunrise and the hour before sunset provide:
- Soft shadows
- Warm tones
- Natural contrast
If you only shoot during golden hour, your images will instantly look more cinematic.
Use Leading Lines
Use roads, fences, railings, tables, or architecture to guide the viewer’s eye toward your subject.
This creates depth and direction without any editing.
Change Your Angle
Don’t shoot everything at eye level.
Try:
- Shooting low to the ground
- Shooting overhead
- Moving around your subject
Different angles tell different visual stories.
Camera Techniques That Actually Make a Difference
Now let’s talk technique — the part most people ignore.
Avoid Digital Zoom
Never pinch to zoom.
Digital zoom reduces image quality.
Instead:
- Move physically closer
- Use built-in lens buttons (0.5x, 1x, 2x, 3x)
Those use actual lenses — not digital cropping.
Use Portrait Mode for Depth
Portrait Mode separates your subject from the background.
After shooting, adjust the f-stop slider to control background blur.
Pro tip: Less blur often looks more natural and professional.
Use Burst Mode for Action
Hold the shutter and slide to activate Burst Mode.
This captures multiple frames quickly, allowing you to choose the sharpest moment later.
Perfect for:
- Kids
- Pets
- Sports
- Street photography
Use Macro Mode for Details
On newer Pro models, Macro Mode activates automatically when you get close.
Use it for:
- Textures
- Food
- Flowers
- Product details
Keep your hands steady for best results.
Improve Stability
Hold your phone with two hands.
Keep elbows tucked close to your body.
In low light, stability alone can mean the difference between sharp and blurry images.
Extra Pro Tips Most People Miss
These small habits make a big difference:
- Clean your lens before shooting. Always.
- Use Live Photo to capture multiple frames and pick the best one.
- Turn off flash unless absolutely necessary.
- Slightly underexpose — it’s easier to brighten than recover blown highlights.
- Take multiple shots. Professionals never rely on just one.
Edit the Right Way (Don’t Overdo It)
Editing finishes the photo — but restraint matters.
Edit, Don’t Just Apply Filters
Avoid one-tap filters.
Instead manually adjust:
- Brightness
- Contrast
- Highlights
- Shadows
- Warmth
Subtle edits look professional. Heavy filters look amateur.
Crop for Better Composition
Use cropping to:
- Straighten horizons
- Improve framing
- Reinforce the Rule of Thirds
Editing is where good photos become great.
Wrapping Up
Taking mind-blowing photos that are visually appealing to the viewers is both challenging and interesting at the same time. You can use your iPhone to take professional photos that are capable of engaging the viewers. Follow our easy and quick iPhone photography tips to take amazing photos on a day-to-day basis.
FAQs
What are some tips for improving the composition of iPhone photos?
To improve the composition of your iPhone photos, try using the rule of thirds, experimenting with angles, paying attention to leading lines and patterns, and using negative space to create balance.
How can I get creative with iPhone photography?
Try using different camera modes, experimenting with editing apps and filters, using props and accessories, and playing with perspective and framing.
How can I take better portraits with my iPhone?
To take better portraits with your iPhone, use portrait mode to create a blurred background effect, adjust the lighting to highlight your subject, use the rule of thirds to frame your shot, experiment with angles and poses, and use editing apps to enhance the skin tone and details of your subject.
What is the best file format to use for iPhone photography?
The best file format to use for iPhone photography is the HEIF format, which captures images at a higher quality and smaller file size than the JPEG format.
How does the iPhone’s camera sensor size affect image quality?
A larger camera sensor on the iPhone can capture more light, resulting in sharper and clearer images with better color accuracy and low-light performance.
What is the advantage of using the RAW format for iPhone photography?
The advantage of using the RAW format for iPhone photography is that it captures more data, allowing for greater flexibility in editing and post-processing.
What is optical image stabilization (OIS) and how does it improve iPhone photography?
Optical image stabilization (OIS) is a technology used in the iPhone camera that stabilizes the lens and reduces blur caused by shaky hands or movements, resulting in smoother and sharper photos and videos.
How does the iPhone’s computational photography technology work?
The iPhone’s computational photography technology uses advanced algorithms and software to enhance image quality and optimize settings, such as exposure, color balance, and sharpness. It also enables features such as portrait mode, night mode, and deep fusion, which use AI to create stunning photos with greater depth and detail.


