Rotoscoping vs. Green Screen: Which Video Editing Technique is More Effective?

Video editing is always fun and exciting. Two of the many exciting video editing techniques that have come into vogue lately are rotoscoping and green screen. Both these techniques differ in terms of functionalities. Depending on your needs and aim, you can make use of these video editing methods.
But when it comes to effectiveness, obviously one method is more effective than the other. Wondering which one of the rotoscoping and green screen methods outperforms in terms of effectiveness? Well, that’s exactly what we will be dilating on this write-up.
An Overview of Rotoscoping
Oftentimes, we see human-like animated characters in movies, don’t we? Some of these characters we can easily identify. This is because these characters are nothing but animated versions of your known characters. They can be movie actors, actresses, models, etc.
Ever wondered how an actor or actress in live-action footage shows up as an animated character? Yeah, you are almost there! It’s through rotoscoping.
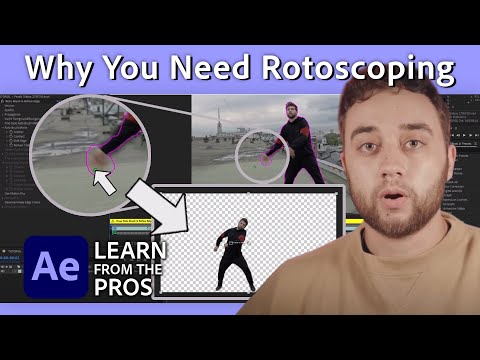
So, what rotoscoping is? It’s a cool video editing technique that video editors apply to trace over live-action footage frame by frame. For a VFX artist, rotoscoping refers to isolating foreground elements from the background in a video.
Animators trace over the keyframes of a video with rotoscoping software. And then with the software, they reproduce the natural motion of the subject. Once traced over the keyframes of a video, they are extracted and placed on a moving background track sequentially to bring out the finished animation.
The best part of rotoscoping method is that it helps inject more life into animated objects, characters, and actions as they were designed from live-action videos.
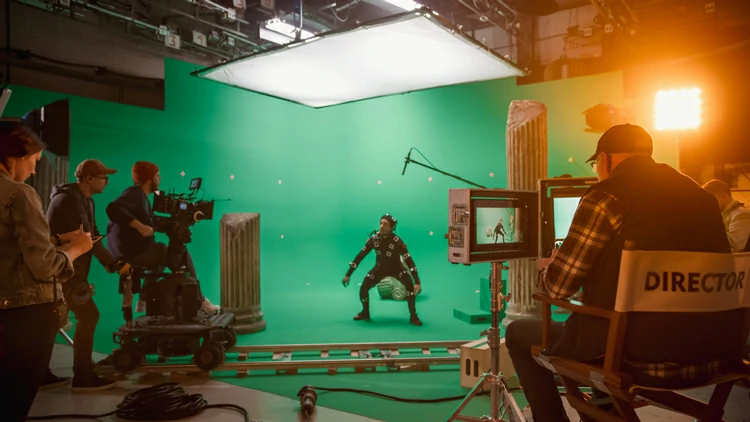
An Overview of Green Screen
Green screen like rotoscoping is also something related to the background of a video but the method is completely different in comparison with rotoscoping. To put it simply, green screen is basically a green-colored background screen placed behind a shot in filming which is later replaced with another fitting background.

Usually, the green screen method is leveraged in movies like sci-fi to showcase different types of actions and explosions. But it can also be deployed in genres like video games, music video production, and newscasts especially in weather map for weather forecast.
Out of so many colors, the green color was picked for the background screen because it’s the least used color by personalities or models in shots. Because it clashes with the colors in front, it’s easier for the VFX artists to paint out the background and replace it with their preferred image or video.
This creates an illusion that the shot was taken in a different setting. Taking advantage of the green screen, you can control a number of factors like weather, lighting, sound, etc. If you shoot a video on-location, these factors can negatively sway away your shots.
An Example of Rotoscoping:
The best examples of rotoscoping can be from Disney as it adopted the technology in the early 90’s to create animation from live action footage. Films like Cinderella, Snow White, and Alice in Wonderland are prime examples of rotoscoping.
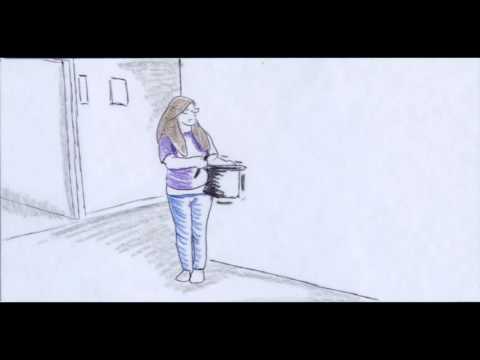
Another example can be Star Wars where actors held a matte propped up on a stick. Late visual effect artists traced over the matte to create a glowing lightsaber effect. Fantasia, I lost my body, and Waking Life movies are worth mentioning too when it comes to rotoscoping.
An Example of Green Screen:
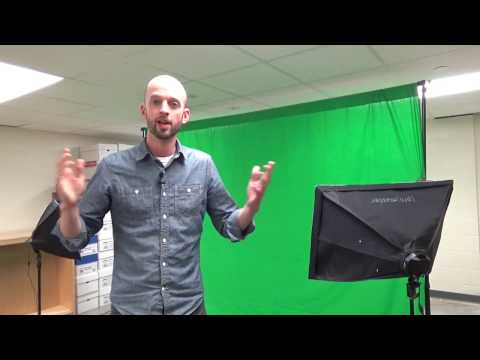
For a better understanding of the gravity of green screen, let’s take a look at an example of green screen. Let’s say, you want to film at your workplace. Once you start shooting, you comprehend that there is plenty of background noise due to the ambient sound and movement.
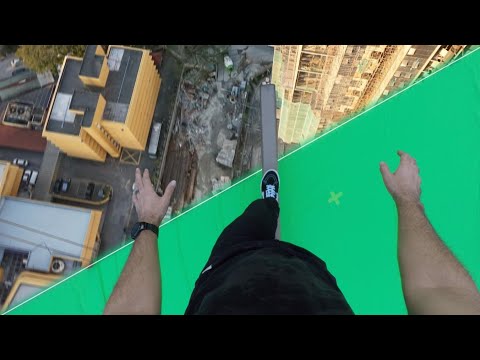
This is where the green screen comes to the rescue. What you can do is just take a snap of your office. Shoot your video elsewhere, maybe at your home putting a green screen behind it. Once you are done with the shoot, swap the green screen with your office image.
And it will appear that your video was filmed at your office. Isn’t it a big advantage? Indeed, it is! That’s how green screen can create a magical effect in your video shots.
Why Rotoscoping for Animation:
Rotoscoping creates lifelike characters that can move exactly like real-world beings. The technology definitely has breathtaking features, so the film industry is using it. Let’s take a quick look at some of the noteworthy benefits of rotoscoping-
- Create spellbinding visual effects in animation
- Bring out realistic motion in animated movies
- Develop a matte or mask for a particular video element
- Extract a particular video item and use it in another backdrop
Why Green Screen for Filming:
Video shooting in front of a green screen lets you appear anywhere you want. You can even create the illusion that your scene is taking place in multiple locations, without ever leaving the comfort of your home.
- Create a magical effect as if two actors are sharing the screen when in reality their action was filmed distinctly. And later merged using the chroma key.
- Get the option to enlarge or shrink a character relative to their background.
- Move characters easily to animated or computer-generated backgrounds.
- Enable to show actors fly in superhero films.
- Transporting characters back through time, or into hard-to-film environments like outer space.
- Place actors into seemingly dicey situations like in the thin rod of a skyscraper or a pit of snakes.
How to Rotoscope:
Rotoscoping was previously done manually onto a glass panel. The rotoscoping expert used to draw over each frame by hand which was time-consuming. But nowadays, with the advances in technology, professionals use animation or VFX software to carry out the job.
Let’s take a look at the method-
Shoot & Analyze the Reference Footage
In order to excel at rotoscoping, you need to prepare the following things upfront;
- Come up with a concept of what you’d like to rotoscope, for example, a character or prop
- Develop the reference scenes to kick off the procedure
On top of that, follow these best practices:
- In the absence of a film camera, a digital camera can work. Leverage it to shoot a scene or multiple clips for the actions you want to animate.
- While capturing, use a simple background. Minimize the number of objects to simplify the tracing process.
- Next, the captured video must incorporate the item or character you want to animate.
- And lastly, set the footage length based on how long you want the animation to be.
Pick preferred software
When you choose VFX software, the best is to go with a tool that you’re acquainted with. Some examples of roto software are Silhouette FX, Adobe After Effects, Mocha, Nuke, Blender, etc.
Trace the Clip
Once you’ve picked your favorite software, move forward to break down the clip and trace the motions you’d like to animate. During this stage, you should do the following:
- Create the timeline of the film
- Set the timeline frame rate
- Insert video footage into the software
- And sketch the frames
Once you are done with this hectic process, you are now free to proceed to add the after effects.
How to Set up Green Screen for Video Shooting:
Setting up green screen is hassle-free. Just by following a handful of steps, you can easily make your all-important green screen ready for shots. Let’s have a quick look at the process of setting up green screen for your video shoot-
Decipher the Scale of your Scene:
Scaling the dimension of your scene and the best lenses for filming your actors are primary factors to set up a green screen. If you’re planning to create a wide-angle scene, it’s a prerequisite to film your subjects at the correct scale.
This process primarily counts on knowing the lens’s field of view to shoot the background element, which is often known as a background plate.
Prep Actors and Objects:
You’ll have to groom actors and props for use on the green screen. No doubt, you must avoid green in actors and props. Actors shouldn’t put on green or they’ll end up showing up transparent in the key.
Besides, you should also avoid glossy objects, as these can reflect the green color from the screen and cause transparent spots. If required to use reflective objects, you’ll likely have to manually mask around those objects in post-production. This obviously is time-consuming, so plan ahead if that’s a need.
Light the Green Screen:
When lighting your green screen background, the aim is to get the lighting as even as possible. This helps to make sure that the green coloring is even, with no hot spots or shadows, which will assist with the chroma key process in post-production.
You will need to light your actors and the green screen separately too, preferably with the actors and the green screen backdrop at least 6 feet apart. Don’t forget to match the lighting on your actor to the scene in which they will show up once the green screen is swapped.
In order to diffuse your lights, you can use on-light diffusion boxes or set up large silk frames. If you’re on a tight budget, try leveraging a white bed sheet mounted on a C-stand a few feet in front of your light.
Besides, the placement of your lights also matters. If you’re only using two lights to brighten your background, place one light on each side of the green screen, a few feet back at a 45-degree angle. You can adjust the angle of each light to ensure they’re not overlapping excessively in the center.
Make sure you’re using the same lights on each side of the green screen for consistency. You may need to use overhead lighting, additional lights, or more diffusion on bigger productions. but the basic principles outlined here will be the same.
Clean Chroma Key is Crucial:
Chroma key implies the tactic of compositing two images (or video clips) together based on color hues and color range. And in our case, we’re deploying a green screen to swap what’s behind our actors. You’ll frequently hear the term “clean chroma key” when editors are referring to green screen composting. A clean chroma key composite is the final goal.
Pros and Cons of Rotoscoping:
The Pros
- Get animations with life-like movements.
- The timing is accurate.
- With digital software, it’s getting easier to rotoscope.
The Cons
- Shooting the reference footage first is a must and then animating it
- The actions are likely to be restricted to whatever is on the footage
- Roto is time-consuming and needs attention to detail
Pros and Cons of Green Screen:
The Pros:
- Allows for thrilling and otherwise-impossible scenes to be produced, expanding film making opportunities and language.
- Protect actors by keeping them in the studio and aloof from the perilous environments depicted using green screen technology.
- Also, it lets actors show up on screen together even if they film the scene separately.
- Cost-effective option to cash in.
- Shoot the video in the comfort of your home instead of a specific location
- Reduce video production time, thereby saving precious time.
The Cons:
- If the lighting is not accurately balanced, the technique appears artificial and off-putting to audiences.
- Despite being low-cost than the real-world alternatives, the process is nonetheless pricey, time-consuming, and troublesome. And thus not ideally suited for a low-budget or independent film.
- If the foreground footage contains a tiny bit of the background color, it will be swapped during the keying process.
Over to you…
Rotoscoping and green screen both are smashing and effective video editing techniques. As both serve different purposes, we wouldn’t recommend a single one. Depending on your needs, you have to adopt one of the two.
The best part of both these video editing processes is that both have huge demand in film making. One technique is used for animation and visual effects while the other one is primarily meant for injecting desired backdrops on your video shoot.