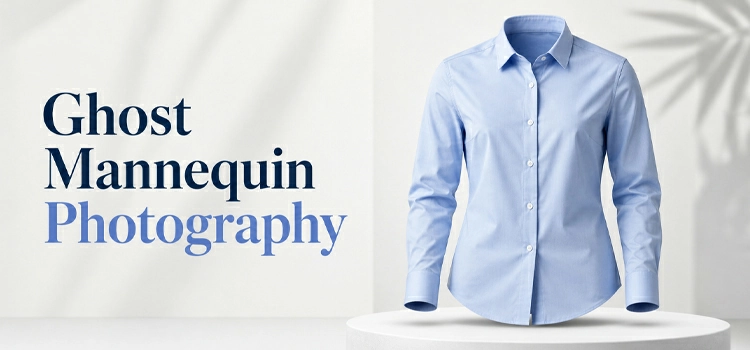
Product Photography Lighting: Everything You Need to Know

Many times, product photography ends up substandard just because of improper lighting exposure. If you are a photographer, it must have happened to you scores of times. No matter whether you are an amateur or a pro, you can’t afford to compromise on your product photography lighting.
In order to make use of different types of lighting in different conditions, it’s salient that you first know and understand the types first. That’s exactly what we will be dilating on this write-up. We will also dive deeper into each of the lighting types so you understand their use cases in product photography.
An Overview of Product Photography
Product photography isn’t just about getting striking shots and making an image stand out. Many photographers may think like this but the goal of product photography is to achieve the objectives of taking the shots.
For example, if you want to shoot a fashion item such as a shoe, sunglass, or clothing, you should take lifestyle shots with a larger frame and clarity so that the audience can see the perspective your product images require.
A product photographer undertakes a number of tasks, including setup, lighting, and photography techniques. They carry out each of their tasks by taking care of minute details to maximize customer satisfaction. And of course, lighting setup is one of those major responsibilities.
Why Leverage Product Photography Lights?
A rising number of people prefer to share their items and products on social media frequently, so product photography has become trendy these days. Lighting is a crucial factor to constitute suitable darkness, brightness, mood, tone, and atmosphere. Hence, lighting is an utmost necessity for shooting product photography.
If you are a product photographer, continuous light, like LED or RGB, may be befitting for your work, as long as you work in both indoor and outdoor scenes. In this way, you can also decipher how to highlight your subjects.
10 Types of Product Photography Lighting
Lighting can make or break your product photography. Imagine, you have a top-grade camera with a perfect studio setup. But if the lighting doesn’t complement your location, your photography won’t bring out a prospective outcome.
Now, we will introduce you to the 10 types of lighting that you can deploy while shooting different types of products. Let’s cut to the chase straightaway-
1. Direct Skylight

Skylight is a cool form of sunlight. That means instead of the warm rays of the direct sun, your subject will be illuminated by the cool bright expanse of the sky itself. With a direct skylight, the color temperature is cooler, and any shadows showing up tend to look less defined.
2. Direct Sunlight

Direct sunlight is visible in the daytime in the sky, especially during the summer. Under this light, The warmer rays of the sun will brighten your subject. The bulk of photographs ever captured is likely to have the sun as the major, if not the sole, light source.
Sunlight is luminous, but direct sunlight in front of our subject isn’t always the best choice for a pleasing image, no matter whether it’s a quickly snapped furniture item or documentation of your home or car. So, you must be watchful before you expose your product photography to direct sunlight.
3. Indirect Light

Indirect light can stem from the sun or an artificial source, but it bounces at least once on a particular surface. However, indirect light often bounces from multiple surfaces and forms even less defined shadows than skylight.
Indirect light, sometimes, ends up forming no shadow. The best example of indirect light will be an overcast day.
4. Side Light

Side light is known for enhancing texture and detail, or it can conceal it. It counts on what angle you are using. The source can be direct and straightforward, although it may be diffused. This light is perfect for shooting products that contain minute details within themselves.
5. Backlight

Backlight comes into play when you place the subject between the main light source and your camera position. By putting backlight on the back of your subject, you can create a silhouette with the dark subject outlined against the background.
You can also bring out a halo of bright luminescence around your subject, animate or inanimate, by exposing detail in the subject itself.
6. Artificial lighting
Artificial lights are available in various types for product photography lighting. You can leverage it when the sun is not shining or maybe shining moderately. In that case, artificial light will help fill in the lacking sunlight.
Artificial light can be a continuous light like LED lights or a high-intensity photo flood. Street lights and house lamps are also considered usable artificial light sources.
7. Flash and Strobes

Apart from the above artificial lights, flash/speedlights and strobes lights can also be leveraged as artificial light sources. They provide a short but intense burst of brightness. Strobes are conducive and mainstays for many studios that do not allow for continuous light.
For studio product photography, it’s highly difficult to beat these cool running light sources for control and repeatability.
8. Diffusers and light modifiers

Diffusers function to spread other light sources in different directions. You can deploy a reflector when direct sunlight, side light, or backlight is your main source. Also, you can mount diffusers on your artificial lights, whether studio strobes or an LED light bar, to soften the light quality.
Furthermore, you can bounce lights off of umbrellas or illuminate them through a softbox. Even, you can use light modifiers to modify your lights with color filters on the light itself
9. Moonlight
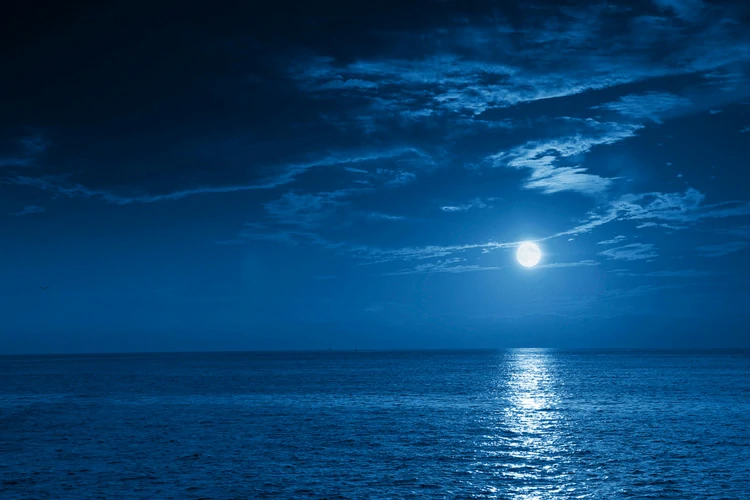
Moonlight can be leveraged In creative and innovative types of product photography. You can open up moonlight to any light that may not appear to be a standard for photography at first. Lasers, flashlights, and even firelight can be complemented with moonlight.
When it comes to using moonlight alone, a rural landscape can have an almost ethereal appearance when captured amidst moonlight. A cityscape can turn out to be full of wonder with this light as a source.
10. Mixed Lighting
Mixed lighting brings out full of possibilities. You can mix LED artificial lights with diffused indirect window light to create a splendid effect. Besides, you can use your on-camera flash under direct sunlight, either to be a fill or for a special effect.
On top of that, you can shoot in sunlight and tap in a reflector to modify it, essentially making the sun two light sources. You can mix and blend side light with backlight or direct frontal light to shoot your subject in 3 dimensions.
Along with that, you can leverage artificial light, either strobe or continuous, with various light modifiers. You can filter an LED light with color and add it to a multi-light setup to spice up your product photography subject.
What is the Best Lighting for Product Photography?
So, we discussed different types of lighting at length. A question must be crossing your mind at the moment which type of lighting is the best for product photography? Well, it doesn’t have a straightforward answer.
Depending on your product type, location, and photography gadgets, lighting will vary. But let’s take a look at how to avail of the 2 broad lights for product photography- Natural lights and Studio lights.
Natural Lights for Product Photography
When you leverage natural lights, there are certain factors that you must focus on emphatically to bring out optimum results. What are those? Let’s check them out-
Decide your Optimal Shooting Time
In order to find the time of day when your light radiates the best, set up a simple scene and take a photo every hour during the times you're available to shoot.
Compare the photos and pick the time when your whites look the whitest, in other words, when the white areas aren't skewing blue or yellow, and you enjoy the appearance of the shadows.
Make Sure to Diffuse the Light
To scatter sunlight and reduce shadows, you can use a diffuser to diffuse the sunlight. A number of ways are there to diffuse sunlight, but a simple white sheet over the light source may be all that you need.
You can also suspend translucent white curtains or deploy the shear "scrim" that comes in a 5-in-1 reflector set.
Be Sure to Add a reflector
To decrease shadows further and illuminate your photo, use a reflector. A reflector is a transparent tool that you place opposite to your light source to redirect light onto your given subject. You can use a mirror, metal, white sheet, white cardboard, or kitchen aluminum foil as a reflector.
Leverage a Mobile Studio
Natural light is definitely NATURAL, so your photography light will bank on the time of day, season, and weather. Your photoshoots will become much easier if you have a mobile photo studio.
The best part of it is that you can use your preferred backdrop and roll the studio anywhere you need to to find the best light in your space. This is basically your replica studio and you have the option to adjust its height for taking both eye-level and flat-lay photography.
Some Key Product Photography Tips While Using Natural Lighting
- Abstain from direct sunlight, unless you wish for dramatic shadows. It is likely to cast hard shadows and the lit side of your subject will be overexposed. For soft shadows, pick a time of day when the sun is overhead rather than shining directly through the window.
- Make use of overcast or cloudy days. These conditions produce more diffused lighting.
- If you’re in direct sunlight, don’t forget to leverage a thin white sheet over the window. The sheet will work as a diffuser, softening the light.
- Take advantage of a reflector. Sunlight hitting your subject on one side is going to bring out shadows on the opposite side. Deploy a reflector on the opposite side to even out the light for a more fully lit product.
- Be innovative with the angle of your reflector. Shadows can be crafted to fit your style. A reflector can be any reflective or shiny surface as mentioned above.
Studio/Artificial Lights for Product Photography
Basically, there are two main types of artificial lights leveraged in photography- Continuous Lights and External Flashes.
Which one you should utilize actually depends on various factors. Your experience as a photographer, your budget, and the genre of photography will decide which artificial light you should go for.
Continuous Lights:
Continuous lights, as the name reflects, it continues. Sometimes, it’s known as “hot” lights, which are either on or off. Once it’s turned on, it stays on, unlike the flash on your camera or phone.
The greatest perk with continuous light is that you can view how the shadows are falling on your scene while you adjust it. That means you won’t need to bother to take multiple reference shots before the perfect setup is dialed in.
On top of that, you can deploy continuous light for either photos or video. You can find fluorescent, incandescent tungsten, and LED bulbs in the market. The best LED lights for product photography are pricey but have features that make them worth the extra expense.
For example, LED lights don’t generate as much heat as incandescent bulbs. And the good ones will be dimmer. This lets you adjust the light intensity without having to move it farther away.
External Flashes:
The core difference between the external flashes and continuous lights is that the former is wirelessly connected to your DSLR and the latter is plugged in to operate. When you click the shutter, external flash will work.
The "external" part implies that they are positioned off-camera and not connected to your camera. External flashes are more common in 3 or 4-point lighting for product photography.
The main perk of a flash is power as a high-voltage capacitor releases a large charge in a short burst. With this power, you won’t have to enhance the shutter speed or ISO or widen your aperture to notch up the brightness you want.
You may also read: Top Product Photographers to Follow for Inspiration
Final Words
Lighting matters a lot in product photography. Especially, if you are doing professional product photography for any ecommerce company, you have to be picture-perfect. You have to focus on the nitty-gritty of the products you are shooting.
Maybe, you have set up your studio to shoot a t-shirt and it got light exposure everywhere except a tiny area. In that case, you can use light sources like a side light, backlight, or just even a reflector to properly expose your t-shirt.
This is how not only you can shoot product photography masterpieces but also nail them. So, hurry up and make your product photography stand out with the proper utilization of lighting.