How to Edit GIF in Photoshop? [The Easiest Way]

You have already learned how to make Gif in Photoshop. Yeah, that’s why you are in this tutorial to learn about how to edit Gif in Photoshop. And definitely, there are a number of reasons to edit your existing Gif.
After making a Gif, you might realize that you made a blunder or a slip-up in the Gif. Does it mean you should write off the Gif? Of course, not! You can edit the Gif effortlessly in Photoshop to fix the error of your Gif.
Not just your self-made Gif, you can even edit downloaded Gifs from different websites to jazz up their appearances and effects. Some of the Gif edits include adding text, elements, and effects, modifying colors, altering hue & saturation, adjusting exposure, merging 2 Gifs, and so forth.
How to Edit GIF in Photoshop?
Photoshop makes it easy to edit Gif in Photoshop in addition to making animated Gifs. Regardless of your Photoshop skills and level, you can take interest to edit Gif in Photoshop.
Let’s get cracking…
1. Open Your GIF in Photoshop
Right at the onset, open the Gif in Photoshop that you want to edit. Instantly after that, all the frames of your Gif will show up as layers in the Layers panel.

2. Activate the GIF Timeline
Now, move and click the “Window” tab in the menu bar. Navigate to “Timeline” towards the bottom of the menu and click it to activate the Gif timeline.

3. Select the Text Tool from the Toolbar
At this point, you can start editing your existing Gif. You can edit the Gif in different ways as mentioned above.
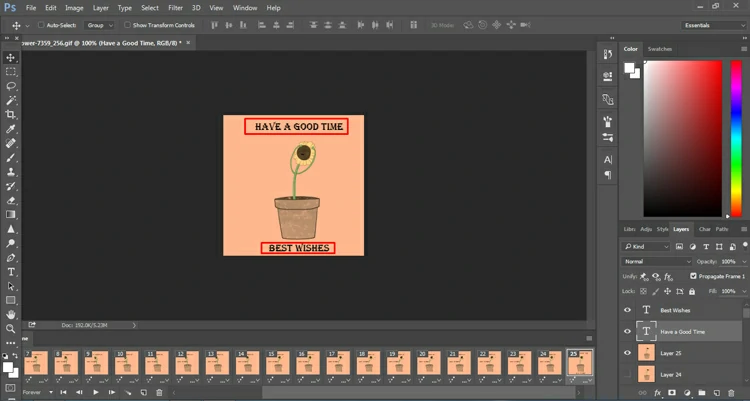
In this tutorial, we will add text to the Gif. For that, navigate to the toolbar and select the Text tool from the specified area. You can also press the key “T” to select the Text tool. Also, make sure the top layer is selected.

4. Add Suitable Text to the Layer
Now, depending on the elements and the nature of the Gif, add appropriate text to the GIF. We have added 2 layers of text in this Gif, on top and bottom.

5. Stylize Your Text
Once you are done adding text to your Gif, it’s time to spice up the text a bit. Alter the text font, color, size, etc. to create a cool look of your Gif.
6. Export the Gif
Once you are happy with the edit of your Gif, move ahead to export your Gif. Go to the “File” tab and navigate to “Export”. Then, select “Save for Web (Legacy)” from the menu to proceed.

7. Save the GIF
Right after that, a window will show up with a myriad of options. You don’t have to bother too much about all these options. Just select “GIF” from the drop-down towards the top and move down to hit the “Save” button.

Final Output
Soon after that, another window will appear asking you to name/rename your Gif file and save it after that. Just do that and save your file. Finally, you can open the Gif file both through your browser and a Gif file opener if you have it installed on your PC.

It’s a Wrap
That’s it for this short tutorial on the process of editing an existing Gif in Photoshop. Hope you enjoyed the tutorial immensely as it was just walk in the park.
Until we see you next time, don’t forget to head over to our blog for exciting Photoshop tutorials we crafted for you.


