How to Remove Wrinkles From Clothes in Photoshop

Welcome to our guide on removing wrinkles from clothes in Photoshop! Whether you’re editing photos for a professional shoot, an online store, or just for your collection, presenting clothes without wrinkles can make a big difference.
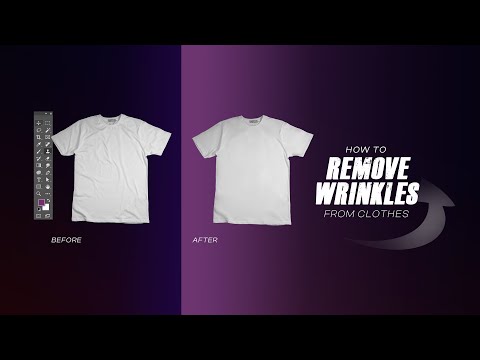
Often, despite our best efforts, clothes end up looking creased in photos. But don’t worry, Photoshop comes to the rescue!
In this tutorial, we’ll walk you through each step of the process. So, grab a photo with some wrinkly clothes, and let’s get started on making those wrinkles disappear!
Objectives
In this tutorial, our main objectives are to:
- Guide you through a detailed, step-by-step process to remove wrinkles from clothes using Photoshop. We aim to make each step clear and easy to understand, so even beginners can follow along and achieve professional-looking results.
- Introduce you to the specific tools and features within Photoshop that are most effective for editing out wrinkles. These tools include the Healing Brush, Patch Tool, Clone Stamp, Gaussian Blur, and Liquify Tool.
- Encourage you to practice and develop your photo editing skills. By the end of this tutorial, you should feel more comfortable using Photoshop to not only remove wrinkles but also to enhance the overall appearance of your photographs.
- Provide tips and tricks to help you achieve more natural and appealing results. The clothes in your photos must look realistic and not overly edited. We’ll share strategies to maintain the texture and fabric of the clothing while removing wrinkles.
- Inspire confidence in your ability to tackle common photo editing challenges. Removing wrinkles from clothes is just one example of how you can improve your photos.
How to Remove Wrinkles From Clothes in Photoshop
Let’s dive into the steps for removing wrinkles from clothes in Photoshop, making it easy for you to follow and apply these techniques to your images.
Step 1: Open the Image

First things first, let’s get your photo into Photoshop. Open Photoshop, then go to File > Open and select the image you want to edit. It’s a good idea to duplicate the original layer right away. You can do this by right-clicking on the layer in the Layers panel and choosing Duplicate Layer.
Step 2: Select the Wrinkled Area

Now, let’s focus on the wrinkles. Zoom in on the area with the wrinkles so you can see them. You can use various selection tools for this step, but the Lasso Tool is a great start for its simplicity and flexibility. Just draw around the wrinkled area.
Step 3: Use Healing Brush Tool

With the wrinkled area selected, it’s time to start smoothing those wrinkles. Here’s how to use it:
- Select the Healing Brush Tool from the toolbar.
- Hold the Alt key (or Option on a Mac) and click a nearby area of fabric that’s smooth to set it as the source point.
- Then, gently brush over the wrinkles. The tool will work its magic, blending the wrinkles with the texture and color of the chosen source point.
Step 4: Apply Patch Tool

For more prominent wrinkles, the Patch Tool offers a powerful solution. Here’s how to use it:
- Select the Patch Tool from the toolbar.
- Ensure the Source option is selected in the top menu.
- Draw around the wrinkled area to select it.
- Click and drag the selection to a part of the garment that is smooth and wrinkle-free. The Patch Tool will then replace the wrinkled area with the texture from the selected smooth area.
Step 5: Utilize Clone Stamp Tool

The Clone Stamp Tool can help you refine these spots. Here’s how to use it:
- Select the Clone Stamp Tool from the toolbar.
- Hold Alt (or Option on a Mac) and click on an area of fabric that matches what you want to clone.
- Carefully brush over the parts of the wrinkle that still need blending. Adjust the brush size, opacity, and flow in the options bar as needed.
Step 6: Smooth with Gaussian Blur

After removing the wrinkles, you might find the edited areas look too sharp or out of place compared to the rest of the image. Softening these areas can help:
- Create a new layer from all the visible layers by pressing Ctrl + Shift + Alt + E (or Command + Shift + Option + E on a Mac).
- Select the Gaussian Blur from Filter > Blur > Gaussian Blur.
- Adjust the blur radius to a low value just enough to soften the edits. Use a layer mask to apply the blur selectively to just the edited areas.
Step 7: Fine-Tuning with the Liquify Tool

If the shape of the garment has been distorted or if you want to adjust the draping of the fabric, the Liquify Tool is your best friend:
- Go to Filter > Liquify.
- Use the various tools within the Liquify filter, like the Forward Warp Tool, to gently nudge and adjust the fabric into a more pleasing shape.
Step 8: Final Adjustments

Now that the wrinkles are gone, it’s time to polish the overall look of your image:
- Adjust the lighting and color balance if necessary. Go to Image > Adjustments and explore options like Levels, Curves, and Color Balance to enhance the overall appeal of your photo.
- If you’ve been working with multiple layers, consider merging them to simplify the final image.
- Save your image in the desired format. Use Save As to keep your edited version separate from the original.
Here’s the video tutorial to learn and practice-
To Conclude
In wrapping up this tutorial on how to remove wrinkles from clothes in Photoshop, we’ve traversed through a comprehensive process designed to elevate the presentation of garments in photographs.
We encourage you to practice these steps, experimenting with different tools and settings to see how they affect the outcome. Remember, the key to successful photo editing is a keen eye for detail and patience.
Sometimes, subtle adjustments can make a significant difference in the final result. We hope this tutorial inspires you to explore more of what Photoshop has to offer.


