What Is Image Masking? Why Do You Need It?

Image masking is a process of graphics software like Photoshop to hide some portions of an image and to reveal some portions. It is a non-destructive process of image editing. Most of the time it enables you to adjust and tweak the mask later if necessary. Very often, it is an efficient and more creative way of image manipulation services.
Types of Image Masking
There are mainly three types of masking in Photoshop –
1. Layer Masking
The layer mask is the type of mask people generally refer to when they talk about masking in Photoshop. We can hide or reveal portions of the images or we can change the opacity of the various portions of an image using masking. If we change the opacity of a layer from the layer panel’s opacity slider, the opacity of the whole image will be changed.

With the layer mask, we can change the visibility of the layer. We can make any portion completely invisible or partially visible. If we paint with black on the mask, that portion of the image will be totally transparent. Meaning it will make visible the layer/s beneath. The image will be partially transparent if we paint with any grayscale color, depending on the % of gray we choose for the brush. If we select a soft brush, the edge transformation will be smoother.
2. Clipping Mask
Clipping masks use one layer to determine the visibility or transparency of another layer. For clipping mask we place a layer at the bottom of the layer we want to apply the transparency. From this bottom layer, we control the visibility of the layer above. For the beginners, it may seem a bit contradictory if they compare the behavior of the clipping mask with the layer mask. It may seem like that clipping mask is working inversely compared to the layer mask.

In the case of the layer mask, we paint using black color on the mask to make the pixels of the layer invisible; but with the clipping mask, we are doing the opposite. The top layer will be opaque or visible if the bottom layer has some pixels in that area. If the bottom layer doesn’t have any pixels, the pixels on the top layer will be transparent or invisible.
3. Alpha Channel Masking
Every image has different attributes for cutting out operations like removing background. So different methods are needed to be applied. Different images require different approaches. Alpha channel masking is a bit complex way of doing masking. The above two types of masking are fairly simple. But when we need to mask out the hair and furry areas, it becomes very difficult and time-consuming to select those areas with just the brush strokes. If the object and the background have a sufficient amount of contrast, the alpha channel masking technique will be easier to apply.

In brief, to work with this method of masking, we use the channel palette to see which channel gives the most contrast. If it is the blue channel, we make a duplicate copy of that channel and apply the level on that to increase the contrast sufficiently. If required, we can paint over the inner portion of the new blue channel with black color to make it totally black. Then we make it inverse to make the white to black and the black to white. Next, we copy the channel and paste it into the layer tab to make a new layer. You can use the dodge and burn tools to make the edge portions more contrasting (making the edge fur/hair more black). Even, you have the option to apply “Color Decontaminate” from the Layer>Matting>Color Decontaminate menu. Sometimes you can get amazing results with this option. Before applying the color decontaminate process, it is safe to make a copy of the layer. Because it is a destructive process. This is just a brief description of Alpha Channel Masking to give you some idea. Now let’s see why we do need the masking.
Why Do We Need Masking?
It Is a Non-Destructive Technique
Masking is a non-destructive process. We can make changes later or fine-tune to our masks whenever we need to. But if we erase the unwanted areas it is difficult for bringing those if we need those areas later in the process of image editing. The same is true if we cut an object or portion from the image-making path on them. We will not be able to include more adjacent areas easily. Just if we want to hide some area we’ve cut out, it may be possible by using the masking technique. So it is very hard to avoid masking again, right?
Just to Hide and Show
As I mentioned before, the simplest use of masking is to hide and show portions of pictures. We can give a transition effect if we use a very soft brush or gradient for masking. Sometimes, we can control the transparencies of areas of a picture, like a very shiny sky. If we want we can make a very bright sky area dimmer (making the area semi-opaque) just by brushing the area with a gray color. Of course, there are other options to achieve this, but this is the easy and handy technique maybe you opt for.
To Modify an Area of a Picture
It is very common that you need to modify an area of the image. For example, you want to change the color of the top garment of a model. You can make a mask by making that portion visible. Then you can apply any kind of modifications you want; like color adjustment/correction, brightness/contrast adjustment, exposure correction, etc.
Removing / Replacing Background of Translucent Objects
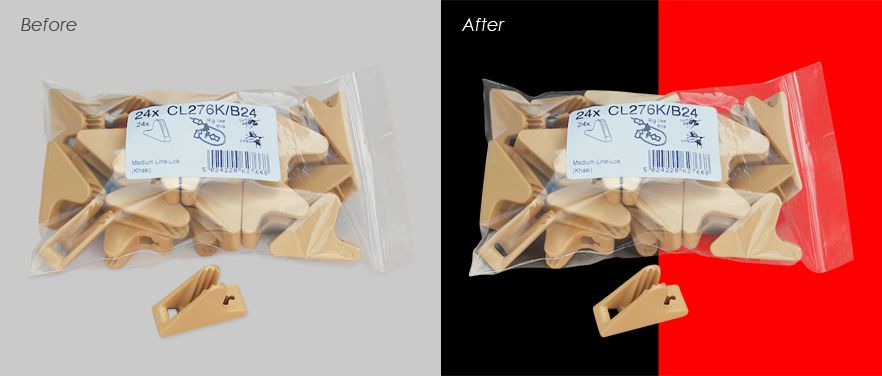
We can use the masking technique to remove the background of translucent objects. This is useful for removing the background of glass types of objects. We can apply this if we need to replace the background of a muslin or mesh type of cloth that has some transparency.
One Advantage of Clipping Mask

One advantage of Clipping Mask compared to Layer Mask is that we can make a different area visible simply by moving the clipped image. We can fine-tune easily what will be visible through the mask if we use a clipping mask. Otherwise, I find a normal layer mask is sufficient for almost all the masking works.
Making Collage Images
We can make interesting collage images using the masking technique. The possibilities of making collage images are really endless. We can make interesting effects using various photos and applying masking on them. Using soft brushes and gradients of gray will make the transitions smooth.

Any Photoshop technique has almost endless possibilities to manifest your imagination. So, do have image masking. Sometimes you can get the same result by employing different processes/techniques of Photoshop. It is up to you which method you are more fluent with or which method takes less time but produces the expected output. The choice is up to you. But image masking, without a doubt, is a useful and creative tool. Cheers…