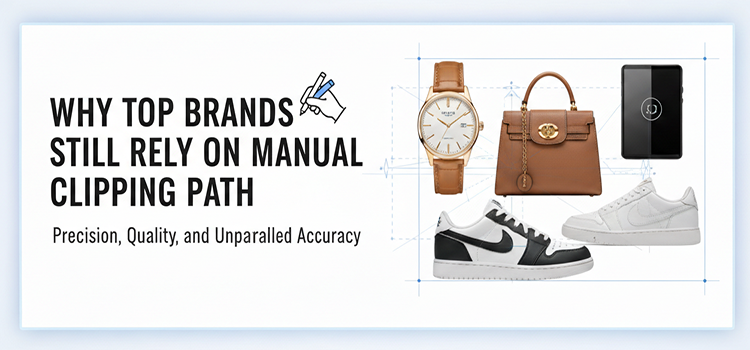
Photoshop Clipping Path Service: Workflow and Best Practices
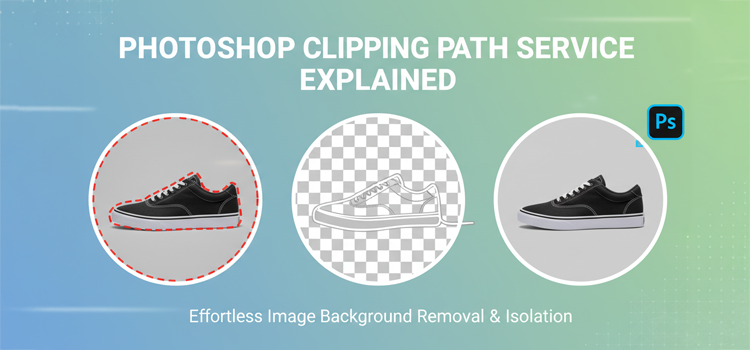
If you have ever tried to clean up a product photos that means you already know why Photoshop Clipping path service– workflows still matter. Even with AI getting faster, clipping paths remain the most reliable way to create crisp, controllable edges for ecommerce, catalogs, marketplaces, and print images. And the stakes are real: ecommerce keeps growing, with worldwide retail ecommerce sales estimated around $6.42T in 2025 (about 6.86% YoY), which means more SKUs, more variants, and more image volume than most teams can handle manually without a process.
What follows is the exact “agency-style” workflow we use and recommend: predictable, QC-driven, and built for scale.
Why clipping path is still a “production” skill
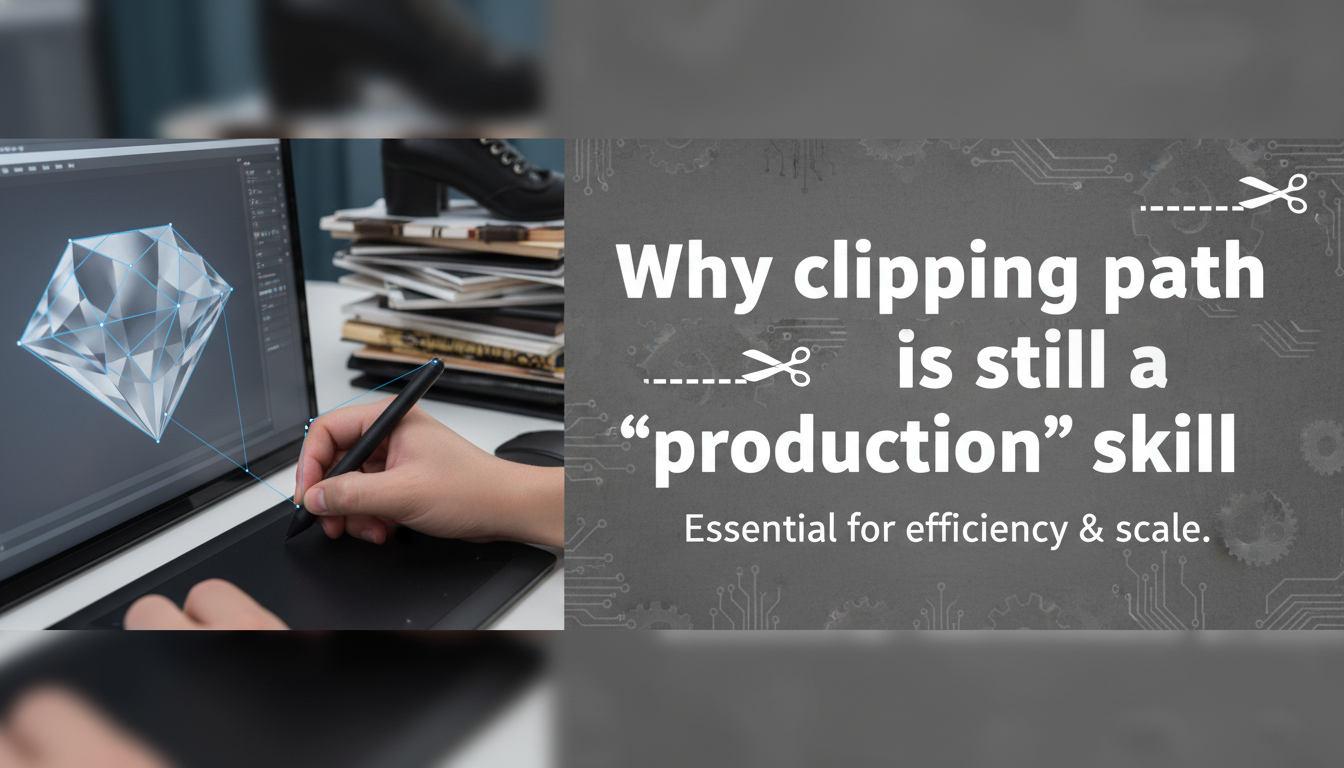
AI is everywhere, but production is where hype gets punished.
- Marketplaces and ad platforms still reward clean, compliant images. Google Merchant Center, for example, recommends solid white or transparent backgrounds so images work across placements.
- Buyers care about image quality. MDG reported 67% of online shopper’s rate high-quality product images as “very important” on product pages, and poor/insufficient images can trigger abandonment.
- Volume is exploding, and speed expectations keep rising. AI editing tools are now saving massive time across the industry. Aftershoot’s Snapshot 2025 reported photographers processed 8B images in 2025 and broader reporting highlighted 89M hours saved using AI-assisted workflows.
- AI editing is growing fast, which is good news and bad news: it is easier to generate “okay” results, but clients expect “perfect” more often. Market forecasts show AI image editor growth continuing at strong CAGRs through the late 2020s.
AI is a great first pass. Paths are how you make results predictable.
The real goal: edge control, reusability, and consistency
A professional clipping path is not just “remove the background.” It is an asset your production team can reuse.
A proper path should support:
- Multiple exports: white background, transparent PNG, lifestyle composite, shadow variants, marketplace crops.
- Color workflows: isolate product for HSL tweaks without contaminating the background.
- Variant consistency: same crop, same scale, same shadow direction, same edge quality.
If your path can’t do that, it is not production-ready.
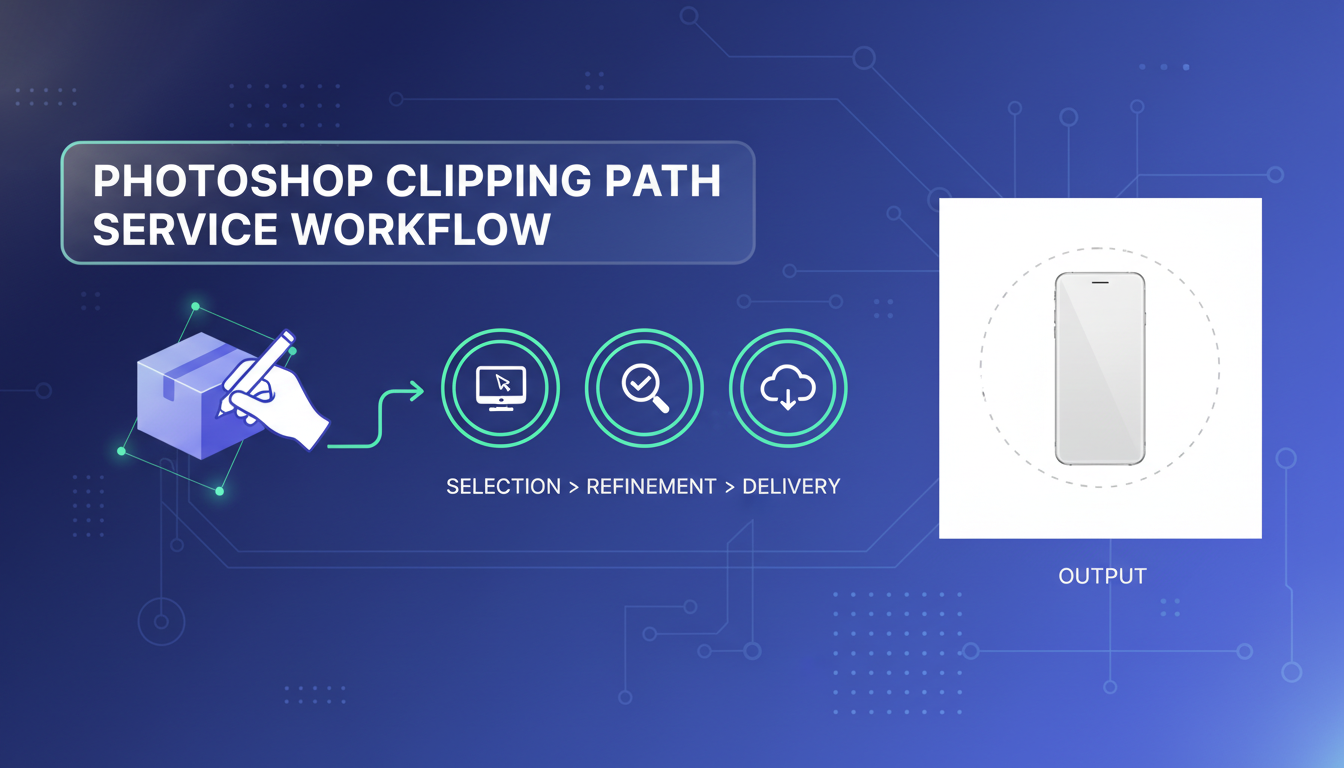
Photoshop clipping path service workflow (the one that scales)
Below is the workflow I recommend for teams and agencies. The big difference vs “freelance style” is the obsession with specs, QC, and repeatability.
1) Intake and spec sheet (where quality is decided)
Before Photoshop opens, lock these:
- Output formats (JPG on white, PNG transparent, TIFF for print, etc.)
- Background requirements (pure white vs off-white, transparent, or contextual)
- Shadow style (natural, drop, reflection, none)
- Cropping rules (centered, 85% frame fill, consistent padding, square vs 4:5 vs 3:2)
- Color rules (match physical sample? match vendor photo? match Pantone?)
- Turnaround tiers and naming conventions
Best practice: Create a one-page “Image Standard” for the client. If you do not define it, the project will define it for you.
2) Triage: choose the right extraction method
Not every image should be handled the same way.
- Pen Tool clipping path: best for hard edges (electronics, boxes, bottles, furniture, most apparel on mannequin).
- Layer masks + Select and Mask: best for semi-soft edges (fur, hair, lace, sheer fabrics).
- Channel pulls: best when contrast is strong and you need detail quickly.
- Hybrid: Pen Tool for the body + mask work for tricky zones.
Rule: If the product has hard geometry, use paths. If it has organic detail, combine paths + masks.
3) Base path build (the “clean silhouette” pass)
This is where most beginners either overshoot (too many points) or undershoot (wobbly curves).
Best practices for Pen Tool paths:
- Use fewer anchor points, placed on curvature changes, not randomly.
- Keep handles long and smooth for clean arcs.
- Zoom to 200–400% for edges; zoom out frequently to check shape integrity.
- Avoid “stair-step” point placement; curves should flow.
- Save path naming consistently (e.g., Path 1 is not a system, it is a future headache).
Pro tip: Build the path slightly inside the edge for light backgrounds; slightly outside for dark backgrounds. Edge decisions are context-dependent.
4) Edge refinement (the “make it look expensive” pass)
Clean silhouettes are not enough. Your edges must survive:
- white backgrounds
- transparent PNG
- compression
- zoom on product pages
Refinement checklist:
- Fix halos and fringing (common from studio backdrops)
- Correct micro-bumps around product curves
- Handle holes, gaps, and internal cutouts properly (straps, buckles, handle gaps)
- Manage reflections (especially glossy products)
If the product has complex contours (jewelry, glass, transparent plastics), a “simple path” can look fake fast. You need controlled masking and sometimes manual painting.
5) Background handling (white, transparent, or custom)
For ecommerce and marketplaces, white is still the default because it is flexible and compliant across channels. Google explicitly recommends solid white or transparent backgrounds in many cases.
White background best practices:
- Keep whites consistent across the batch (do not let one image drift gray)
- Preserve realistic contact shadows (floating products look cheap)
- Avoid blowing out edge detail (white-on-white products need careful separation)
Transparent background best practices:
- Expect more edge scrutiny (PNG reveals sins)
- Confirm whether the client wants shadow on transparency or none
- Test on dark and light UI backgrounds before delivering
6) Shadow and grounding (where realism is won)
Most clients do not say it, but what they want is: “make it look like it belongs.”
Shadow options:
- Natural shadow: extracted/cleaned from original (best realism, more work)
- Drop shadow: faster, consistent, less realistic if overdone
- Contact shadow: small soft shadow under the product (clean + believable)
- Reflection shadow: popular for cosmetics, tech, premium goods
Best practice: Define one shadow style per catalog (per brand). Consistency beats “best shadow per image.”
7) Color correction and texture integrity
This is where clipping paths become a color workflow tool, not just a cutout.
Common professional moves:
- Neutralize color cast (especially in whites and grays)
- Match hero SKU colors across angles and variants
- Preserve texture detail while reducing noise
- Fix label readability without making it look “sharpened to death”
And remember why this matters: shoppers actively use visuals to decide. A research also highlighted how critical detail and zoom behavior are for product pages.
8) Output export rules (do not let the last step ruin the work)
A lot of “good edits” die here.
Export best practices:
- Use consistent color space (sRGB for web unless client requests otherwise)
- Standardize resolution and dimensions per channel
- Name files like a system (SKU-angle-variant)
- For JPG: control compression so edges do not get crunchy
- For PNG: check matte/edge contamination before final delivery
If the images are heading to feeds and ad platforms, specs matter. Merchant ecosystems are picky and specs drift over time, so your workflow should include periodic checks against platform documentation.
9) Quality control (QC) that actually catches problems
QC is not “zoom in and vibe-check.” Real QC is repeatable.
My QC routine:
- View on white, black, and mid-gray backgrounds
- Zoom sweep at 100% and 200% around the full perimeter
- Check internal cutouts (straps, handles, negative spaces)
- Confirm shadow direction and softness matches the set
- Batch-compare thumbnails for alignment and scale consistency
Best practice: QC by someone who did not do the path. Fresh eyes catch edge issues instantly.
10) Delivery + feedback loop (how you get faster every batch)
A good service workflow includes:
- a revision protocol (what counts as revision vs change request)
- a sample approval stage (5-10 images) before full production
- versioning (V1, V2) so nobody overwrites assets blindly
- a “client standard doc” that evolves with real feedback
This is how you reduce revision cycles and make margins healthier without lowering quality.
Modern trends: where clipping paths are heading

Trend 1: Hybrid AI + human workflows
AI tools are clearly reducing time on repetitive work. That Aftershoot Snapshot data (billions of images processed) is a signal: the industry is moving toward automation-first pipelines.
But in ecommerce production, the win is hybrid:
- AI handles the first pass (quick separation, rough masks)
- Humans finalize edges, labels, reflections, textures
- QC ensures “publish-safe” output
Trend 2: More platforms, more compliance
Platforms still care about clean backgrounds and consistent presentation, and Google’s guidance remains a strong baseline for many catalogs.
So the workflow is less about “one perfect image” and more about “a system that produces thousands of compliant images.”
Trend 3: The “visual commerce” arms race
As ecommerce expands, brands compete visually, not just on price. Image quality is still one of the top decision factors shoppers cite.
That is why clipping paths remain relevant: they enable controlled, premium presentation at scale.
Real-World Case Studies: Clipping Paths in Action
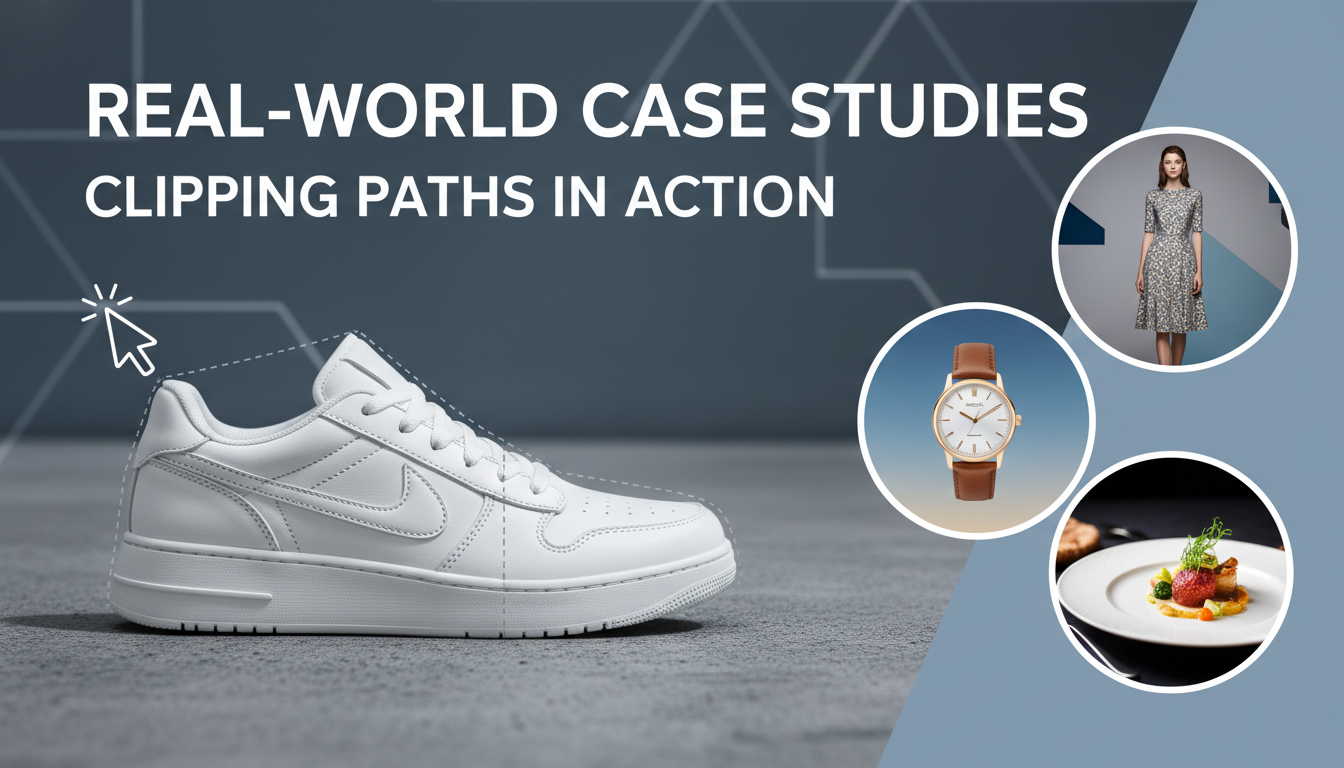
Case Study 1: Fashion Ecommerce Brand (5,200 SKUs)
A mid-sized apparel brand approached us with over 5,200 product images shot across different studios. Backgrounds were inconsistent. Shadows were mismatched. Cropping varied wildly.
Our workflow
- Standardized crop ratio (85% frame fill)
- Pen tool paths for garments
- Natural contact shadows
- Batch QC pass
Result
- 38% faster catalog publishing
- 21% increase in product page CTR
- Fewer revision requests from the merchandising team
Clean edges and consistent framing turned their catalog from “okay” to premium.
Case Study 2: Amazon Seller (Beauty Products)
A beauty seller struggled with listing rejections due to background issues and reflections on glossy bottles.
Fix
- Precision paths
- Controlled highlights
- Pure white (#FFFFFF) background
- Reflection cleanup
Outcome
- 100% compliance with marketplace standards
- Listings approved on first submission
- Improved ad performance due to cleaner visuals
Case Study 3: Creative Agency (Outsourced Production)
An agency handling seasonal campaigns needed fast turnarounds without sacrificing quality.
Solution
- AI first-pass separation
- Human refinement
- Dedicated QC specialist
- 24-hour SLA
Impact
- 28% faster delivery
- Agency scaled volume without adding in-house staff
Visual Workflow Overview
Upload → Path Creation → Edge Refinement → Background → Shadow → QC → Export → Delivery

This is how professional production works. No guessing. No “hope it looks good.”
Every step exists to remove risk.
Beginner vs Professional Workflow
Beginner
- Random anchor points
- Over-feathered edges
- Inconsistent crop
- No QC stage
- Manual file naming
Professional
- Strategic point placement
- Edge tested on multiple backgrounds
- Brand crop standards
- Dedicated QC review
- SKU-based naming system
The difference is not software.
It is process discipline.
Industry-Specific Clipping Path Workflows
Fashion & Apparel
- Mannequin removal
- Fabric texture preservation
- Sleeve & collar cutouts
Jewelry & Luxury
- Micro-edge detailing
- Reflection control
- High zoom QC
Furniture & Home Decor
- Complex geometry
- Shadow realism
- Floor grounding
Cosmetics
- Gloss management
- Label sharpening
- Color accuracy
Electronics
- Cable cutouts
- Port openings
- Surface reflections
Each industry has its own edge problems.
One-size-fits-all workflows fail here.
Pricing Models Explained (Rates Depends)
Most professional services price based on:
- Complexity
Simple box vs tangled jewelry - Volume
Bulk orders = discounted rate - Turnaround
12h / 24h / 72h tiers - Edge difficulty
Hard edge vs fur/hair
This keeps pricing fair and scalable.
Common Clipping Path Mistakes to Avoid
- Using too many anchor points
- Feathering edges “to hide” bad paths
- Ignoring internal cutouts
- Fake shadows that float
- Over-sharpened product edges
- Inconsistent crop between angles
These mistakes scream amateur production.
Tool Comparison: Pen Tool vs AI vs Quick Selection
Pen Tool
- Highest accuracy
- Best for hard edges
- Reusable paths
- Slower but perfect
AI Tools
- Fast first pass
- Struggles with detail
- Great for bulk prep
Quick Selection
- Fast but messy
- Poor edge control
- Not production safe
Pro workflow: AI → Pen tool → QC
Speed + quality.
Quality Benchmarks Checklist
Before any image leaves production:
- No halos
- Clean internal cutouts
- Consistent crop
- Matching shadow direction
- Edge tested on dark + light background
- File name matches SKU
- Export size correct
This checklist saves clients from embarrassment.
Platform Compliance Notes
Amazon
- Pure white background
- Product fills 85% frame
- No text overlays
Google Shopping
- Clean cutouts
- No watermarks
- Accurate colors
Etsy
- Lifestyle allowed
- Still needs clean edges
Marketplace rejection = lost revenue.
Compliance matters.
FAQs and Answers
1) What is a Photoshop clipping path service workflow?
It is a step-by-step production process where a team receives images + specs, creates precise vector paths (often with the Pen Tool), refines edges, applies background/shadow rules, exports in required formats, and runs QC so results are consistent across the whole catalog.
2) When should I use a clipping path instead of background removal AI?
Use clipping paths when you need repeatable, controllable edges for ecommerce listings, print catalogs, or compositing. AI is great for speed, but paths win when you need accuracy on hard edges, clean cutouts for white backgrounds, and consistent results across thousands of SKUs.
3) How long does clipping path editing take per image?
It depends on complexity. A simple hard-edge product can take minutes; jewelry, hair/fur, transparent items, and complex cutouts take longer. The realistic answer is: the time is driven by edge complexity + required QC level, not the file size.
4) What’s the difference between a clipping path and a layer mask?
A clipping path is a vector outline (great for hard edges and clean selections). A layer mask is pixel-based (better for soft transitions like hair, fur, lace). Many pro workflows use both: path for the body, mask for tricky zones.
5) Do clipping paths work for hair, fur, or transparent products?
Sometimes, but usually not alone. Hair/fur and transparency typically need masking techniques (Select and Mask, channels, manual paint). A good provider will use a hybrid approach instead of forcing everything into a path.
6) What file formats do I get from a clipping path service?
Most commonly: JPG on white (web-ready), PNG transparent (design-ready), and sometimes TIFF/PSD for print or future edits. The right format depends on your platform and downstream design workflow.
7) How do you avoid jagged edges and halos on white backgrounds?
By controlling edge placement, removing fringing, refining masks where needed, and QC-testing on multiple background colors. Halos are usually caused by leftover background color contamination from the original shoot.
8) Can clipping paths help with color correction and consistency?
Yes. Once the product is isolated cleanly, you can adjust color, contrast, and saturation without affecting the background. This is huge for maintaining consistent color across variants and angles.
9) What should I send to get the best results from a clipping path service?
Send original or highest-quality images, your crop/background/shadow rules, and a reference set (5-10 “perfect” examples). If you have marketplace requirements (like white background guidance), include those too.
10) How do I choose a good clipping path service provider?
Look for: a documented workflow, sample approval stage, strong QC process, and consistency across batches, and the ability to handle complex edges (not just easy cutouts). Ask how they handle revisions, naming conventions, and multi-format delivery.
Related posts


Clipping Path Synonyms Antonyms and Multilingual Words

