Photo Editing QA Checklist: The Ultimate Quality Control Guide for Professionals

If you submit images to clients, e-commerce listings, or high-volume catalogs, “looks good” is not quality assurance. It. A photo editing QA checklist turns taste into repeatable standards, catches tiny defects before they become refunds or rework, and keeps your team consistent even when the workload spikes.
AI-assisted photo editing is pushing more images through the pipeline than ever. In 2025, Aftershoot (An AI) reported its users processed 8.8 billion images (up from 5.4 billion in 2024) and collectively saved 89 million hours using AI tools for culling/editing tasks. That scale is exactly why QA matters more now, not less.
Why QA in photo editing is harder now than ever
1) Volume is up, tolerance is down
Clients are faster to notice inconsistency than they are to notice artistry. In a separate Aftershoot survey coverage, 64% of pros said clients did not notice a difference between AI-edited vs manual results, while only 1% reported negative feedback. That is not an argument to “go full AI.” It is a warning: clients judge you on consistency and delivery, and QA is how you guarantee both.
2) Marketplace rules are strict (and measurable)
For e-commerce, QA is not subjective at all. Amazon’s main image guidance explicitly calls for a pure white background (RGB 255,255,255) in many categories to keep the catalog consistent. That means your QA needs objective checks (histogram/eyedropper sampling), not “white-ish.”
3) The market is moving toward “edit faster”, not “edit simpler”
Multiple market reports project continued growth for AI image editing tools (different methodologies, different numbers), but the direction is consistent: AI features are expanding and adoption is rising.
For example, one 2025 report projects the AI image editor market growing from $88.7B (2025) to $229.6B (2035).
Another forecast describes 16.3% CAGR (2024–2029) for the AI image editor market segment it tracks.
When speed increases, your defect rate usually increases too, unless QA gets upgraded.
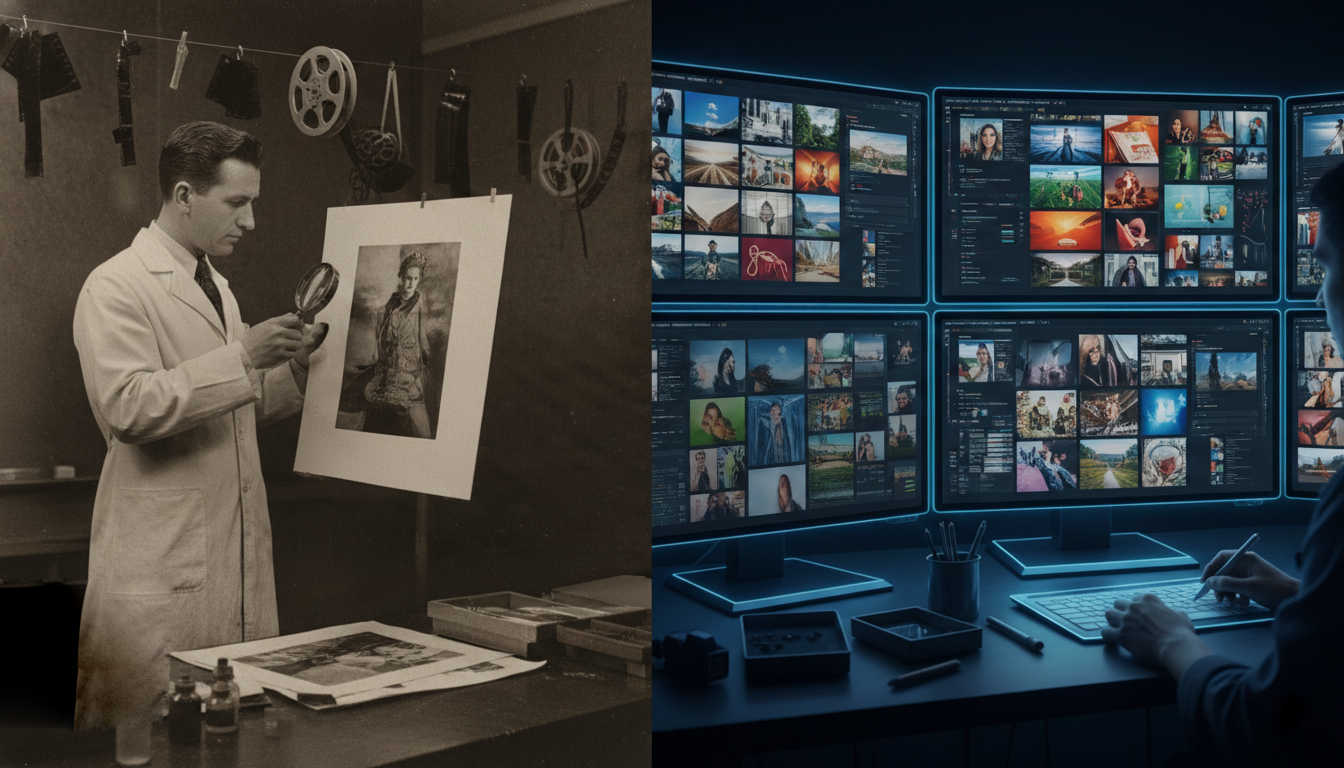
The core idea: QA checks the promise, not the pixels
![]()
A clean QA system validates three promises:
- Brand promise: color, styling, realism, and consistency match the brand guide.
- Platform promise: specs and marketplace rules are met (size, background, framing, no forbidden overlays).
- Technical promise: no artifacts, no halos, no clipped channels, no banding, no weird edges at 100%.
If your QA checklist does not clearly connect to those promises, it becomes busywork.
QA workflow that actually works (without killing your margins)

The 3-pass model (fast + reliable)
Pass 1: Batch scan (10–20 seconds per image)
- Spot obvious failures: wrong crop, wrong background, missing product parts, heavy artifacts.
Goal: catch “rejects” quickly before you waste time on micro-issues.
Pass 2: 100% inspection (selective zoom)
- Zoom to 100% on high-risk areas: hair/fur, glass, straps, lace, thin edges, jewelry prongs, typography, gradients, and shadows.
Goal: catch artifacts the client will notice when they zoom.
Pass 3: Consistency check (set-based QA)
- Compare images as a group: color temperature, shadow direction, margin spacing, scale, horizon, skin tones, and product hue.
Goal: eliminate “this one looks different” problems (the #1 silent killer in catalogs).
This model scales from solo editor to 50-person production team.
Photo Editing QA Checklist (copy/paste friendly)

Below is a practical checklist you can use for photo retouching, product editing, and most commercial work. Use it as-is, or trim it to match your service level.
A) Brief & spec compliance
- Ensure final usage: web, print, marketplace, social, ads, and packaging.
- Confirm dimensions, aspect ratio, and safe margins.
- Confirm file type and color space (sRGB for web unless specified; CMYK only when required).
- Work on naming convention and folder structure (this saves more time than any AI tool).
- Confirm “do not change” rules (logos, labels, textures, serial numbers, and product shape).
B) Composition & framing
- Subject centered and consistently scaled across the set.
- No accidental cropping (tips of shoes, handles, straps, jewelry edges).
- Straight horizon / aligned verticals where relevant.
- Perspective looks intentional (not “warped because I used the wrong transform”).
C) Background quality (where most QA fails)
- No halos, jagged edges, chatter, or leftover color spill around cutouts.
- Edges look natural at 100% (especially hair/fur/mesh).
- Shadows are believable and consistent (direction + softness).
- If your platform requires pure white: sample background values (do not guess). Amazon guidance calls for RGB 255,255,255 in key contexts. (Amazon Seller Central)
- No banding in gradients (common after heavy compression or sloppy denoise).
D) Color & tone accuracy
- White balance consistent across the set.
- Product color matches reference (brand swatches, Pantone target, or physical sample notes).
- No clipped highlights on glossy products unless stylistically intended.
- Blacks are not crushed (watch for lost texture in fabrics).
- Skin tones (if applicable) are consistent and natural (no orange faces, no gray shadows).
E) Retouch integrity (the “do not lie” section)
- Texture preserved (avoid plastic skin, waxy fabric, smeared grain).
- Dust/scratches removed without erasing real product details.
- Labels/text remain sharp and readable (check at 100%).
- Symmetry corrections are subtle (no uncanny-valley geometry).
F) Artifact & edge defect sweep (zoom-based)
- Check: hairlines, jewelry prongs, transparent objects, glass edges, lace/mesh, straps, product cutouts.
- Look for: fringing, matte chatter, alpha holes, over-feathered edges, sharpening halos.
- Check smooth surfaces for patchy healing or repeating clone patterns.
G) Output & delivery QA
- Export settings match destination (web compression vs print quality).
- No accidental upscaling artifacts.
- Metadata policy followed (keep/remove depending on client).
- Final files open correctly, no corrupted exports, no missing layers if layered delivery required.
A simple scoring system that makes QA faster
Instead of arguing about whether an image “passes,” use a lightweight scorecard:
Score each category 0–2
- 2 = clean (no meaningful issues)
- 1 = minor (quick fix, not client-visible at normal viewing)
- 0 = fail (client-visible, rule violation, or inconsistent with set)
Categories (7 total):
- Spec compliance
- Crop/geometry
- Background & edges
- Color/tone accuracy
- Retouch integrity
- Artifacts at 100%
- Consistency with the set
Passing rule:
- Hero images: 13/14 minimum, and no “0” in any category
- Bulk/catalog: 12/14 minimum, allow one “0” only if fixed before delivery
This keeps QA objective and fast.
Modern trends: where defects are coming from now

Trend 1: “AI-clean” images still need human QA
AI tools can be incredible at speed, but they also introduce new failure modes:
- weird micro-texture smoothing
- incorrect object boundaries (especially transparent materials)
- inconsistent shadows across a set
- subtle hallucinated detail (labels, stitching, texture patterns)
Given the reported scale of AI-assisted workflows (billions of images processed), even a small defect rate becomes a massive rework problem.
Trend 2: Marketplaces reward consistency, not creativity
Platforms want uniform browsing experiences. Amazon’s image requirements reinforce that consistency logic (clean backgrounds, clear product presentation).
So your QA checklist should prioritize repeatability and spec compliance over stylistic experimentation—unless you are working on brand campaigns.
Trend 3: QA is shifting from “pixel peeping” to “system checks”
The best teams treat QA like production design:
- standard lighting/shadow styles
- consistent crops and spacing
- reference frames and approved samples
- automated checks for dimensions/filenames
- human checks for realism and edge integrity
That is how you scale without quality collapse.
Comparisons that matter (and what to choose)
Human-only QA
Best for: luxury brands, skin work, high scrutiny, print campaigns
Trade-off: slower, expensive, but catches taste-level issues better
AI-assisted editing + human QA
Best for: e-commerce, agencies, high-volume catalogs
Trade-off: fastest and safest when QA is strong (my default recommendation)
AI-only “auto-edit and ship”
Best for: internal drafts, low-risk content, fast social output
Trade-off: risky for clients; failure patterns repeat across sets
If you care about retention, refunds, and repeat orders, AI-only is usually false economy.
What photos need what editing services/QA checks
However, get here a practical “what needs what” map you can hand to editors or put into your SOP. We are listing the most common product types and the specific editing work that usually matters for each.
E-commerce Products photos (general)

- Background cleanup (pure white or brand color), cutout/masking
- Crop + alignment consistency (same scale and margins across SKU set)
- Exposure/contrast normalization (match the set)
- Color accuracy (avoid hue drift between angles)
- Shadow/reflection (natural drop shadow for depth; avoid floating)
- Dust/scratch removal, label sharpening
- Export specs (sRGB, correct dimensions, compression)
Arts & Crafts Photos
- True color + texture preservation (paper grain, yarn, paint strokes)
- Remove lint/dust without smearing texture
- Accurate whites for paper/canvas (no yellow cast unless intentional)
- Even lighting across handmade surfaces
- Edge cleanup for irregular shapes (cutouts, stickers, die-cuts)
- Optional: lifestyle color grading consistency
Beauty & Personal Care Product photos
- Gloss + highlight control (bottles, tubes, pumps)
- Label legibility (micro sharpening, de-warp if shot at an angle)
- Color accuracy (brand-critical: lipstick shades, creams, packaging)
- Plastic reflections cleanup (do not over-smooth)
- Clean cutout and perfect edges around caps/nozzles
- Liquid/gel transparency handling (avoid muddy edges)
- Optional: “premium polish” retouch (specular cleanup)
Kitchenware Photos
- Metal reflection control (stainless steel, chrome)
- Remove fingerprints, micro scratches, water spots
- Straighten perspective (handles, rims, flat-lays)
- Keep edges crisp (no halo on spoons/knives)
- Shadow consistency (avoid harsh mismatched shadows)
- For glassware: transparency-safe masking + clean rim highlights
Home Décor Photos
- Color match (fabric, paint, ceramics) across the full set
- Natural shadowing to avoid “cutout look”
- Texture retention (wood grain, woven fabric, ceramics)
- Perspective correction (frames, wall art, lamps)
- Remove dust, minor chips (only if product should look flawless)
- Optional: room scene/lifestyle grading consistency
Furniture Photos
- Perspective correction is huge (verticals/horizons)
- Accurate fabric and wood tones (no oversaturation)
- Seam/edge cleanup, remove showroom tags or scuffs (if allowed)
- Floor shadow and contact shadow realism (avoid floating)
- For sets: consistent scale and angle across products
- Optional: background replacement or staged environment
Fashion Products Photos (general)
- Wrinkle reduction (but keep fabric realism)
- Color consistency across sizes/variants
- Clean cutouts around hairline fabrics (lace, knit)
- Remove lint, dust, stray threads
- Shape correction (subtle; avoid misrepresenting fit)
- Branding: keep logos accurate and undistorted
Apparels Photos (specific)
- Neckline + sleeve symmetry, stray fibers removal
- Fabric texture preservation (avoid “plastic cloth”)
- Flat-lay alignment templates (consistent crop + spacing)
- Ghost mannequin compositing (if used): clean inside collar/armholes
Watches
- Extreme dust/scratch removal (macro-level)
- Crystal glare control while keeping realistic reflections
- Dial text sharpness, hands detail clarity
- Metal polishing without blurring bevels/edges
- Keep time/date consistent if required for catalog
- Avoid altering serials/markings unless approved
Jewelry photos
- High-end retouch: dust, pits, scratches, prong cleanup
- Stone sparkle enhancement (controlled, not fake)
- Color accuracy of gemstones (avoid shifting sapphire/emerald tones)
- Clean cutout around fine chains and tiny gaps
- Reflection and highlight shaping (premium look)
- Often requires 200%+ zoom QA
Baby products / Toys
- Bright, clean color (but not neon-fake)
- Remove scuffs, dust, fingerprints (kids products show marks)
- Maintain safety labeling and warnings (do not retouch away)
- Plastic glare control
- For plush: fur/hair masking and texture-safe cleanup
Wedding Photography

- Skin retouch (natural texture, no over-smoothing)
- Color grading style consistency (film look / airy / true-to-life)
- Tone balance for mixed lighting (indoor tungsten + daylight)
- Dress detail recovery (whites without clipping; lace preservation)
- Background cleanup (exit signs, distractions) when needed
- Batch sync + hero-image fine retouch
Corporate / Event Photographs
- Accurate skin tones under ugly lighting
- Brand-consistent color (company logo colors, stage lighting)
- Distraction removal (badges, cables, mic stands if allowed)
- Sharpening for faces, noise control for low light
- Fast turnaround workflow: batch edits + select hero retouch
- Delivery in multiple crops (LinkedIn, website, press)
Real Estate Photos
- Vertical correction (walls/doors straight)
- Window pull / exposure blending (HDR done cleanly)
- Color cast removal (mixed light: tungsten + daylight)
- Replace blown windows (if ethical policy allows)
- Green lawn/sky adjustments (keep realistic)
- Remove small clutter (trash bins, cords) if approved
- Avoid misleading edits (size/structure changes)
Automobiles Photographs

- Paint reflections control (remove distracting reflections, keep realistic sheen)
- Remove dust, swirl marks, minor scratches (if allowed)
- Tire + rim detail enhancement (clean rubber, sharp rims)
- Consistent background and shadow under car
- Glass transparency cleanup (windshield glare management)
- Color accuracy (car color must match reality)
Technological Products Photographs
- Edge-perfect cutouts (phones/laptops have unforgiving lines)
- Screen replacement/compositing (clean, brand-safe visuals)
- Remove fingerprints, micro scratches, dust
- Manage moiré/aliasing (screens, meshes)
- Control specular highlights on glossy plastic/metal
- Label and port details clarity (precision sharpening)
- Avoid warping product geometry
Quick rule of thumb (so your team does not overthink)
- Reflective (metal/glass): reflection control + micro scratch/dust cleanup + precise masking
- Textile (fashion/furniture): texture-preserving retouch + wrinkle control + color consistency
- Label-heavy (beauty/tech): readability + distortion correction + clean highlights
- Large spaces (real estate): verticals straight + exposure blend + color cast control
- High-value detail (jewelry/watches): macro QA + premium retouch at high zoom
Our “no excuses” QA toolkit (apps + habits)
- Reference board: 3–10 approved finals that define “done.”
- One-click zoom routine: edges, labels, highlights, gradients, shadows.
- Sampling habit: background values and key product colors.
- Set view: always review as a grid before exporting.
- QA log: track top 5 recurring defect types weekly (then train/fix upstream).
You do not need fancy software to run QA. You need consistency and a checklist you actually use.
Final takeaway
A Photo Editing QA Checklist is less about catching mistakes and more about shipping predictable quality at modern speed. AI is accelerating output (and expectations) at the same time. The teams that win are the ones who standardize what “good” means, measure it, and run QA like a design system, not a last-minute panic.
FAQs
-
What is a Photo Editing QA Checklist?
A Photo Editing QA Checklist is a structured quality control system used to review edited images before delivery. Instead of relying on personal judgment, it defines clear standards for color accuracy, edges, retouch quality, file specs, and consistency. Think of it as a “design spec” for your edits if it does not meet the checklist, it does not ship.
-
Why is quality assurance important in photo editing?
Because one bad image can break trust. QA prevents issues like color mismatch, sloppy masking, over-retouching, and export mistakes. For ecommerce and commercial work, consistency matters more than creativity. A checklist ensures every image meets brand and platform requirements, not just your personal taste.
-
What should a professional photo editing QA checklist include?
A solid checklist covers five areas: brief compliance, composition, background quality, color accuracy, retouch integrity, and export settings. Professionals also include zoom-level checks for edges, artifact detection, and set-level consistency reviews. QA should test both technical and visual quality.
-
How do I check image quality at a professional level?
Always review images at 100% zoom. Focus on edges, hairlines, shadows, highlights, text, and smooth surfaces. Compare images as a set, not individually. If one image looks different, clients will notice. Sampling background color values and checking histogram clipping also helps.
-
What are the most common photo editing QA mistakes?
Over-smoothing skin, leaving halos around cutouts, inconsistent shadows, wrong background white, crushed blacks, blown highlights, and warped product shapes. Another big one is inconsistent color across a batch. Most complaints come from these “small” issues.
-
How do ecommerce brands use QA in photo editing?
Ecommerce brands use strict QA rules. They check background color (often pure white), consistent cropping, accurate product color, and shadow realism. Marketplaces like Amazon have exact image standards, so QA ensures compliance before listing to avoid rejection or lower conversions.
-
Can AI-edited photos pass professional QA?
Yes, but only with human review. AI tools are fast, but they often create edge artifacts, fake textures, or inconsistent lighting across a set. Professionals use AI for speed and humans for quality control. QA is the safety net that protects brand trust.
-
How long should photo editing QA take?
For bulk ecommerce work, 10-20 seconds per image for the first pass is realistic. Hero images and premium retouching need deeper inspection, usually 2-5 minutes per image. The goal is speed without sacrificing standards.
-
How do agencies maintain consistency across large teams?
They use reference images, preset styles, naming rules, and standardized QA scorecards. Everyone follows the same checklist, so results stay consistent regardless of who edits the image. This is how agencies scale without losing quality.
-
What tools help with photo editing quality control?
Photoshop zoom inspection, histogram, eyedropper sampling, grid view comparisons, and reference boards. Some teams also use Trello, Notion, or Google Sheets to log QA issues and track recurring defects. The real tool is discipline, not software.