Perspective Correction Tutorial: Straighten Curved Lines

Photography is an art, and art should be flawless (unless the flaw is art). For numerous reasons, your best photographs may suffer from problems like perspective distortion which is also known as keystone distortion. Such a problem becomes visible with some vertical lines & shapes which ruin the quality of photographs. This distortion is caused by improper camera settings and operation. If you shoot your best images not with the parallel to an object’s surface and center, the images’ dominant lines get bent and thus it produces photos with perspective distortion.
In this content, we are going to show how you can fix bent lines for correcting perspective distortion in Photoshop step by step. So, here we go!
1. Open up your photo in Photoshop and duplicate it. Look at our image which is suffering baseline distortion. It is not perfectly aligned and the car looks upright instead of straight on the land.

2. Select Move Tool from the left toolbar. Take Guide and drag a line to align your image accurately. Now, rotate your image holding the transform pointer from any corner.

3. Have a look at the image corner and you will find out the miss-match. We have to fix it. So, we are going to use Fill Take Lasso tool and draw lines to select the defective corner. Click right button of the mouse and select Fill. You will get a box, select the Content-aware option and click on Ok. Finally, see the difference.


4. Finally, you will get a perspective distortion free image like the below image.

So far it is the easiest way of perspective bent line correction, but now we will show this photo editing with a more complex image. Look at the real estate image below. We have pointed out some places where there are problems with bent line. Using some guide of Photoshop, we have tried to make you understand the problems.

1. All right, now we are going to fix bent lines for this image editing in Photoshop. So, we open up the real estate image in Photoshop, duplicate the image layer, and take some guides to point out where we should fix it.

2. Take the Rectangular Marquee tool and select the area you first want to fix bent line in your photo.

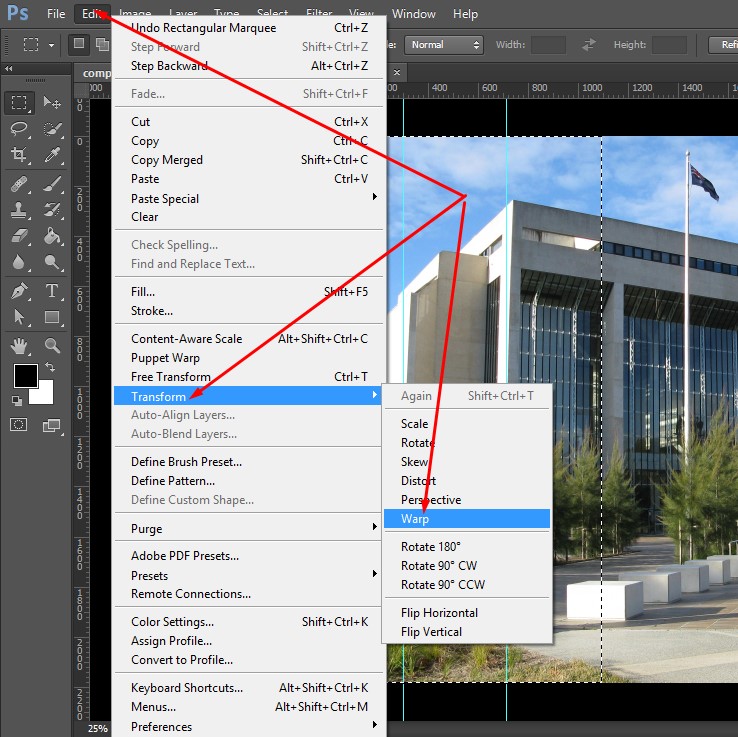
3. Then go to Edit from the top options bar. You will get a dropdown menu, click on Transform, and from the submenu, select Warp tool.
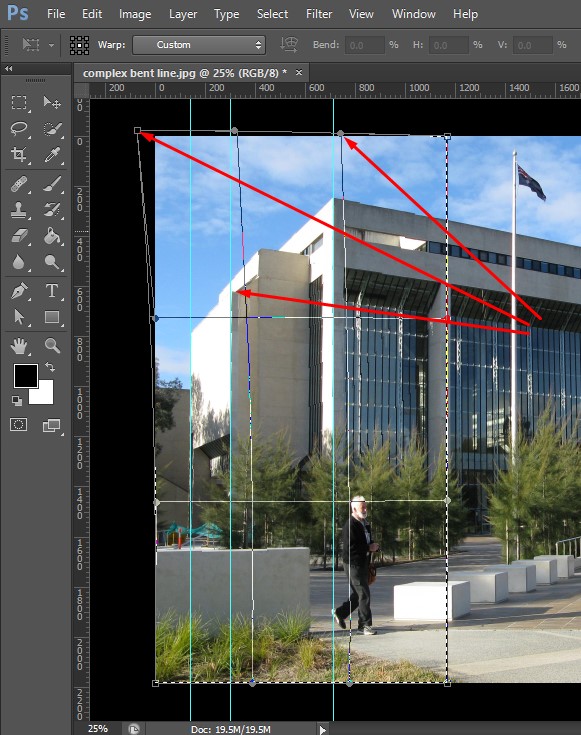
4. While selecting the Warp tool, you will get some pointers and handles. Holding these controllers, you have to fix the bent line. Move the handles and you can understand the changes.
However, we have worked for this tutorial and see the below image to feel the difference. There are no bent lines in this image. We have kept before and after image side by side for your better understanding.


Bent lines in your image are serious issues that destroy the quality of the image. It spoils the quality of the great images of the photographers. So, perspective correction for fixing bent lines is very important. Besides, there may come situations when you cannot shoot images with perfect perspective. You may take the image with a bad perspective reluctantly. In this case, you can take the advantage of image editing in Photoshop for fixing perspective issues.