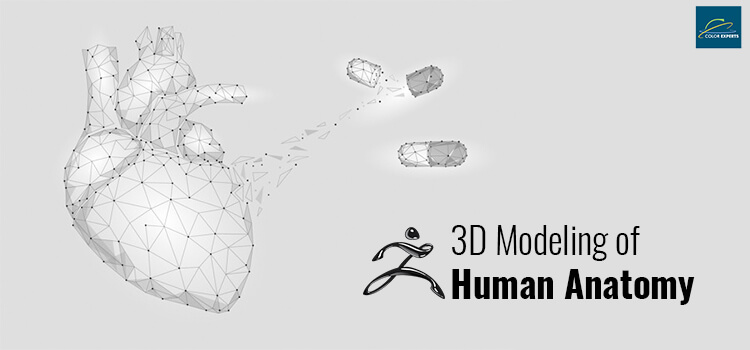
Killer Strategies for Human Body Anatomy with 3D Modeling
Can you name one of the fastest-growing technologies in the current world? Let’s get introduced to one of the on-demand technologies. We are talking about 3D modeling which is not only growing fast but also in vogue in the current world globally. With the introduction of this technology, any object can be designed 3-dimensionally with full of depth. No matter whether they are animate creatures or inanimate objects, 3D modeling can do wonders to portray them.

Head 3D Revolution
In this write-up, we will specifically shed light on 3D modeling of human anatomy. We will see how human body parts should be designed proficiently part by part in a 3D software. A human body has various internal and external organs that are in resounding demand for 3D modeling.

Hand 3D Revolution
These 3D models require highly in the field of medical science. This technology helps us to comprehend the functions of various internal and external organs, the structure of various bones, etc. Doctors also make use of this technology to diagnose diseases in different organs. Let’s pick up some crucial tips and tricks concerning how to model human anatomy 3-dimensionally.
Find a Quality Reference:

Quality Reference
The quality of your reference matters a lot when it comes to modeling an object 3-dimensionally. The reference quality, basically, counts on the materials or the components used to structure the human body. Umpteen sources are available at your disposal to find your reference. You can go for anatomy and biology books, pathology exhibitions, and visual demonstrations. These resources will let you gather a reference image to kick off your modeling.
No wonder that you also have the internet to collect a befitting reference. You can search for various anatomical and biological sites to find the relevant illustrations. You can also watch various video tutorials on the subject on YouTube or other video-sharing platforms. But remember that the Internet resources can be deceptive and incorrect many a time. So, you have to be circumspect before you pick your reference. Gathering multiple references can also be a fabulous idea as this will let you scrutinize the references and conclude thereafter.
Even though the above-mentioned ways are handy for managing your reference, the best and most accurate way can be an access to a first-hand surgical procedure. This is, no doubt, a difficult way to execute and everyone can’t do that. But there are courses available globally offering this amenity to have first-hand surgical experience. Even you can get in touch with various medical colleges as there can be mutually beneficial medical projects. This will enable you to observe and fathom the color, textures, and functions of various anatomical structures.
Initiate your Work with the Skeleton Modeling:

Skeleton Modeling
The first thing that you have to focus on while starting your modeling is skeleton modeling. This is because the skeleton will let you create a framework for other body parts. In order for the human form to appear, you have to overlay muscles onto the skeleton. Regarding internal organs, pelvis and ribcage specify the boundaries.
It’s very key to emphasize on the ratios of the skeleton as wrong ratios will result in inconsistent overlying structures. Apart from that, bones are definite in sizes and differ in shapes from one another. They have a plethora of flat surfaces as well as protuberances letting muscles attach.
Head to Muscle Attachment and Insertion:

Muscle Attachment and Insertion
When it comes to supplementing muscle on the bones, it’s pivotal to know where the muscle originates on the bone and where it inserts. In order to notch up a better idea on it, you can keep a reference image in front of you and spot the outlined areas on the skeleton denoting the sites of origination and insertion. Thereafter, you can make sure that each end of the muscle covers the skeleton precisely that will also give you an idea of the position of the muscles with respect to one another.
Make Use of ZBrush UV Master
Generally, it’s a time-consuming task to unwrap a model but there is an option that you can utilize is ZBrush UV Master. This feature will automatically unwrap your model and enables you to retain accuracy even on complex models. Press the ZPlugin and select the UV Master. Now, select Unwrap and make sure your model is at its lowest subdivision level. Then, head to Texture map and select Create from Polypaint. As soon as you export the model from ZBrush, a texture map will be created with the .obj file.
Take Advantage of Displacement Maps for a Low Polycount:
As you know a human body is formed with innumerable anatomical structures and so your model will get pretty dense with the rising number of objects. That’s why you have to make an attempt to keep the polycount as low as possible. But surely, you can’t compromise on the quality or restrict the details in an attempt to reduce the polycount. Unwrap the model in ZBrush at its lowest subdivision level and create a texture map to diminish the polycount.
Now, select Create Displacement Map and make sure that Flip V is selected. Then, using the Node Editor, you can add the displacement map to the model.
Blow up your Model into the ZBrush:
When importing the model into the ZBrush, some volume of the model will be lost after you subdivide the geometry. In this case, you have to inflate the object a little bit before sculpting. Now, head to select the deformation and adjust the slider on the inflate to supplement a small amount of volume.
Utilize Auto Backfacemask:
When you are in the process of modeling, certain areas of your model can get thin, like the coronoid process of the mandible, sculpting can be troublesome. The problem takes place as the brush impacts the geometry behind the surface you intend to sculpt. To avoid this problem, click on Auto Masking and then select Backfacemask. This step will automatically mask off the geometry behind and deter unwanted deformation.
Review the Model:
After you complete modeling human anatomy, you shouldn’t think it’s done and dusted. This is because anatomy is intricate and unending. The more you will urge to illustrate the structure, the more you can sharpen. No doubt, you are bound to err while modeling but you have to strive to perfect your craft as better as you can.
Even though human anatomy 3D modeling is a tough job, we tried our level best to illustrate it as simply as we could. You can continuously supplement bones, muscles, nerves, and other anatomical structures to strengthen your model. Make sure that you are not stuck in one part of the body rather keep on jumping between various parts. This will make you spot the entire body thoroughly.