Luminar AI Review: Should you Pick it up?
AI or artificial intelligence is impacting nearly every industry as time passes by. No matter whether it’s education, healthcare, marketing, cybersecurity, logistics, or even entertainment, AI has crept into all these sectors. With no surprise, even the image editing field has also come under the influence of AI.
That means now image enhancement or photo touch-up action can be executed effortlessly with a click of a mouse. But that doesn’t guarantee that you would notch up the desired outcome for your imagery. The outcome depends on the photo editing tool that you leverage.
If you google, you will find scores of AI photo editing tools. But all of them don’t promise quality up to scratch. In order to know which AI photo enhancement tool will produce top-grade results, you must carry out holistic research on different tools.
To make your research a bit easier, we have come up with Luminar AI review in this write-up, a premium AI photo retouching tool. We will give you an overview of the tool, list the features, look at the pros and cons, and finally check out the tool’s pricing.
So, let’s get started….
What is Luminar AI?
From the above text, it’s evident that Luminar AI is an AI photo editing tool and it was developed by Skylum. It leverages artificial intelligence for quick and smooth photo touch-up solutions. Tedious and lengthy image editing processes at once have now shrunk to the click of a few buttons.
Most photographers are well aware of Adobe Photoshop and Lightroom. They’re the most advanced and comprehensive editing tools available out there. But Photoshop and Lightroom users also know the fact that they aren’t exactly straightforward. Each and every editing process entails a variety of brushes, layers, and masks.

Even though Luminar AI is exceedingly powerful, it’s simple enough to pick up quickly, even for those with little or zero image processing experience.
The objective of Luminar AI is to make the editing process fun and easy, letting users polish their creative skills while being guided with Templates and other handy features.
On top of that, it is way faster with a bunch of new as well as useful features and therefore your entire batch of photos can be processed in a jiffy.
You may also go through-
AI-powered Photo Editing and Manual Photo Editing: Which one is worth it?
Who is Luminar AI For?
Luminar AI has extensive appeal in the photography world. Everyone from starters to pro photographers can notch up the perks of this Skylum product. The latter, however, are likely to use it more as a plugin, along with other image-retouching software.
One of the core benefits of AI tools is that they make many editing tasks easier than they ever have been. Luminar AI serves the same purpose either.
User-friendliness is one side of the coin. The other side is the outcome. Luminar AI is advanced and accurate, bringing out cracking results. It’s not always perfect, but the standard of editing it executes gives this image touch-up software a professional appeal.
Key Features of Luminar AI
The best part of Luminar AI is that it comes with a bunch of useful and effective features. And you would fancy taking advantage of these features. These special features make Luminar AI a robust tool and keep it ahead of many of its contenders.
Clean and Crisp Workspace
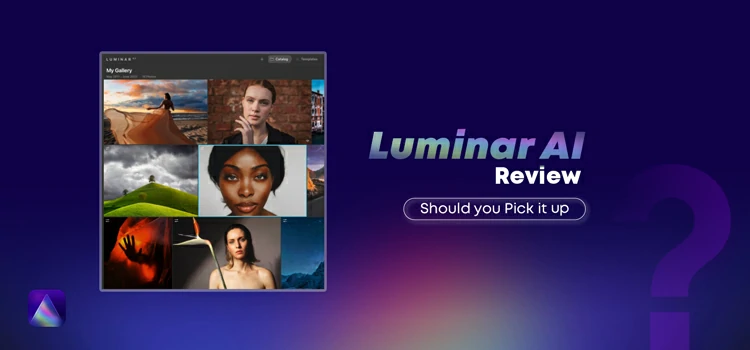
When you first open Luminar AI, you’ll spot that it consists of 4 primary workspaces: Catalog, Templates, Edit, and Export. if you’ve used other photo editors, you’ll instantly note that Luminar AI’s interface is much more polished and clutter-free.
The catalog is predominantly an arsenal of all Photos, Single Image Edits, Recently Added, Recently Edited, and Trash. You can also manually inject Albums and Folders.
Templates are AI-powered presets that automatically analyze the content of every image and suggest the best edits for it.
Edit is basically a collection of all editing tools grouped into 4 panels: Essentials, Creative, Portraits, and Professional.
Export provides several saving options: Save to Disk, Mail, Messages, SmugMug, and 500px.
Adding images to Luminar AI is a piece of cake. You can click on the + icon in the top bar. Alternatively, you can add one or a number of images (or even an entire folder) by simply dragging it into the Luminar AI window.
Based on your device’s specifications, you might be able to import multiple images within a couple of seconds. The catalog lets you sort and filter all your images. In addition, you can deploy filters to find any photo relatively faster.
With Luminar AI, you can browse all your images concurrently, but this is not very useful if you’ve got plenty of them. A better and perfect option would be filtering them by single edits, recently added, or even sorting them based on capture or edit time, file name, type, and size.
Handy Templates as Automatic Presets
Templates are the most significant modifications you would find by upgrading from Luminar 4 to Luminar AI. Templates are like automatic AI-powered presets. Every time you use them, the AI tool analyzes objects, colors, and scenery in your photo and applies the best possible edit depending on its analysis.


But that’s not everything about the templates! Every template is adjusted for your photo distinctly, meaning that Luminar AI suggests the same template for multiple photos, but it alters for each one.
How to Use Templates in Luminar AI?
First up, open an image and click on Templates in the upper part of the window. In the right sidebar, Luminar AI will immediately offer a handful of already installed Templates for you.
Selecting one of the collections, Easy Landscapes, for example, Luminar AI will open a series of 6 Templates. You can click on them to apply the edits right away. However, these edits aren’t permanent instead, you can click Edit in the top bar and adjust the Template to your preference.
Advanced Edits With AI Tools
Edits workspace is where you will be able to make all your tweaks and adjustments. If you kicked off with a Template, this is where you make tweaks. If you’re kicking off fresh, leverage these tools to make adjustments.

If you are wondering about the most splendid tools of Luminar AI, we will always highlight AccentAI, SkyAI, and Portrait tools. The latter, especially, will save the bulk of the time that you’d otherwise spend masking and “liquifying” in Photoshop.
1. SkyAI
Sky Replacement is available in Luminar 4, and we love how perfectly this tool masks the sky into shots. However, it doesn’t take reflections into account, making the replacement in such images quite evident. We are delighted to find out that the new SkyAI injects reflections into the water and other reflective areas.
Take a look at the sky replacement of Luminar AI. The image demonstrates how powerful the AI image editing tool is by bringing out a mesmerizing result-

2. AtmosphereAI
Landscape photographer avails AtmosphereAI tool every time as it adds more “wow factor” to their shots. This tool allows you to inject fog, layered fog, haze, and mist into your photos.
On top of that, Luminar AI is apparently capable of identifying the depth of an image and the distance of objects, as it knows how to place fog behind trees and other things.
AtmosphereAI, however, has three settings that let you adjust the applied fog. The depth slider regulates the percentage of the photo covered in fog, while brightness brightens or darkens the photo.
3. SkinAI
BodyAI and FaceAI tools are designed to sculpt and polish portraits by slimming down the body and improving face.

In our view, these two tools will be in vogue amongst Instagram models, influencers, and shutterbugs working with models because they allow shaping a thin body and chiseled face incredibly easy.
4. IrisAI
Unlike Luminar 4, which could create rich and expressive eyes, this tool tweaks the color, shape, size, and brightness and even improves the texture of the iris. Furthermore, it also works on several people appearing in a single photo.
5. Portrait BokehAI
Bokeh AI is finally here! This brand-new tool was available with the free Luminar AI update 4, which came out on July 27, 2021.
Portrait Bokeh AI identifies people and their poses in the photography and selectively blurs the background. Additionally, it can do plenty of more things than just blurring the background.
This tool makes use of artificial intelligence to create a depth map, which is then used to remove the sharpness of objects accurately based on their distance from the person.
6. CompositionAI
CompositionAI is a brand new Luminar AI tool that automatically recognizes elements in your picture and then crops the photos optimally. Based on our tests, CompositionAI closely follows the rule of thirds.
7. StructureAI
This tool adds detail and texture to your photos in particular. The AI behind it figures out objects and applies the texture accordingly. For example, it won’t apply any texture to people, but it will apply texture to water, rocks, and grass.
8. AccentAI
AccentAI executes all the basic adjustments on its own by producing natural lighting and boosting colors. It functions similarly to Lightroom’s “Auto Settings” feature; however, the artificial intelligence of Luminar AI recognizes subjects in the photo and applies the settings accordingly.
9. Sky Enhancer
As the name reflects, this tool enhances and beautifies skies by giving them texture and color. With the power of AI, it seeks to produce a satisfactory result.
10. Augmented Sky AI
Augmented Sky is the same tool that made us lift our eyebrows when it was first introduced with the Luminar 4.2 update. It lets you inject various elements into your images, such as mountains, clouds, birds, giraffes (??), hot air balloons, aurora, etc.
11. Color Harmony
Color Harmony boasts several tools: Brilliance, Warmth, Color Contrast, Split Color Warmth, and Color Balance. These sliders are all aimed at optimizing and fixing color tones in your photos.
12. Mood
Tweaks and modifies the color scheme of a photo based on Lookup Tables (LUTs).
13. Golden Hour
It draws warm accents to photography, mimicking the light around sunrises and sunsets called the golden hour.
14. Sunrays
This tool adds a new sun and sunrays to the image, giving you control over their position, warmth, and overall look. On top of that, you can also set the penetration, the number of sun rays, and even the sun radius.
15. Supercontrast
It provides you with controls over contrast in highlights, mid-tones, and shadows, individually. This is useful for high-contrast scenes, such as landscapes in particular.
How to Add Skies in Luminar AI?
To add skies in Luminar AI, you need to follow the steps below:
- OpenLuminar AI in your PC
- Click Edit in the top bar
- Navigate to Creative sections of tools
- Click on SkyAI
- Click on Sky Selection
- Scroll down until you see a plus (+) icon and click on it
- Trace your sky files and click open
Luminar AI Works as a Plugin
With each purchase of Luminar AI, you will get both a standalone app and a plugin version that you can deploy along with the following apps:
- Lightroom Classic (Starting from version 6)
- Photoshop (From version CS5)
- Photos for macOS
To install Luminar AI as a plugin, first, install it as a standalone app. Once installed, open it, click on LuminarAI in the top left corner, move to File, and Install Plugins.
Luminar AI will automatically identify which of the three previously mentioned apps you have installed and your computer and will provide you with an option to connect with them.
If you successfully installed Luminar AI as a plugin, you’ll be able to open it from within Lightroom, Photoshop, and/or Photos for macOS.
Luminar AI in no way is trying to be an alternative to other photo editors. Yet, it encourages creativity by offering its tools as a plugin to Lightroom or Photos, consequently offering you more creative options.
The Pros and Cons of Using Luminar AI for Photo Editing
Pros
- Great bang for your buck
- Turns complex edits into simple ones
- AI tools produce astounding results
- Template-based editing perfect for beginners and newbies
- Manual masking possible for advanced users
- Cool plugin for Adobe/Mac Photos
- Quick and fast (Massive improvement to Luminar 4)
- Fun to leverage
- Regular updates & new camera support available
Cons
- Offers limited export options
- Handful of metadata/DAM options
- Limited layer-based editing available
- Unable to transfer Luminar 3 or 4 catalog
- Advanced features tricky to locate
- Pricing is a bit confusing
Pricing
Luminar AI is available with a one-time payment from Skylum. It costs $47 for 1 device or a computer. For 2 devices or computers, it costs $59. Every Luminar AI license contains a standalone app and a plugin. You can even get other tools like Luminar Neo and Soulful Panoramas in a bundle plan.
Free Trial
Luminar AI offers a free trial for everyone who chooses to sign up. What you have to do is go to Skylum and hit the “Free Download” button. A download will start instantly after that. Then, move ahead to set up the Luminar AI following the instructions and activate it for free.
Frequently Asked Questions (FAQ)
How to get Luminar AI for free?
To get Luminar AI for free, follow the steps underneath:
- Go to Skylum.com.
- Click the Free Download button.
- The download will start automatically.
- Open the downloaded file (LuminarAISetup.exe).
- Follow the instructions.
- Activate your free trial.
Is Luminar AI worth considering?
In one word if we say, it’s yes! Luminar AI is worth it because it does certain wonders that even professionals with years of experience will find handy and fruitful.
Apart from that, it saves hours of your precious time that you can invest in other productive work. Batch processing is quicker, enhancing photos is faster and the AI does an unbelievably fantastic job of handling some requirements that even seasoned editors struggle to accomplish.
Is Luminar AI better than Lightroom?
This is tricky to answer because it is like comparing an apple with an orange. Both Lightroom and Luminar have their pros and cons.
Someone who is already using Lightroom but desires to migrate to a simpler and easier tool will find Luminar AI to be a stellar piece of software to work with.
But Lightroom’s workflow is way better than Luminar AI and more importantly, the file management system of Lightroom is something incredible. So, it’s important to give it a second thought before making the switch.
Plus, Lightroom has plenty of more benefits to offer than just Presets and a file management tool.
Is Luminar AI better than Photoshop?
Yes and no, we would say. So far, Photoshop has been the leader of the photo editing sector with every other tool failing to compete with it. But in terms of simplicity, Luminar AI can be a cool choice.
Luminar does a whole lot of things well and for those, it gives even Photoshop a run for its money.
But when it comes to holistic editing freedom and the power to do any sort of editing action, Photoshop is still the king of the hill.
Over to You…
We believe that we have covered nearly everything about Luminar AI as promised at the outset of the write-up. Now, the ball is in your court! You have to make up your mind about whether you want to utilize Luminar AI as your photo editing solution.
No product is flawless, as is Luminar AI. We have evidently highlighted the number of benefits you can reap by picking up the tool. Concurrently, we have also mentioned the disadvantages of the tool. If you feel like the pros overshadow the cons, you are good to go with this AI image editing tool then.
We would always recommend you make use of the amazing features of Luminar AI, especially the plugin option for Lightroom. If you use the plugin, you can carry out the basic edits in Lightroom and then open the tool itself to carry out the rest of the editing actions.
So, are you ready to grab Luminar AI? It’s up for grabs in your vicinity!