How to Replace Sky in Photoshop | Fast & Easy Way!

Looking for an easy-peasy way to replace the existing monotonous sky from your photo? It can be a landscape picture, a dawn picture, or even a twilight visual, you can replace any of them with a befitting sky photo. You may be wondering what can be reasons to replace the sky from a photograph.
Well, there can be plenty of reasons to do that. One reason can be an unclouded sky in your image making your entire image dull and boring. So, to remove this dullness in the image, you have to add a spice that can be a sky replacement. If you replace the unclouded sky with a cloudy one, it will surely get the appeal in it.
This is how there can be many other reasons that may prompt you to go for a sky swap of your image. In this tutorial, we will walk you through a step-by-step process to replace the sky from your image. And the best part of the process is you don’t have to have a great deal of technical knack to do that.
How to Replace Sky with Photoshop Using the AI Feature
We will walk you through a step-by-step process of doing sky replacement with the help of Photoshop in this tutorial. To make this tutorial beginner- and advanced-friendly, we’ve covered two techniques.
The first is produced with Photoshop’s new AI feature. That’s why you will need to have the latest version of photoshop in order to follow the first technique. But if you are using the old one, you can skip to the 2nd method.
The second approach is used by most professionals as it gives them more control over the sky replacement process. So, have patience and enjoy the tutorial.
1. Open Your Image in Photoshop

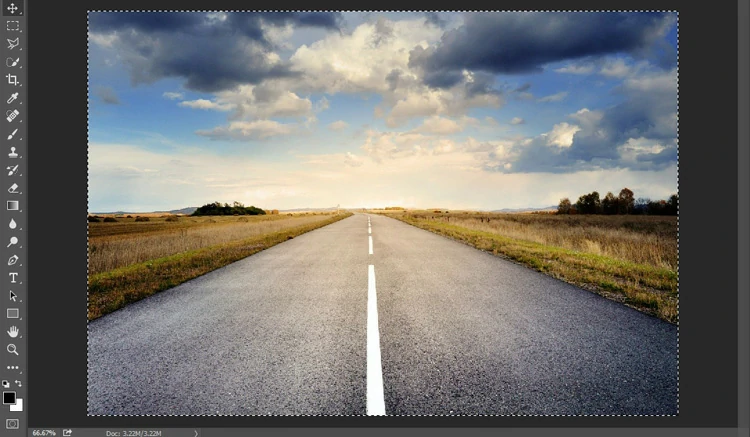
First of all, choose and open an image with an outside view in Photoshop. Make sure the sky is fully visible in the image.
2. Select Sky Replacement

Now, go to the “Edit” tab, find and then click “Sky Replacement” on the menu.
3. Choose Your Preferred Sky

This will pop up a window with a series of different sky designs. Pick and choose the sky you want to use for your image. Keep an eye to select the sky that matches the environment of the image.
4. Adjust the Parameters

Once the sky is selected, you can adjust different parameters of the sky like brightness, temperature, scale, etc. After you are satisfied with the adjustments, hit the “Ok” button.
5. Final Output

Finally, your image will show up with the old sky replaced by the new sky.
Alternative Ways to Replace Sky in Photoshop: Simple Steps
All you have to have is a little bit of curiosity for Photoshop. Don’t worry if you are a beginner as we will show you a super easy technique to swap your existing unwanted sky picture with an appropriate one.
If you are using an older version of Adobe Photoshop, this section of the tutorial will be useful to you. This technique is also a preferable alternative if you want to make your sky replacement look more professional and realistic.
So, let’s begin…
1. Open Your Original Image

First up, open the original image in Photoshop of which you would like to replace the sky. No matter whether it has complex elements or not like land, trees, leaves, mountains, etc.
2. Open Your Sky Replacement Image

Now, go ahead and open the 2nd image which is your sky replacement image. Make sure that both your images have the same dimension (Length × Width) to keep things simple.
3. Select and Copy the Original Image
Now, it’s time to select your original image and then copy it. To do that, hit Ctrl + A (Windows) or Command + A (Mac) and the selection will show up through the edges. Then, press Ctrl + C (Windows) or Command + C (Mac) to copy the image into your clipboard.
4. Paste the Image Into the Sky Replacement Image’s Document

Now, move on to the document of your sky replacement image and paste copied image. For that, press Ctrl + V for Windows and Command + V for Mac. Photoshop will automatically place the original image into its own layer and the sky replacement image into the background layer.
5. Duplicate the Layer Of the Original Image
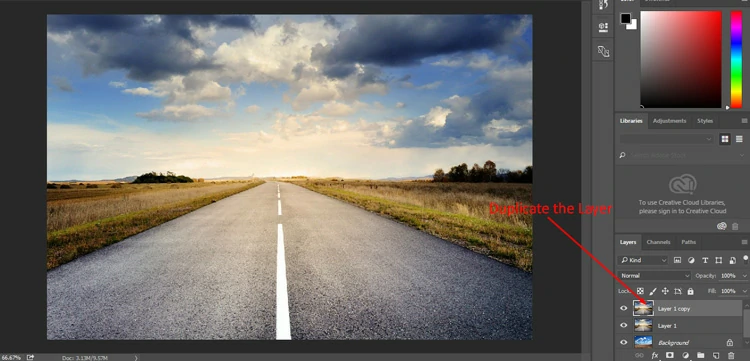
Now, duplicate the layer of the original image as a way to save a backup copy so that you can make the necessary changes later. To do that, press Ctrl + J on your keyboard and the duplicate layer of your original image will appear on top in the layers panel.
6. Select the Polygonal Lasso Tool

Turn off the top layer and select the original layer. Now, you are all set to select the part of your original image that you want to keep protected after replacing the sky. Go to the toolbar, navigate to the Polygonal Lasso tool and click it.
7. Select the Desired Areas

Now, select the preferred areas of your image with the tool gradually. You can be a little loose while selecting if the areas have minute parts otherwise, you have to be careful.
8. Add a Layer Mask
After making the selection, it’s time to convert the selected area into a layer mask. Click the Layer Mask icon at the bottom of the Layers panel. With that, Photoshop will add a new Layer Mask to Layer 1, and from the preview thumbnail, you can view the selected area as white and the rest of the part is black.

The white part denotes the visible area while the black part denotes the invisible area. From the image, you can see the image with replaced sky but it’s not looking picture-perfect yet.
9. Open the Blending Options
Now, if you turn on the top layer, you can see the entire original image as we duplicated it before. Double-click the preview thumbnail of the original layer and the Layer Style dialog box will appear immediately.
From there, click the “Blend If” drop-down menu and select “Blue”. Also, there are 2 sliding bars at the bottom of the dialog box. After you changed the Blend If color to blue, the sliders of the sliding bars also changed to white.

Drag the slider of the top bar on the left and the original sky will start disappearing and the replacement sky will start appearing. You can ignore the bottom sliding bar.
10. Adjust the Transition Between the Photos
Now, release the slider for a while, then press and hold the Alt key for Windows and the Option key for Mac. With the Alt key held down, click the slider back and drag it towards the left.

This will split the slider and you can easily adjust the softness of the transition between the photos easily by adjusting the two halves of the slider.
Final Output Using Manual Technique

Finally, you are done!!! The sky is replaced from your original image as you can view from the image below. The new sky is added with complete perfection.
You may also read- How to Blend Colors in Photoshop
Wrap Up
That’s all we had in this tutorial for you. Hopefully, you enjoyed every bit of this step-by-step tutorial. Until we meet next time with another electrifying tutorial, just chill and enjoy your time!!!