How to Smooth Skin in Photoshop

Smooth skin of a photo has always been a tricky job in Photoshop. If you overdo smooth the skin, the face will look artificial. If you barely smooth, the blemishes will still be visible. Neural Filters are a completely new solution to the problem.
Standard Photoshop Neural Filters employ AI to recognize facial features and carry out skin smoothing in a manner that supports skin’s natural texture, lighting, and detail. Instead of learning complicated techniques such as frequency separation or heavy dodge and burn, you can get clean and natural results with only a few clicks.
Here, we are going to show you how to smooth skin in photoshop using Neural Filters as a photo retouching service, the situations for which such filters are suitable, and cases when you need to fine tune the results manually. If you are working on portraits, fashion photos, or social media pictures, this process will allow you to maintain realism and professionalism of the skin while saving time.
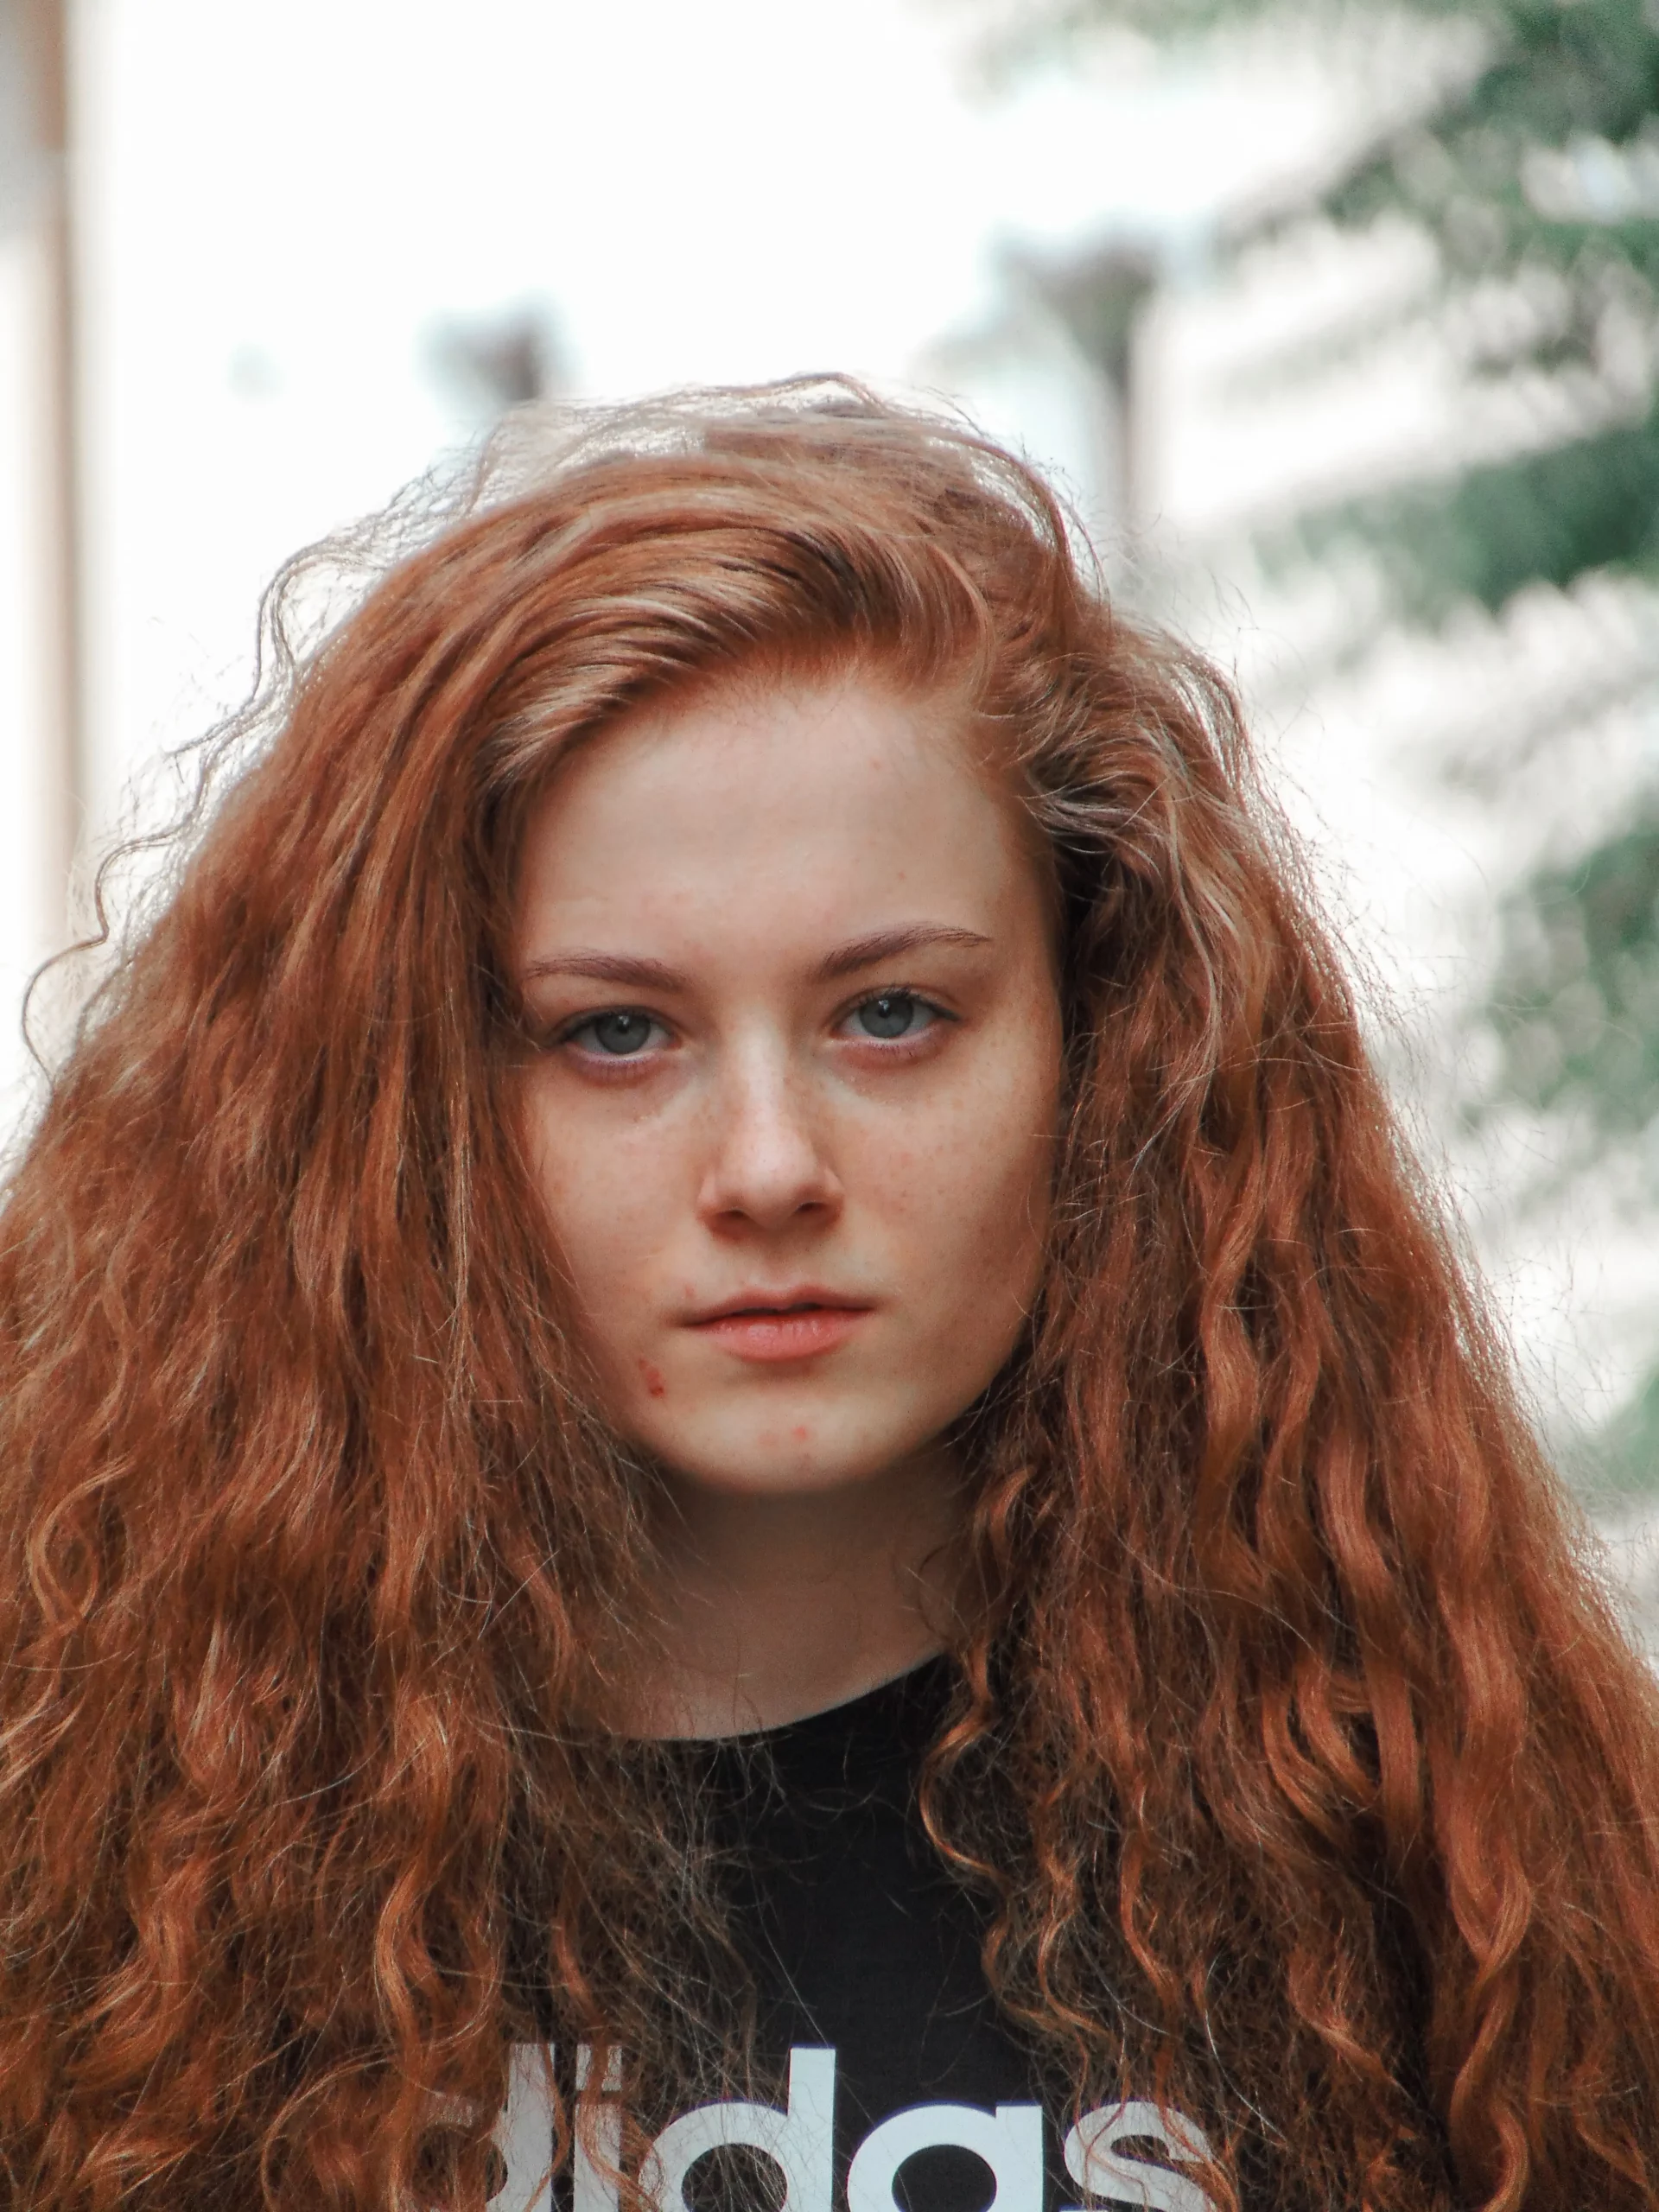
Now we will work on this photo to describe how to smooth skin in Photoshop.
Neural Filters (Easiest & Fastest):
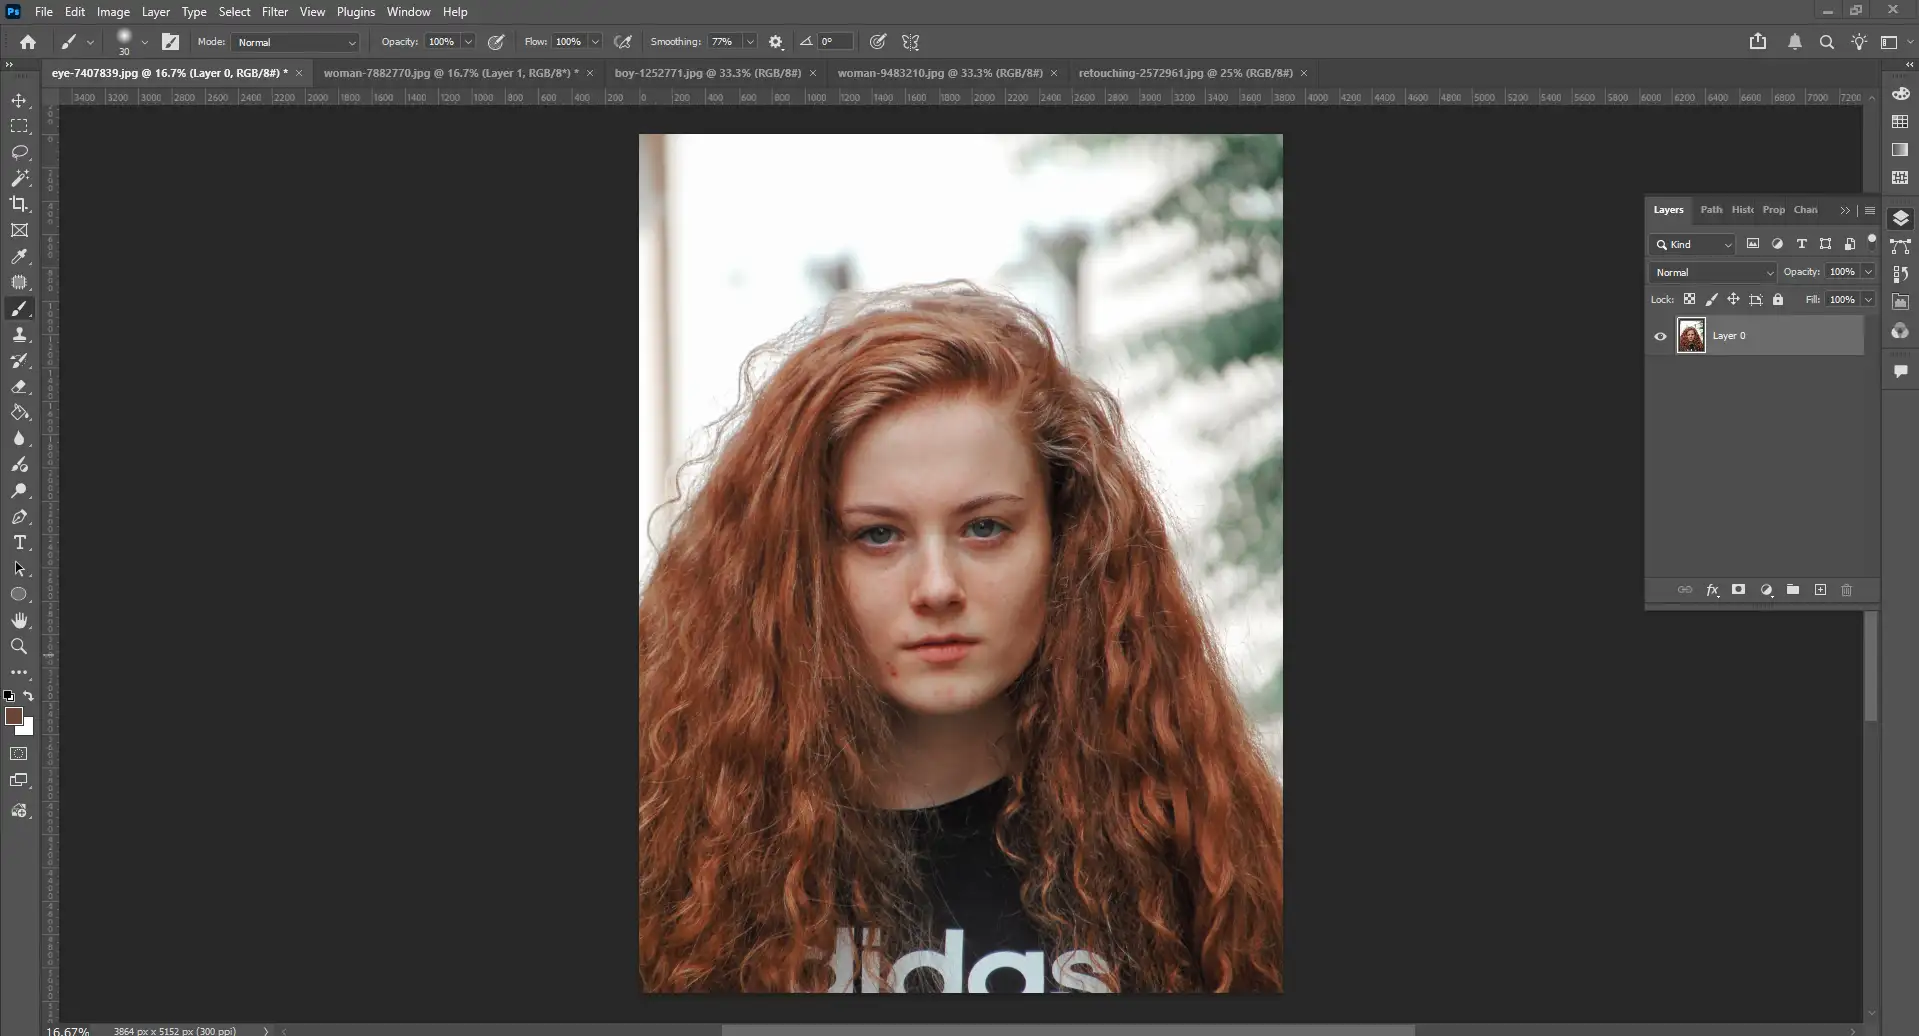
Open your selected image in Photoshop. Choose the image that has spots, acne, pimples, and blemishes. Such image is perfect for skin smoothing in Photoshop.
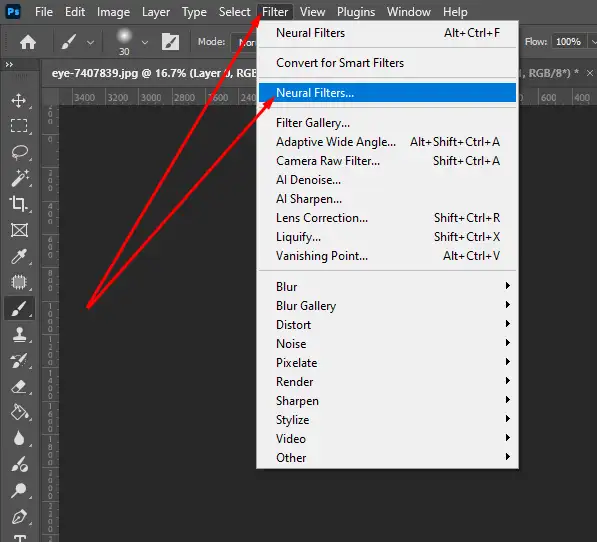
Go to Filter option from the top bar of the Photoshop software, click on the Neural Filters and select Skin Smoothing.
Adjust the Blur (approx. 65) and Smoothing (approx. 20) sliders as your image needs from the right side.
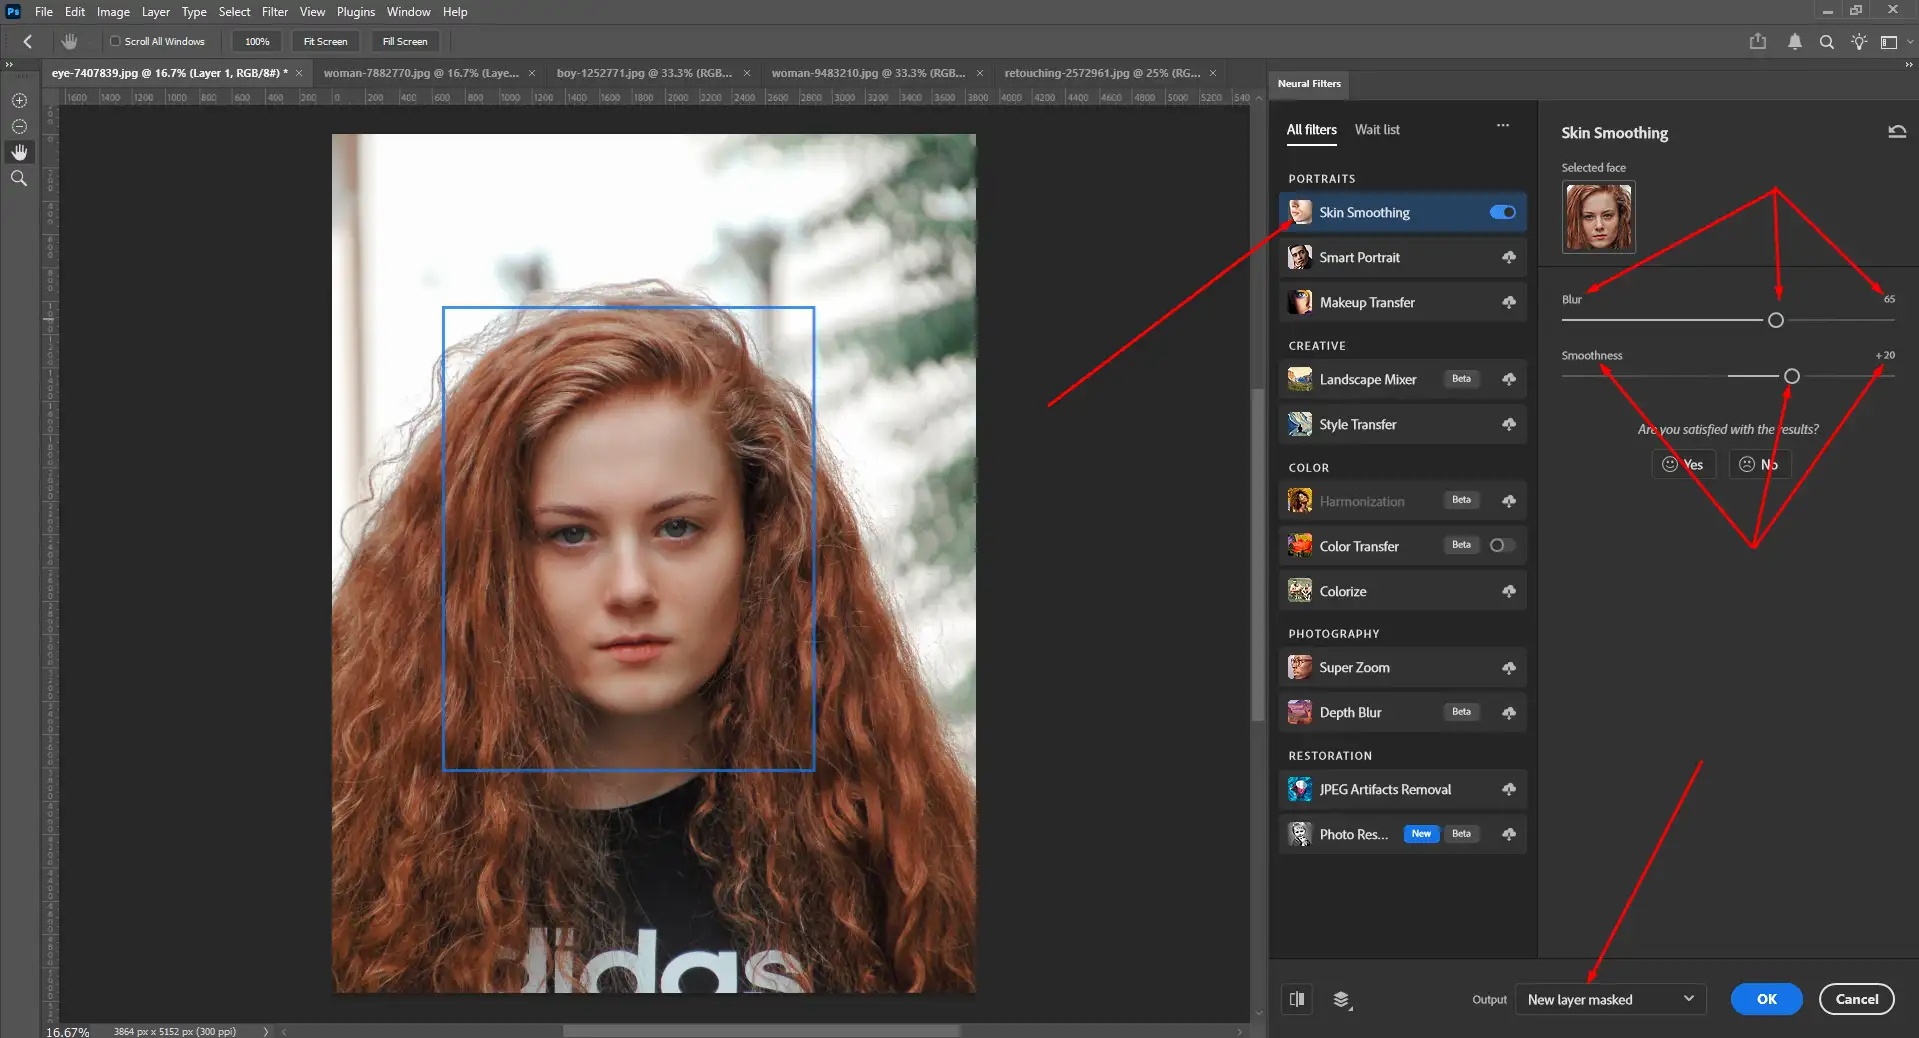
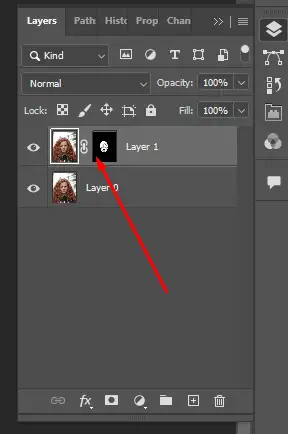
Select “New Layer Masked” for output to keep the edit non-destructive. Look at the bottom from the right panel (if you struggle to get the option).
Final Output. The image below is the result of our experiment.
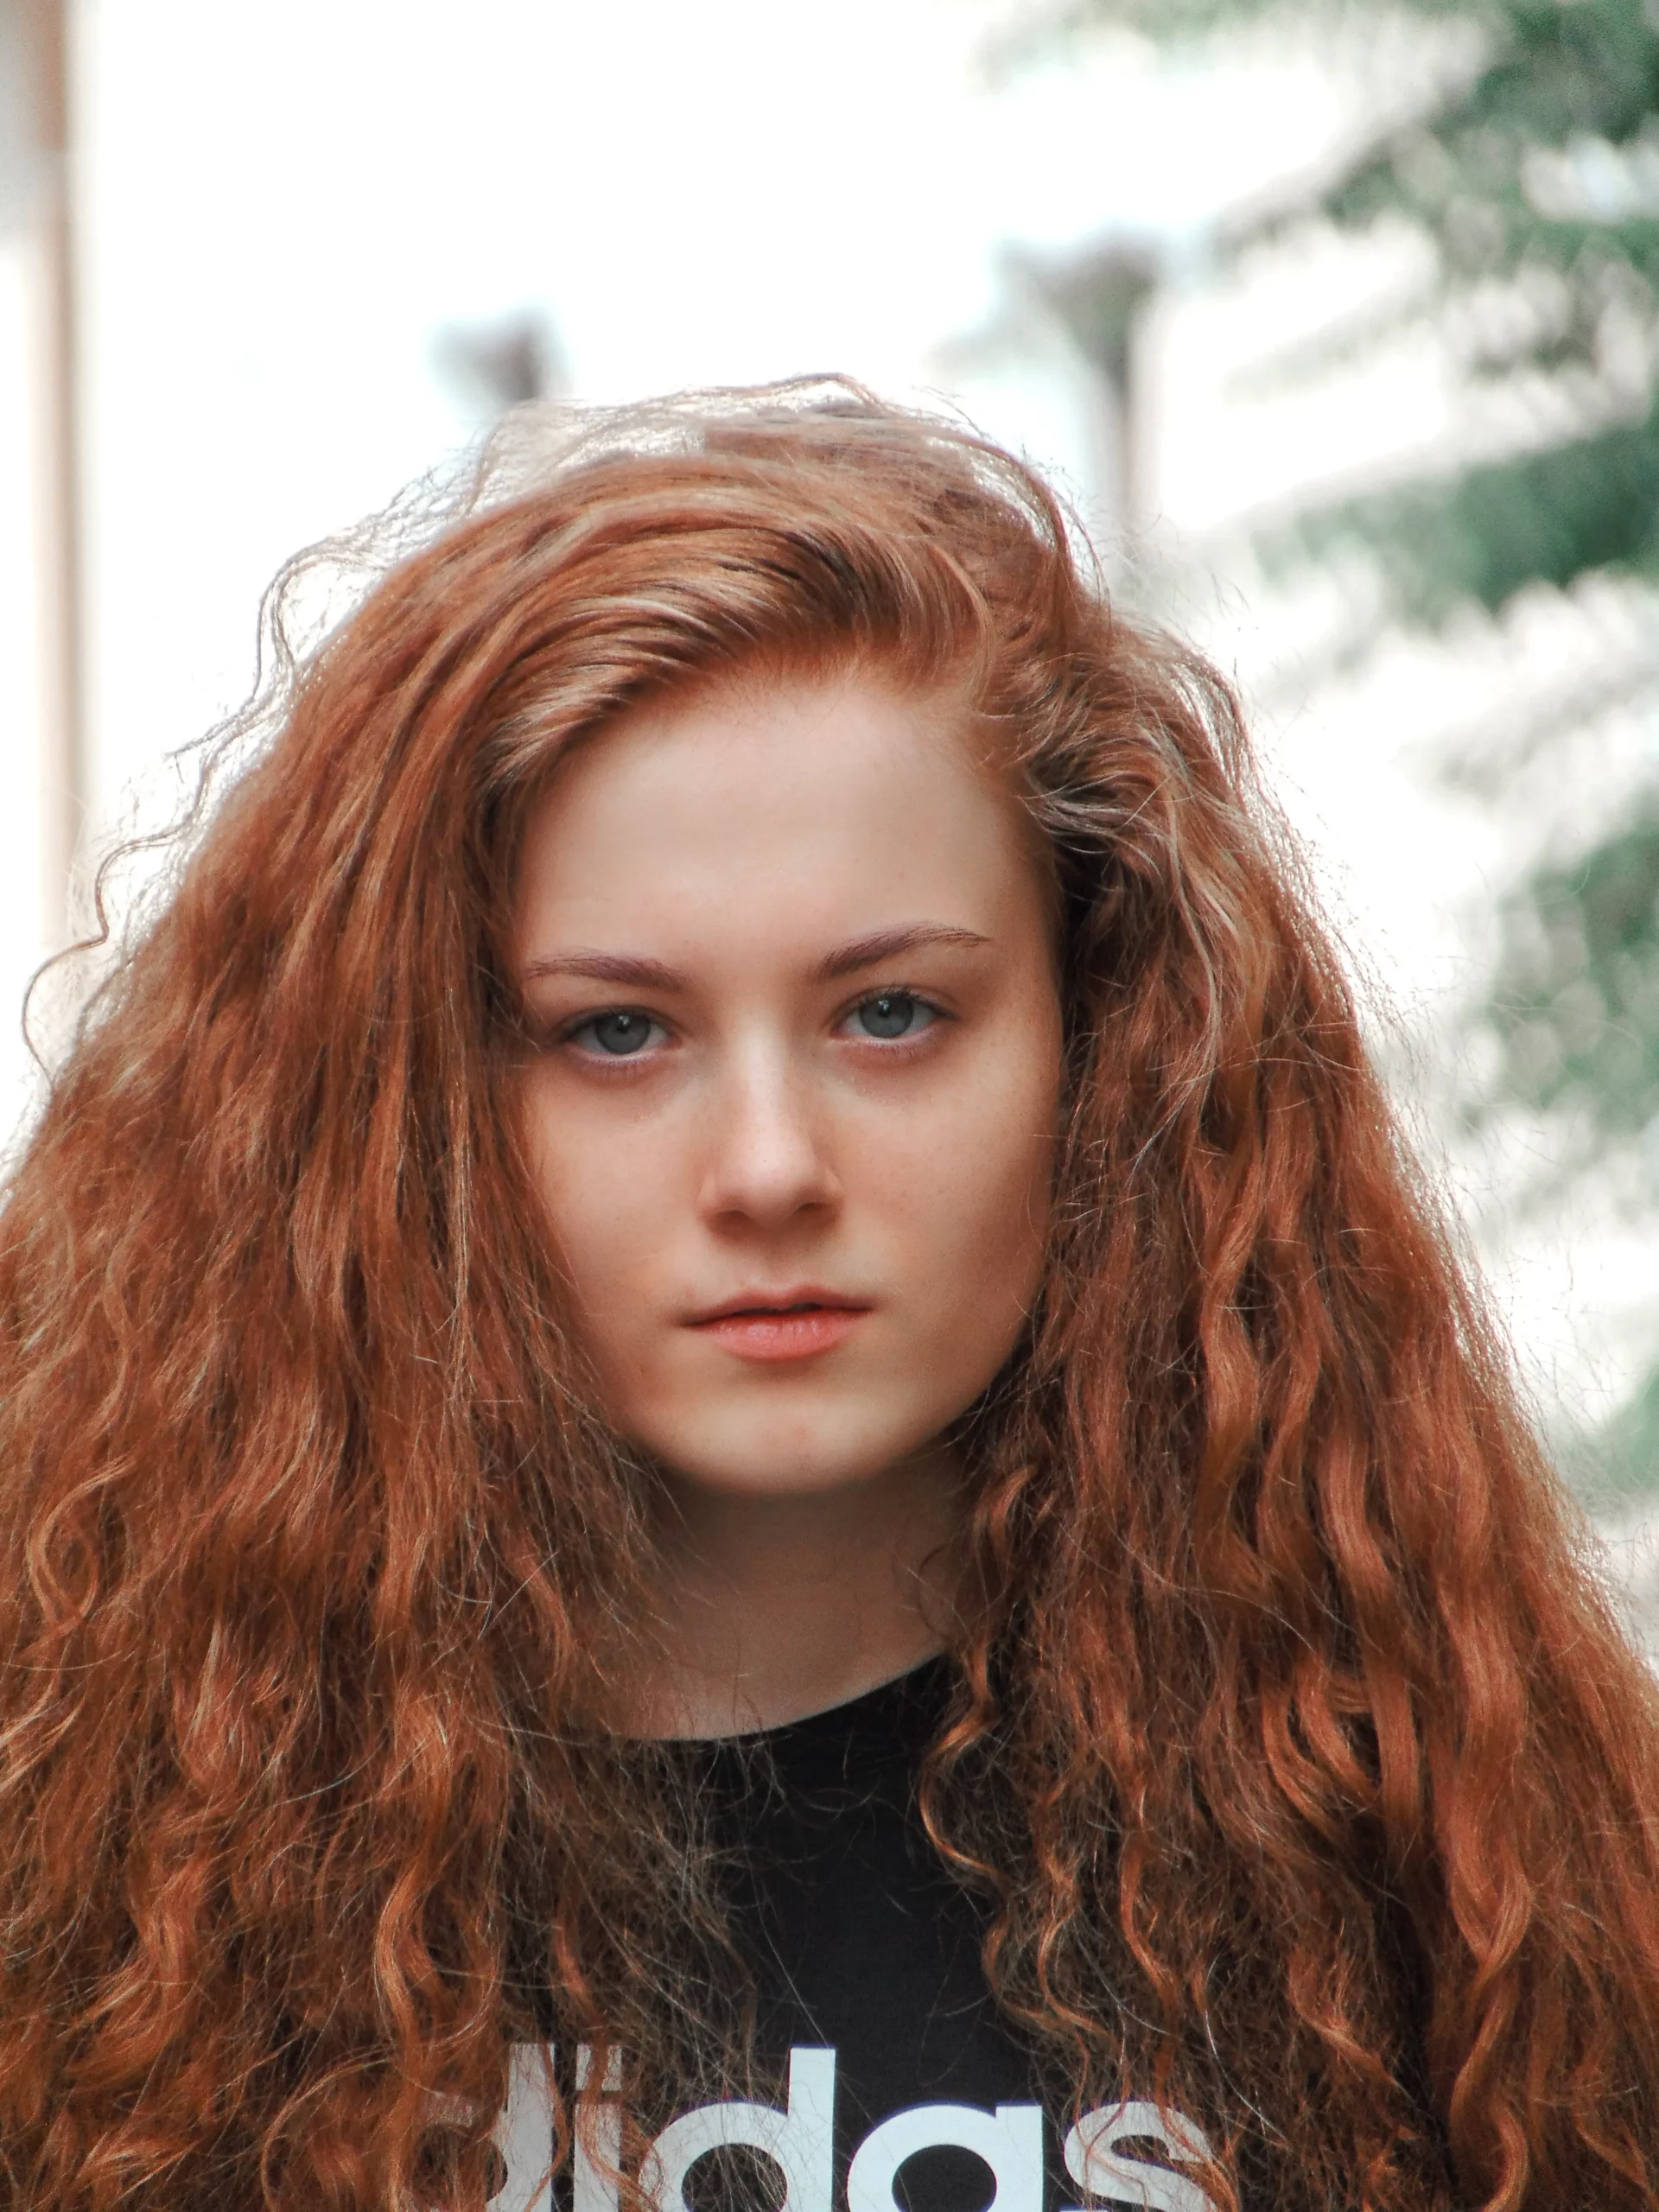
Neural Filters have revolutionized the skin smoothing process in Photoshop by making it quicker and more user, friendly. By barely setting up, you can easily get rid of blemishes, smooth the skin, and still keep the natural appearance of the skin without completely losing the skin texture or spending lots of hours on manual retouching.
However, Neural Filters are most effective when used as a base for work rather than totally replacing traditional retouching. For example, in the case of high, end portrait or commercial photography, the combination of AI, based smoothing and manual touch, ups can bring the most reliable and publish, ready results.
If you are after a neat, trendy skin retouching that is highly efficient, Photoshop’s Neural Filters are definitely a good choice to be included in your workflow just keep in mind that slight changes always lead to a more professional look.
Photoshop Neural Filters
Photoshop Neural Filters are AI, powered smart tools integrated into Adobe Photoshop, which can quickly and intelligently handle complicated edits. Operating with Adobe Sensei, these filters apply machine learning techniques to understand pictures and create new pixels where necessary thus, skin retouching, portrait modifications, and applying artistic effects can be done a lot quicker as compared to the conventional methods.
You are able to get to Neural Filters via Filter > Neural Filters within Photoshop. Most of the filters will only update once from the cloud before you can use them, since the AI models are operated by Adobe’s cloud system.
One major benefit of Neural Filters is that they allow non-destructive editing. Rather than permanently changing your picture, you can use Smart Filters or new layers to apply effects, change them later, and adjust the outcome with the sliders and masks. Thus, Neural Filters are the perfect solution to quickly execute your workflow without compromising on the control or the quality.
Features and Common Uses
Skin Smoothing:
It reduces blemishes, uneven skin tone, and shine. While working, it preserves natural texture. Its adjustable sliders will allow you control smoothness and intensity for realistic photo editing results.
Smart Portrait:
One can change facial features like age, expression, the direction of head, and eye location by AI, based sliders for the face.
Makeup Transfer:
Transfers the makeup or lipstick color from one picture to another, thus facilitating a quick and easy way to reproduce a certain style.
Style Transfer:
Changes the visual style of photos to those of art pieces, can be used for artistic experiments or for generating a concept.
Photo Restoration:
Does old or damaged photos good by getting rid of scratches, bringing out details, and generally making the pictures look better.
Landscape Mixer:
Alter the season, the time of day, the light, or the land features in the outdoor pictures through AI, supported realistic effects.
Non-Destructive Editing:
Supports Smart Filters and new layer outputs, allowing edits to be adjusted or removed at any time.
Masking and Refinement Controls:
Built-in masks let you apply effects only where needed and refine results manually.
Slider-Based Controls:
Simple sliders make advanced edits accessible without complex Photoshop techniques.
Cloud-Based AI Models:
Neural Filters use downloadable cloud-powered AI models. These models ensure consistent and updated results.
Workflow Speed Optimization:
Significantly reduces editing time for common tasks like skin retouching, portrait correction, and creative experimentation.
How to Use Neural Filters in Photoshop
- Open your image in Photoshop
- Go to Filter → Neural Filters
- Download any filters marked with a cloud icon (required for first-time use)
- Select a filter and adjust the sliders and controls in the panel
- Choose an output option such as Smart Filter or New Layer for non-destructive editing
- Apply the effect and fine-tune as needed
Why Use Neural Filters?
Faster Workflow
Neural Filters significantly cut down the time it takes to perform complicated editing tasks such as skin retouching or portrait adjustments.
Creative Flexibility
One of the benefits of using them is that you can try out various looks and styles very quickly without making any permanent changes.
Non-Destructive Editing
By applying Smart Filters or adding new layers, you can always go back and modify your edits at any point in your work.