How to Fix Blurry Photos Induced by Camera-Shake in Photoshop

A detailed and sharp image is desired by everyone everywhere, but due to many reasons your best photos may get blurred and it can be fruitless. To fix such an issue, Adobe Photoshop CC has introduced an intelligent mechanism that automatically reduces image blurring resulted from camera shake. It also offers some other options that allow you to adjust advanced settings to perfect your blurred images. The Shake Reduction filter in the Filter menu is an excellent tool that can reduce blurring from images.
Types of Camera Shake Movements
Camera movements or shake can influence the pixels in a photo. There are many ways a camera can shake and can make blurry pixels. But, the good news is, Adobe Photoshop CC’s Came Shake Filter can fix an image that is induced by:
1. Linear motion,
2. Rotational motion,
3. Arc-shaped motion, and
4. Zigzag motion.
Let’s dive deep into how they might look. One caution though, we have used extreme examples of camera shake for you to easily understand the difference. These photos might not be fixed into their original pixel with this Photoshop CC feature. To understand the type of Camera Shake Movement, just observe how the pixels got spread or smudged.
Linear Motion Camera Shake
When the pixels of the images get spread out in a single line, it is called a linear camera shake. In the below image, you can observe that the pixels are smudged in a straight line (diagonally, either up or down).

Rotational Motion Camera Shake
When the camera shake induced in a circle, you get a Circular Camera Shake. This is obviously rare, but this also can happen. You can see smudging of pixels in a circle.

Arc-Shaped Motion Camera Shake
When there is a bit of rotational motion of the camera but do not create a full circle, you get the pixels spread into arches. This makes an arch-like smudging motion in the picture.

Zigzag Motion Camera Shake
If your camera shakes in both horizontal and vertical directions, you get a zigzag motion in the camera shake picture. In the photo below, you can see pixels have been smudged in both horizontal and vertical directions and creating a zigzag line.

How to Fix Camera Shake Photos
Decently lit still camera photos containing low noise are best for working with a camera shake reduction filter. According to Adobe, the following three types of images are suitable for shake reduction:
- Images taken by a lens with a long focal length.
- Images of a static scene captured with a slow shutter speed without flash
- Blurred text in photos.
Use of Automatic Camera Shake Filter
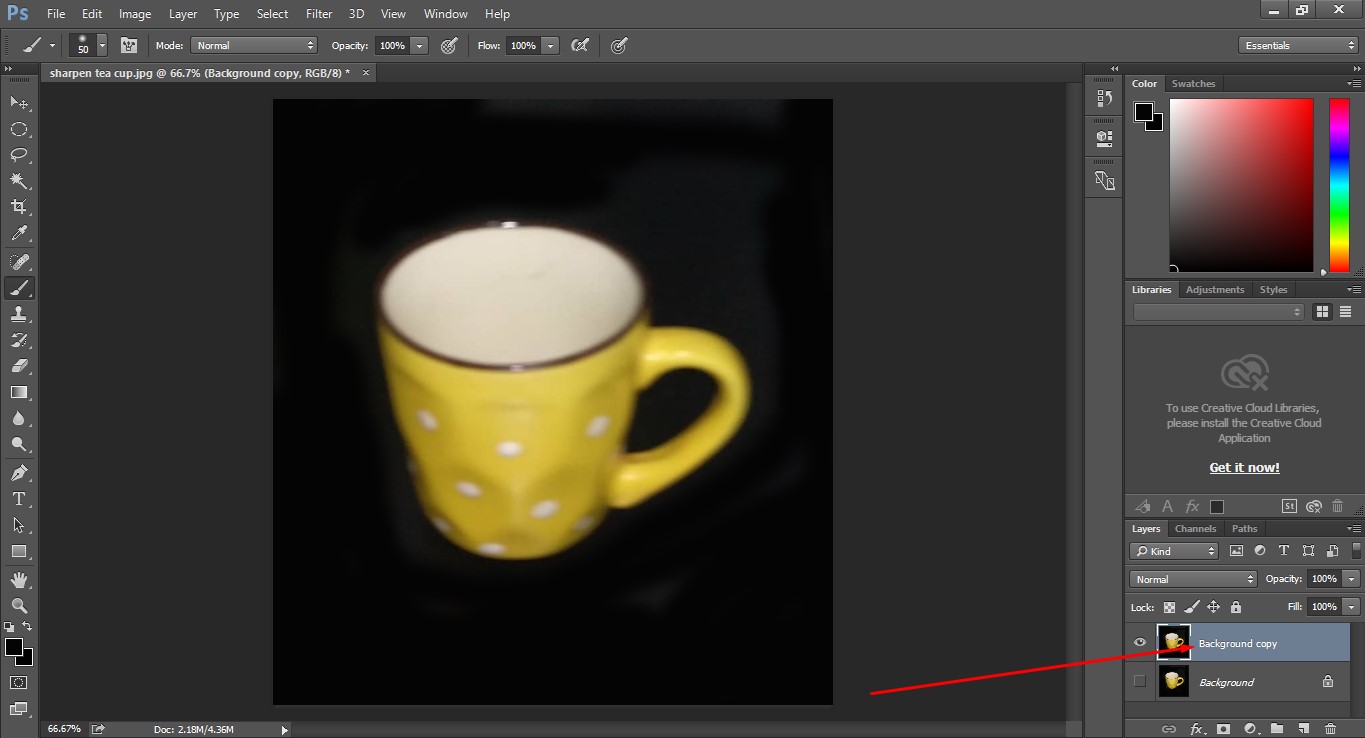
- Open your subject in Adobe Photoshop CC (because only Photoshop CC has a Camera shake Filter) and duplicate the image layer.
- Click on Filter You will get a dropdown menu and click on Sharpen. Select Shake Reduction from the submenu.

[Filter > Sharpen > Shake Reduction]
- While clicking on the shake reduction, your subject will get a reduced camera shake automatically as is defined by the Photoshop algorithm. If you are satisfied with the result so far, then save the images. But, if you feel further retouch for sharpness, there are a lot of slides that allow doing so.

- If you need, retouch further using the slides that the image shows below.

- Your photo may demand more photo retouching. So, go to Filter again and click on the Camera Raw Filter (Shift + Ctrl + A).

- A preview box will appear with a lot of retouching options that allow you further image retouching.

Use Multiple Blur Traces
Blur traces represent the shape and extent of the blur. It is used to select the region where it is a blur in an image. There may have various shapes of blur which automatic camera shake reduction cannot trace because it works best on just the default region which is determined by Photoshop itself. At a time you can use multiple blur traces to sharpen multiple regions. You can also resize and change the focus point. You will get your used traces are listed in the Advanced panel under the Shake Reduction dialog.

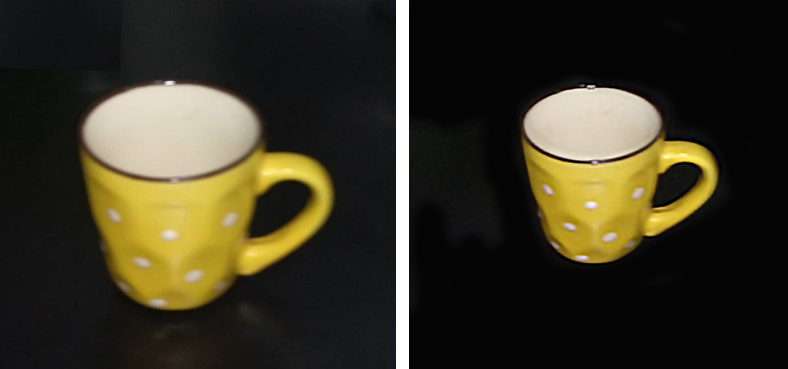
Before and After (Final Output)
Anyway, if you cannot remove the camera shake using Photoshop by yourself, don’t be frustrated. We are here providing all types of camera shake reduction services. We are also offering all types of professional image editing services at the best prices for eCommerce business owners, photographers, printing industries, and many more. We have a well-decorated in-house production set up with the latest photo editing tools and gears and experienced graphic designers.
They are doing high-end quality image manipulation within time. Our top-notch customer care unit is always ready to help you providing any service related information. You’ll get a 50% discount on bulk image editing orders that will help to reduce your cost. We are also offering Free Trial which allows you to judge our overall service quality.