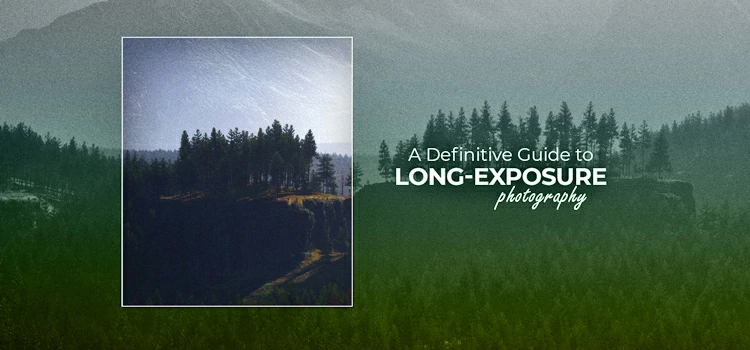
A Definitive Guide to Long-Exposure Photography
The world of photography is vast letting you experiment with a myriad of stuff. After learning about basic photography skills, most photographers tend to try something more innovative to take their pictures to an advanced level.
Now, how about capturing a scene that you could watch for a while with your eyes wide open in just one shot? Sounds exciting, right? That’s exactly the idea behind taking long-exposure photographs.
Long-exposure photography is one of the creative techniques which is generally acknowledged as a thrilling genre of photography. This method of camerawork may seem to be a bit challenging at first but with proper knowledge and guidance, you can grasp this category quite easily.
In this article, we will provide you with a definitive guide to long-exposure photography which will help you learn all the essentials to begin with as well as master the technique. Interested? Let’s dive into it right away!
Long-Exposure Photography Explained:
Now, what does long-exposure photography precisely mean? It’s just as the name specifies, the photography technique that involves capturing images for a long extended period in which the camera’s shutter speed slows down.
That’s why long-exposure photography is also often known as time-exposure/slow-shutter photography among photographers. This technique simply lets you enhance your images by displaying them highlighting the details without any post-processing.
Using this method photographers are able to make pouring or overflowing water appear soft and smooth with more texture.
Ferris wheels, painting with lights, flawless fireworks, spectacular sunrise/sunset, traffic light trails, star trails, etc. are some more examples of long-exposure photography.
Categories of Long-Exposure Photography
There are many types of long-exposure photography. Depending on the time of the shooting, you can mainly classify it into day and night categories individually. Now, let’s get some photography ideas from both categories.
1. Long-Exposure Photography during the Day
Shooting long-exposure photographs in the daytime can be quite a bit of a challenge because of the excessive amount of light. Too much light and brightness can lead to overexposed pictures. That’s when the Neutral Density/ND Filters come to the rescue.
Some photography ideas for daytime long exposure are given below-
- Waterfall Shots
- Cloud Shots
- Beach Shots
- River, Lake, & Creek Shots
2. Long-Exposure Photography during the Night
Photographing at night mostly refers to long-exposure shooting. Because the shortage of light requires you to keep the shutter unlocked for a lengthy period of time in order to let the sensor receive more amount of time.
Here are some night time long exposure photography ideas-
- Milky Way
- Star Trails
- Northern Lights
- Urban Shots
- Light Painting
- Car Light Trails
*You may also read– Underexposure Vs Overexposure in Photography.
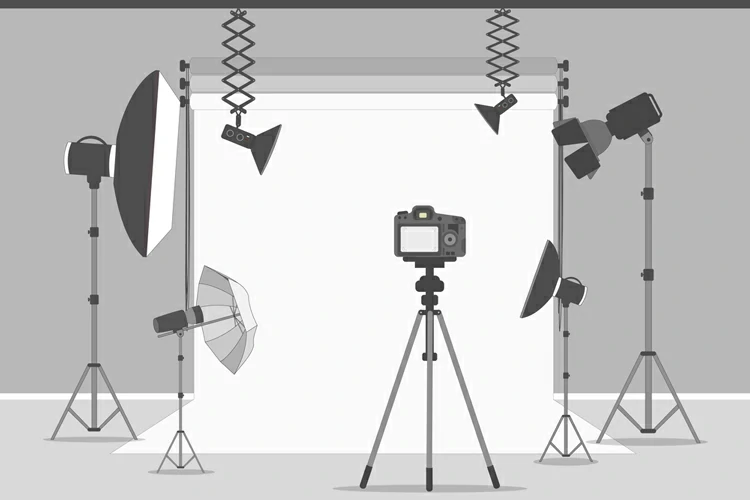
Essential Equipment for Long-Exposure Photography
It is important to collect all the essential pieces of equipment required for shooting long-exposure images. Although you can click great photographs with whichever camera you want, however, for long-exposure photography some tools are a must.
Here’s a short list of all the equipment you need-
- Manually functional camera
- A strong tripod
- Lens
- Remote shutter
- Neutral Density or ND filters
- Headlamps
Step-by-Step Strategies for Long-Exposure Photography:
Once you have all the essential equipment, you are all set to jump to capture long-exposure photographs. To receive the best outcomes, you need to follow each step meticulously mentioned below-
Step 1: Learn about the Weather Conditions

The first and foremost task to do before moving on with shooting long-exposure pictures is learning the weather conditions of the day. The weather can solely determine the pattern of long-exposure photography in most cases.
To be more precise, if you know about the weather being overcast you could include partially or mostly cloudy, or even dark & shady skies to have dazzling, attention-grabbing skies in your long-exposure photographs.
On the other hand, capturing smooth skies or texture-less clouds in your photographs can make you lose the effect of the long exposure and you would probably end up getting just a dull shot. So, avoid these scenarios to get the best influence of long-exposure photography.
Step 2: Visit the Site Beforehand
In long-exposure photography, everything appears somewhat different compared to how it’s seen with the naked eye. Therefore, to capture the perfect shot, you need to visualize the scene in your mind with long exposure.
For instance, imagine the presence of clouds moving around or the power of the ocean. This will certainly help you capture the perfect picture in long exposure when you are actually shooting it.
Hence for the best outcome during your long-exposure photo-shooting, you ought to visit the site of your pre-set location in advance.
You should think through the scenarios you would be dealing with. Think about the moving objects such as water, clouds, birds, or anything else that exists out there. You can shoot some long-exposure snaps as a test and get an idea of their movements.
Step 3: Place the Gadgets in a Proper Position
Since long-exposure photography is not really about exceptional kinds of stuff, you don’t need any extraordinary camera. You can use the maximum digital cameras that are existing. The newest smartphones can also get your job done as well.
However, what you do need to keep in mind is you should get a camera that is manually functional. As a result, you will be able to adjust several settings of the camera like- shutter speed, ISO, and aperture according to your requirements.
Now another crucial tool that you need for long-exposure camerawork is a strong and steady tripod. Lacking a tripod can lead to blurred shots which will ruin your photographs no matter how powerful your camera’s image stabilization is!
A tripod will securely hold your camera throughout from five-second to the utmost ten-minute of exposure. That’s why you should purchase a sturdy and good-quality tripod that can even resist substantial wind.
After you have got your camera and tripod equipped, you would want to place the camera on your tripod. Then add any relevant devices (just in case you intend to use any), for example- the filter holder, headlamps, etc. in front of the lens.
Step 4: Set the Camera’s Exposure
Now it is time to set your camera’s essential settings. At the outset, adjust the camera’s mode to Manual or Aperture Priority and its ISO to the lowest in-built value (possibly ISO 50/100/200) of your camera.
Next, depending on the scene decide on a suitable value for the aperture. For landscape shots, we suggest choosing between f/8 & f/11. As for the shutter speed, go along with what your camera recommends, and click a couple of test shots.
To know if you have selected the right exposure for your test shots you can review the end results on your histogram. Once you get accurate exposure, set the shutter speed accordingly and keep taking snaps till you get your perfect shot.
After having a successful test shot, note down the value you used as shutter speed for that photo to work with it afterward.
Step 5: Compose the Picture and Set the Focus

To create a mesmerizing image, it is important to have a solid composition both in general photography as well as long-exposure or slow shutter speed photography.
Hence, once you are done with the placement of the tools for shooting photos, it’s time to move on with the enhancement of the composition and then set the focus.
Mostly, from the forefront to the background, photographers want to preserve the sharpness of the whole shot.
So make sure you keep your focus at a hyper-focal distance, which is approximately one-third way to the scene. You can also take the help of a depth-of-field calculator if you can’t figure out where exactly to keep focus.
Thus, you can set your camera’s lens focus loop just accurately wherever you want to.
Step 6: Add the Filter
When you carry out your shoot in darkness and prefer relatively less lengthy exposure like- in the range of five to thirty seconds, you can skip the filter. However, mostly while shooting a long-exposure photo, using a filter seems more appropriate.
Filter produces a better result especially when you are doing your photography in the daytime. So, we would recommend adding one. Therefore, you can add an ND (Neutral Density) filter at this stage.
Step 7: Turn On the Bulb Mode

If your camera has the option of Bulb Mode, we suggest you turn it on. As a result, it lets you brush aside the camera’s 30-sec shutter speed limitation.
In case your filter is not that much of dark or you are doing your photo shoot in a brighter zone with strongly effective light, you may skip this step and move on to the next one.
Step 8: Estimate the Accurate Shutter Speed
At this point, you are almost done. All that is left for you to ensure is to conclude what shutter speed is perfect for you, which involves a simple estimation.
Now let’s reverse to Step 5 a bit. Adjust the shutter speed with the value you noted back then from the test shots. You need to adjust it matching with the number of your filter’s stops if you are using one. If not, you drop the shutter speed at zero stops.
Nevertheless, in case you are struggling while working with the adjustment of your shutter speed and filter stops, don’t get anxious. You can download apps like PhotoPills and Long Exposure Calculator from the internet to get your conversion done in a jiffy.
To give you an idea, let’s consider the app Long Exposure Calculator. It can calculate the newly inserted shutter speed mechanically. You only need to put your shutter speed value and the Neutral Density or ND filter stops that you are using. Ta-da! It’s done!
Step 9: Apply Shutter Speed and Click Long-Exposure Photo

As soon as you are done calculating your new shutter speed, you need to make sure about applying it appropriately. If the duration of your shutter speed is less than thirty seconds, you will be able to adjust it as you usually would.
But if the duration is more than thirty seconds, you ought to use a remote shutter. The using method of a remote shutter varies from camera to camera. In some cameras, the system is to click once while you start taking a picture and again for a second time to close the exposure.
For some other cameras, you have to keep holding the shutter key until you want the exposure to end. In such cases, a remote shutter with lockup modes is much preferred. At last, when you are ready, click your shot!
Step 10: Check Out the Histogram Once More
After you have taken your final shot, check out your histogram again as an ultimate precaution. Now depending on the new analysis of your histogram, you can know whether you have succeeded or failed.
If it’s nearly equivalent to your previous test shot, the mission is done! If it’s moved too far off to the left or right direction, you need to redo the shot all over again along with adjusting your shutter speed suitably.
Wrapping up
Long-exposure photography is thrilling and visually appealing at the same time. It aims to capture stationary objects in a scene while blurring the moving objects to bring out photography masterpieces.
Understanding the concept of long-exposure photography is mainly the mixture of knowing the theory & basics and then putting it all into action. It takes dedication, time, effort, and patience to master this technique.
Besides, long-exposure photography allows you to learn to view things in your own way. As a result, you can keep doing new experiments the more you work on it to showcase your talents and creativity.
So, this blog rounded up sequentially: composition building, settings adjustment, filter usage, shutter speed estimation and application, clicking the shot, and finally checking it on the histogram.
So what are you waiting for? Get your backpack and start visiting sites to practice! Make sure you follow the guidelines of this article step-by-step while practicing.