Mastering the Art of Natural Light Photography

Natural light is a useful and free resource for photographers. It is always available. You can use it to enhance portraits, landscapes, and everyday snapshots.
Great natural light photography takes practice, timing, and creativity. You don’t need expensive gear or a studio to start. Just use your camera or phone and look for good sunlight.
Learn natural light photography basics and try our expert tips and creative ideas today to take stunning, professional images.
What is Natural Light Photography?
Natural light photography relies on sunlight instead of flashes or studio lights. It uses available light, like sunlight through a window or the warm glow at sunrise and sunset.
Natural light changes with the seasons as the sun moves through the sky. This shift gives photographers a canvas full of options. Embrace it and master capturing those changing colors!
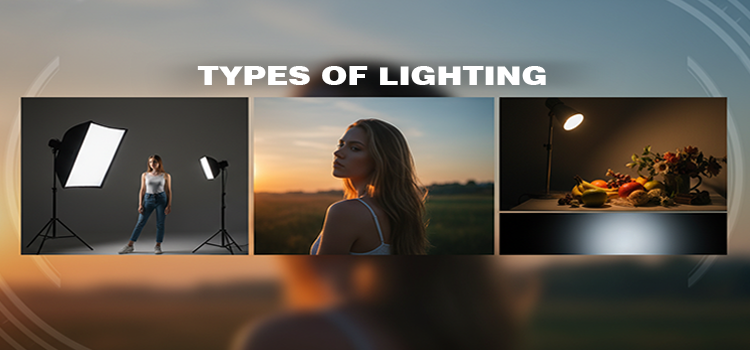
There are different types of photography light you’ll come across:
- Direct sunlight: Strong and bright. It creates bold shadows and high contrast.
- Diffused light: Soft and even. This light appears on cloudy days or in shaded areas.
- Golden hour: Warm, soft light right after sunrise or before sunset. It’s perfect for portraits and dreamy photos.
- Blue hour: Cool, dim light just before sunrise or after sunset. It’s great for moody or dramatic shots.
Why Choose Natural Light?
Natural light is an easy and effective way to improve your photography. You don’t need costly gear or a big budget—just the sun and some awareness. Here’s why many photographers love it:
1. It’s free and always available
No need to buy or carry extra lights. Light is already available, whether you shoot indoors by a window or outside in a park. You just need to know how to use it.
2. It gives your photos a natural, authentic look
Natural light gives softer, more realistic tones than artificial light. It adds warmth and depth, especially during golden hour or cloudy days.
3. It challenges your creativity
Natural light changes all the time, so you adapt. This helps you become a better photographer. You notice details such as shadows, reflections, and light touching your subject.
4. It works beautifully for many types of photography
Natural light enhances many styles, including portraits, food, travel, and nature. It creates atmosphere, evokes emotion, and tells a clear visual story.
5. It reduces editing time
Good natural lighting means fewer adjustments during post-processing. You’ll often find that your colors and exposure already look great from the camera.
Best Times of Day to Shoot
Natural light photography depends on timing. Sunlight quality changes throughout the day, affecting mood and challenges. Know when to shoot to improve your photos.
Golden Hour (Just after sunrise and before sunset)
Photographers love this time of day. The warm, soft light makes everything look stunning. Long shadows create a golden glow. It’s ideal for capturing portraits and landscapes.
Blue Hour (Before sunrise and after sunset)
The sky looks best at sunrise and sunset. The light is soft and low-contrast, which is great for taking moody, dramatic photos. It also works well for cityscapes, street photography, and creative silhouettes.
Midday (10 a.m. to 3 p.m.)
Shooting at midday can be tough. The sun is high and harsh. It makes strong shadows and can wash out colors. However, don’t avoid it completely. You can still get great results. Find shade, use reflectors, or shoot indoors near diffused light, like windows.
Cloudy Days
Cloud cover acts like a large diffuser. It softens light and reduces harsh shadows. This makes cloudy days ideal for portraits, product shots, and well-lit outdoor scenes. So, don’t skip your shoot if the sun’s hidden. It could be the perfect time for soft, balanced photos.
Key Techniques to Master Natural Light
Use natural light effectively by understanding how it behaves and shaping it to match your vision. Here are the key techniques to master natural light photography.
1. Position Your Subject Carefully
Where your subject stands about the light source makes a big difference. Try these setups:
- Front lighting (light behind you): Creates bright, evenly lit images with fewer shadows. Great for simple, clean looks.
- Side lighting (light from the left or right): Adds depth, drama, and texture. Perfect for portraits, food, or still life.
- Backlighting (light behind your subject): Creates a soft glow or halo effect—ideal for dreamy portraits and silhouettes.
2. Use Shadows Creatively
Don’t be afraid of shadows—they add dimension and mood. Play with them to create contrast or mystery. For example:
- Use window blinds to cast patterns.
- Position your subject half in light and half in shadow for a dramatic effect.
- Try black-and-white editing to make the most of bold shadows.
3. Diffuse Harsh Light
Direct sunlight can be too strong, especially at midday. But you can soften it:
- Use natural diffusers like clouds, sheer curtains, or tree branches.
- Carry a portable diffuser or white sheet to create soft, even lighting.
- Shoot in shaded areas to avoid blown-out highlights and squinting subjects.
4. Reflect Light to Fill Shadows
When the shadows are too deep, bounce some light back onto your subject:
- Use a white wall, reflector, or foam board to reflect sunlight.
- Even a simple white T-shirt or aluminum foil can help in a pinch.
- Position your reflector opposite the light source to lighten shadowy areas and balance the exposure.
5. Move Around, Don’t Just Zoom
Sometimes, a small step to the left or right can completely change the way light hits your subject. Try moving around instead of relying on Zoom:
- Look for how the light changes as you shift angles.
- Try shooting from above or below for interesting light patterns.
- Be aware of how backgrounds catch or reflect light too.
6. Adjust Your Camera Settings Manually
Auto mode doesn’t always get natural light right. Learn to take control:
- ISO: Keep it as low as possible (e.g., 100–400) in bright light to avoid noise.
- Aperture (f-stop): Use a wide aperture (e.g., f/1.8–f/2.8) for shallow depth of field and better low-light shots.
- Shutter speed: Use faster shutter speeds for bright scenes, slower ones for soft lighting or motion blur.
7. Use Natural Light Indoors Like a Studio
You don’t always need to be outside. Indoors, natural light can be just as beautiful:
- Shoot near large windows or glass doors.
- Face your subject toward the light source, or place it at an angle for soft shadows.
- Use white walls or ceilings to bounce and spread the light naturally.
Camera Settings & Gear Tips
You don’t need much gear to capture beautiful photos in natural light. Whether you have a DSLR, a mirrorless camera, or just a smartphone, here’s how to maximize natural light.
1. Master the Exposure Triangle
The exposure triangle has three settings: ISO, aperture, and shutter speed. Balancing these controls the look of your photo.
- ISO: Adjust for light sensitivity. Use low (100-400) in bright sun, higher in low light.
- Aperture (f-stop): Wide (f/1.8, f/2.8) for portraits with blur, narrow (f/8, f/11) for landscapes with more focus.
- Shutter Speed: Fast (1/500s, 1/1000s) for action and bright light, slow (1/60s or less) for more light, but use a tripod to avoid blur.
2. Shoot in Manual or Aperture Priority Mode
If you’re just starting, use Aperture Priority mode (A or Av). It lets you control depth of field while the camera handles the rest. As you gain confidence, switch to Manual mode (M) for complete control of your image.
3. Use Natural White Balance Settings
Natural light changes color throughout the day, so setting the correct white balance is important:
- Daylight: For sunny conditions.
- Cloudy: Adds warmth to cooler, overcast scenes.
- Shade: Warms up photos taken in shaded areas.
- Or use Custom White Balance by measuring the light with a white object in your scene.
4. Enable RAW Format (if available)
Shooting in RAW instead of JPEG offers more editing flexibility. You gain better control over exposure, shadows, highlights, and colors. This is especially useful in changing natural light.
5. Recommended Lenses for Natural Light Photography
If you’re using a DSLR or mirrorless camera, certain lenses perform better in natural light:
- Prime lenses like 50mm f/1.8 or 35mm f/1.4 let in more light and produce sharp, vibrant images.
- Zoom lenses like 24-70mm f/2.8 are versatile but tend to be heavier and more expensive.
- For wide scenic shots, wide-angle lenses (e.g., 16-35mm) are great during golden hour.
6. Simple Gear That Helps
You don’t need to go overboard, but a few helpful tools can level up your natural light photography:
- Reflector: Fills shadows with bounced light.
- Diffuser: Softens midday sunlight.
- Tripod: Helps in low light or long exposures.
- Lens hood: Reduces lens flare in direct sunlight.
Creative Ideas to Try with Natural Light
Once you’re comfortable with natural light, it’s time to get creative. Sunlight changes constantly, giving you many ways to experiment and tell stories. Here are some fun ideas to inspire you.
Try silhouette photography at sunset
Create dramatic silhouettes with natural backlighting. Place your subject between you and the setting sun, exposing for the background to make them dark against the glowing sky.
Use window light for soft, moody portraits
Place your subject near a large window with sheer curtains for soft highlights and gentle shadows. Experiment with angles to see how lighting affects the emotion in the shot.
Capture the golden hour glow
Golden hour’s warm tones make scenes look magical. Use them for dreamy portraits, landscapes, or product photos needing a natural feel. Backlight subjects for a halo effect and play with lens flare for mood and sparkle.
Play with shadows and patterns
Use objects to cast patterned shadows on your subject. Place them between the subject and light source to shape light creatively.
Experiment with reflections
Look for puddles, mirrors, glass surfaces, or shiny floors that reflect natural light. You can capture symmetry, depth, or double exposures with real reflections—no editing needed. A good reflection can change an ordinary photo into a stunning composition.
Shoot during overcast weather for a soft, cinematic look
Cloudy days provide soft, diffused light ideal for moody portraits, close-ups, and flat-lay photography. It creates natural, film-like shadows and tones, suited for emotional or editorial images.
Create rim lighting with backlight
Rim light creates a glowing outline when the sun is behind your subject and out of frame. It adds separation and dimension, especially in portraits and wildlife photography.
Use household items as modifiers
Get resourceful! Use a white sheet to diffuse light. A foil-covered board can reflect it. You can even use colored cellophane to tint your photos. Experimenting with items at home can lead to unique results. This helps you see how light behaves.
Indoor Natural Light Photography Tips
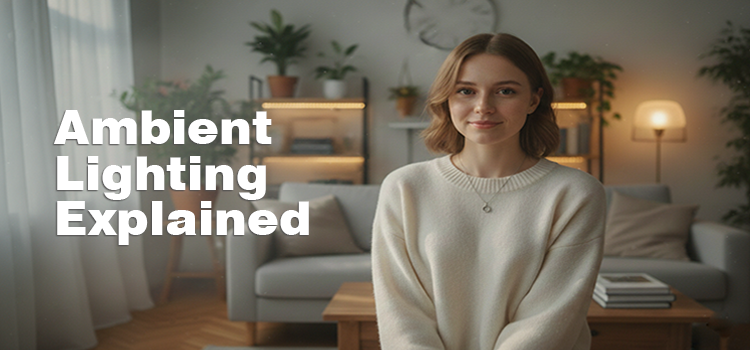
Shooting indoors doesn’t have to mean poor lighting. Use natural light from windows and doors to create stunning images. Here are some helpful tips.
1. Find the Best Light Source
Search for rooms with big windows, glass doors, or skylights. South-facing windows usually get steady light all day in the northern hemisphere. East-facing windows shine in the morning, and west-facing ones light up in the afternoon.
- Observe how the light changes in each room.
- Pay attention to the time of day the light is strongest or softest.
2. Place Your Subject Near the Window
Window light can act like a natural softbox. Position your subject within a few feet of the window to get even, diffused light.
- For soft shadows, keep the window to the side of your subject.
- For a clean and even look, have your subject face the window directly.
- Want drama? Try backlighting with the window behind your subject.
3. Use Curtains or Sheer Fabrics to Soften the Light
If sunlight from the window is too harsh, hang a white curtain. You can also use sheer fabric to diffuse the light. This will reduce contrast and soften shadows.
- Avoid direct sun falling on your subject unless you’re going for a high-contrast look.
- If you don’t have curtains, a white bedsheet or parchment paper can work as a DIY diffuser.
4. Use Reflective Surfaces to Bounce Light
If one side of your subject looks too dark, reflect some light back onto them:
- Use a white wall, foam board, or even a mirror.
- A piece of aluminum foil wrapped over cardboard makes a simple reflector.
- You can also buy an inexpensive 5-in-1 reflector with different surfaces (white, gold, silver, etc.).
5. Keep Backgrounds Clean and Simple
Indoor photos can get messy fast. Keep the background uncluttered so the viewer’s focus stays on your subject.
- Use neutral walls, fabric backdrops, or curtains.
- Shift your angle or move things around until the composition feels clean.
6. Turn Off Artificial Lights
Mixed lighting from lamps or ceiling bulbs can cause color casts and uneven tones. Stick to natural light by turning off artificial lights in the room.
- Set your white balance to match natural daylight.
- This helps you avoid awkward yellow or orange tints in your photos.
7. Shoot with a Wide Aperture
Indoor light is usually softer but less intense than outdoor light. To let in more light, use a wide aperture (like f/1.8 or f/2.8). This also gives you a beautiful shallow depth of field.
- If light is still low, increase ISO or slow down your shutter speed.
- A tripod can help prevent blur when using slower shutter speeds.
Outdoor Natural Light Photography Tips
Shooting outdoors offers many lighting options. The sun is your main light source, adding texture and atmosphere. To take advantage of natural light, learn to read and adapt to changing conditions.
1. Pay attention to the direction of light
Pay attention to the light when shooting outside. Front lighting gives clear photos but can look flat. Side light adds depth and drama. Backlighting creates dreamy effects. Move around to find the best angle.
2. Use the environment as a light modifier
Outdoor places have natural light management. Trees and buildings create shade or reflect light. Shoot in open shade for softer, more flattering light.
3. Be prepared for changing light conditions
Outdoor light changes fast. A sunny sky can turn cloudy in minutes. Adapt by finding shade or waiting for clouds when the sun is strong. Raise your ISO or change your aperture when light dims.
4. Avoid harsh midday sunlight
Late morning to mid-afternoon light is harsh and creates strong shadows. It makes subjects squint. Use shade or a diffuser to soften the light. You can create bold shadow patterns or silhouettes, but avoid overexposed highlights and extreme contrasts.
5. Use the golden hour to your advantage
The hour after sunrise and before sunset offers soft, warm light. Skin tones improve, colors are richer, and shadows are longer. Ideal for portraits, landscapes, and lifestyle shots.
6. Keep your background in mind
Focus on the background too. Remove distractions like bright spots and clutter. Use natural elements like trees or the sky for a clean look. A few steps can change the photo.
7. Watch for reflections and glare
Natural light makes reflections on surfaces like water, glass, and shiny objects. These reflections can help or hurt your photo. To reduce them, change your angle or use a filter. You can also use water or window reflections to add depth and interest.
Common Mistakes to Avoid
Even with great natural light, small mistakes can ruin a photo. Here are common mistakes and how to avoid them.
Ignoring harsh shadows: Bright sunlight causes harsh shadows, especially on faces. Fix this by shooting in open shade, using a reflector, or waiting for a cloud.
Overexposing your highlights: Midday natural light can be intense, causing bright areas to lose detail. Check your exposure often and adjust it or use a smaller aperture if highlights are blown out.
Relying on auto mode: Auto mode can misjudge lighting. Switch to aperture priority or manual mode to control the image’s look and get better results.
Not checking your white balance: Natural light changes color during the day. Auto white balance can make colors look cold or yellow. Use daylight, cloudy, or shade presets, or set a custom balance.
Shooting too fast without observing the light: Check the light before you start shooting. Find its source and pick the best angle. A few steps can make a big difference in your image.
Forgetting about the background: Check the background before taking a shot. Avoid bright spots, clutter, and objects that could stick out from your subject’s head.
Post-Processing Natural Light Photos
Natural light shots often need post-processing. Editing enhances the scene and fixes light issues.
Start with exposure and white balance: Fix brightness and color tone issues first. Degree of exposure and white balance can greatly impact the image.
Enhance highlights and shadows: Adjust natural light contrasts with highlight and shadow sliders. Lower highlights to recover sky details, raise shadows to reveal portrait details.
Boost contrast and clarity: Increase contrast to separate light and dark areas. Add clarity or texture to make your subject stand out, but avoid overdoing it.
Fine-tune colors for mood: Use natural light to start. Adjust vibrance for subtle color boosts that protect skin tones. Use saturation for bolder changes. Apply color grading tools to warm up or cool down your photos.
Use selective adjustments for control: Edit part of a photo using radial filters, brush tools, or linear gradients to highlight a face, sky, or foreground without changing the whole image.
Crop and straighten if needed: Good framing makes your photo more polished. Crop to improve composition, remove distractions, and fix horizons.
Don’t over-edit—keep it natural: The beauty of natural light photography is its authentic, real-world feel. Avoid using heavy filters, extreme smoothing, or overly sharp effects. The goal is to enhance the photo while keeping the natural vibe intact.
To Conclude
Natural light is a great tool for photography. It’s free and easy to use. You only need a good eye and some creativity. It brings depth, emotion, and beauty to your images, indoors or outdoors.
Mastering natural light takes practice. The more you shoot, the better you’ll understand it. Try new angles and adjust your settings without fear. Grab your camera and start exploring. You don’t need perfect conditions to create something beautiful.
Happy shooting!


