Drone Photography Tips and Tricks

Photography has always been the main focus of storytelling. When telling a story through photographs everything depends on perspective. That’s why photographers often crave some creative and unique perspective for their stories to have a strong stand. However, adding new perspectives to your stories is not an easy task unless you have something to get the shot from different angles, something like a Drone.
Drones are the most exciting development in photography in recent years. Up until now, UAV’s were used only for commercial, agricultural and military purposes. But for the past two years or so, drone photography has been the fastest-growing photography trend. Never has it been so easy to capture the stunning aerial view of magnificent sunset or sunrise.
Using a drone can benefit you with some crazy perspectives, it can get you high up landscape photography, cityscapes, real state, and landscape. As time progresses, drone photography is getting huge popularity, hence, the desire to buy a drone. And the good news is with time the price has also dropped significantly, making it easier than ever to get a camera in the air for both hobbyists and professionals.
While flying the damn thing, gradually, you will get benefited from practicing and flight exercising, however, once you feel ready, even then you will need to know the rules and regulations. Drone has the capacity to disrupt events, hit people, and even worse an aircraft. So to avoid that, you need to learn the legal issues, and following that you may even need to take a flight test to become registered.
Laws and Rules
Safety always comes first. Before you actually take your drone off of the ground, you need to keep all the laws and regulations in mind about the UAV, which is assigned by the government. Although many of the rules apply to those using drones commercially, many of us actually do it for fun, so all of the rules may not affect us.
If you are using your drone for fun and recreational purposes, you don’t need to have any pilot requirement and also any permit. The only thing that you need to do is to register your drone with the FAA. It will only cost you $5. Land on this page, create an account, and follow the instruction to register your drone.
Other than that, you should also follow these –
- You shouldn’t fly below 400ft.
- Keep your drone in direct eyesight.
- Never ever fly your drone near other aircraft or within five miles of any airport.
- Never fly over a group of people, stadiums, or sporting events.
There are other scenarios where you are not even permitted to fly. For example, you are not allowed to fly anywhere in Washington D.C. or in a national park. There some online maps and apps which can help you avoid the restricted places. Like FAA’s B4U Fly app, which will tell when you are in a restricted place.
These are the limitations that you should follow when flying a drone in the US. There are other countries that have their set of rules and regulations. Here are links to the regulations for Australia, New Zealand, and the UK.
That said, we are all set to dive into the good stuff. Although there are so many similarities with landscape photography it is not as easy as you might think to take good drone photographs. In this article, we have managed to jot down some killer drone photography tips and tricks to level up your drone photography game. All of the tips are from some of the most prominent drone photographers in this field.
#1- Always Fly Close To The Ground
While flying a drone it is very easy to fall for the temptation to fly high. Most of the drones can fly as high as up to 8km above the ground so the urge is real. However, flying high doesn’t always mean you will get better photos, in fact, most of the great drone shots are taken low to the ground as it allows the camera to see the contours and dynamics of the landscapes. In that way, you can balance the depth, size, and shapes of the landscape. Which you won’t be able to achieve if you were way up from the ground.
Just like a great landscape, think about photos of rolling hills that captures the shape of the train. This is also the same for drone photography. You will be able to capture more details and tell a much better story if you stay close to the ground.
#2- Do not forget the rules
Just like landscape photography, there are some basic rules to follow when taking shots from the air. It can be a little bit tricky to get the best shot possible if you are not familiar with some of the beginner techniques like the rule of thirds, leading line, and the golden ratio. It’s easy to forget the fundamentals when you are flying but those still apply to the world of drones.
The most common technique that is used in photography is the rule of third. It is most effective when you want your subject separated from the background, but not losing the background entirely. To do that you have to divide your frame into 9 equal blocks with 4 intersecting points. Then you need to drag your subject out of the center and put it in one of the 4 intersecting points. So, according to your need, you can actually manipulate the technique to get more aesthetically pleasing photos. Here are some of the examples. Normally every camera interface has this grid to help photographers take better photographs. If not found, you can just use your imagination and take the photo using the rule of third.

The leading line technique is very straightforward. If you find any kind of lines in the scene, then the clever thing is to follow the line. A line can be anything, a trail, a road, a river, or something like a tree trunk. Following these lines can lead you to take better photos that are more pleasing to our eyes.

Golden ratio or Fibonacci spiral is something you need to master before applying. This technique is more aggressive in attracting our sight to the center of attention. The golden ratio is visible throughout nature. So manipulating this technique can yield some really good looking photos. Here are some example-
#3- Learn To Bracket Your Photos

Most of the consumer drones have a built-in camera that can shoot up to 4K resolution videos and images. But those cameras house smaller sensors and tend to have poor dynamic range. On the other hand, relatively cheap entry-level cameras have bigger sensors, thus have the capability to capture an incredible range of light. So, when snapping landscape with a drone you would be required to bracket a whole lot more.
Exposer bracketing is a process of combining the same images with multiple exposers some being overexposed and some being underexposed. This gives you the ability to record a much larger dynamic range. Then you take these images and blend them together into one image in postproduction.
Almost most of the drones have HDR features which enable you to capture multiple exposers and blend them into one single photo automatically, in just one click. But if you want to get the best dynamic shot possible, this is not recommended. Instead, take multiple exposure manually or use AEB (Auto Exposure Bracketing) function. This will take 4 or 5 photos with different exposure value automatically with one click.
This will give you total control over the exposure and how it will blend together in the post-production. And also allow you to decide how the final image will look. You can easily do this blending with software like Adobe Lightroom/Photoshop or tone mapping software.
#4- Best Time For Drone Photography
Photographic timing is very important for various reasons. Most important reason being is that to get the best exposure for your photos. Natural light varies throughout the day. In the middle of the day, you will get the most light, which is not actually suitable for any kind of photography unless you use filters and other fancy stuff. But what is ideal though, is something known as “Golden Hour”. Most landscape photographers will agree that the best lighting that you can get is within this hour. Since landscape and aerial photography have so much in common this golden hour rule is also applicable for drone photography.
This gives you about an hour before sunset and an hour before sunrise to shoot. At this time the light tends to be softer and warmer thus gives you the perfect golden glow. Basically, you can tweak the timing so that you can get more control in your hand to see whether the lighting is perfect for your desired scene or not. If you shoot when the sun is right down the horizon, you will often get an image where it is poorly illuminated.
#5- Use Terrain View In Google Maps

This, in particular, is the handiest tip for any kind of photography. Use the map. Use it to your advantage. Many drone photographers find it very helpful when choosing the location for drone photography. Google map is a great place for researching drone photos. So many drone photographers spend hours and hours trawling over the insane amount of satellite map data looking for potential aerial photographs.

But there is one problem. In satellite mode, it is very hard to find a suitable place. Because some of the best landscapes remain invisible when looking straight down. One way to fix this is to turn on Terrain View. In terrain view, what it allows you to see is the depth of the scene you are looking at. And this is very important in drone photography. Because it enables you to see lots more of the scene for great drone photography which you might skip otherwise.
#6- What Makes a Photo Interesting?
You have done everything to get the perfect shot but couldn’t manage to get it. You scouted the location, got a perfect place and started shooting at the perfect time, yet something is off in all of your photos. So what is that you are doing wrong?
Most probably you are missing the fundamentals of what makes a photo interesting. There can be two types of problems:
- What to capture?
- How to capture?
We have already discussed the second problem (see #2). So we will go in-depth to answering the first question. In the following, we have discussed sixteen fundamental ideas that you can apply to make your drone photography interesting.
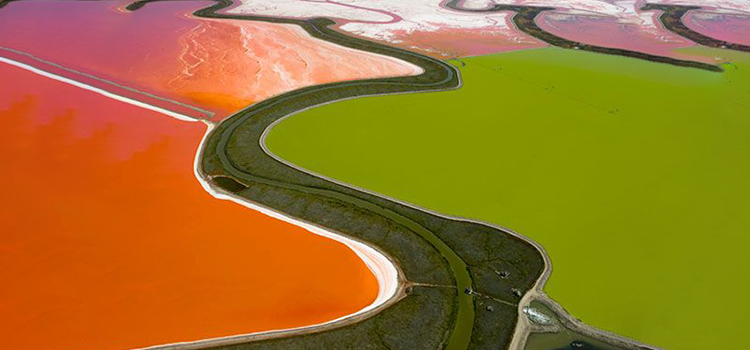
- Shapes

The shape of composition has everything to do with a photo. It allures our visual like no other. It controls our visual experience, whether you are looking for a pleasing or tension driven image. We are driven subconsciously towards these kinds of photos. The shape of a composition change with the perspective. For instance, the photo (above) will look different from the ground, but when you are taking this photo from the air, you will see visible shapes. It looks kind of leaves in a tree, doesn’t it?
As like pattern, the shape helps control our visual in a big way. A shape can be defined as an area with a visual boundary or an invisible boundary. It’s not important to have a real boundary, it can be invisible too.
What is more important though is the visual compositions that you want to create with these shapes and the effect that you want to provoke on the spectator.
Here are some ideas on how you can use shapes to create interesting composition:
- Separation or connection. You can connect the shape with the area or separate it to give it a structure.
- Stress a certain portion of an area that you find more appealing
- Create a leading line, then lead your spectator through the line
- Try to convey depth or certain movement (sometimes frenetic)
There can be many types of shapes, circles, squares, triangles, polygons, ovals or sometimes it can have natural shapes like leaves, raindrops, etc. Shapes can often lead spectators to various psychological associations on various levels of depth. Circles, for instance, can convey the satisfaction behind completion. Triangles, on the other hand, can represent either stability or conflict.
-
Symmetry
First of all, symmetry is sexy. We love the order of things. Aesthetically speaking, if you like something regardless of whether it’s an object or a human face, there is a pretty big chance you find symmetry in them. Although perfect symmetry is offbeat in nature, you cannot just be obsessed with it. You have to find the sweet spot. Particularly in photography, you have to be pretty steady with this philosophy. So, what does symmetry interpret in photography?
Well, if you are able to capture something with mirroring sub-part or recurring sub-part then it will be considered as symmetry.

Like other optical phenomena, symmetry also captivates our visions. It adds tension to a photo. Since this theme can be used to balance any composition, the increasing popularity of its usage is not that surprising. For all the drone photographers, here is a great piece of advice, try to use/add symmetry where it is least expected. And from time to time, break up the symmetry in some way. If you do this, it will add an obvious tension in composition, thus producing a less expecting result but with a greater sense of authenticity.
- Lines
Lines are amazing in any kind of photography. Regardless of the genre, it makes photo enthralling by a huge margin. We can connect with the viewers in an instant. It leads your gaze into something that the composer wants you to see. In a photo, the line can encapsulate much information. Use them to your advantage.
Lines can lead to many things, whether it’s a person, an empty space, or a vanishing point in the background of the frame. It’s your responsibility to drive your spectator’s attention to your story. You are basically taking them on a journey along the frame. Through the photograph, then from one part of the frame to another, and finally your object of interest or the main subject of your story.
The key is to hold their gaze as long as possible, allure them, captivate them, and let their eyes soothe on the subject. In drone photography or any other genre for that matter, leading lines are the pillars of storytelling. Leading lines can be of any kind, it can be curved, straight, diagonal, oval, elliptical, vertical, or horizontal. No matter what it is, your sole mission is to hold the attention of your viewers and lead them from one edge to another by capturing a line (or many) entering the frame through one of the edges so that it leads the eyes to another area or your subject of interest.
To achieve this goal, you can use roads, rivers, creeks, boardwalks, trails, trees, electric poles, fences.
- Patterns and Repetition
Patterns are very common in nature. In fact, recurrence is the most common phenomena found in nature. It surrounds everywhere, both in nature and manmade forms. What it translates is that there is a great opportunity to capture a compelling and dramatic image.
The pattern can be of any type, it can be shapes, colors or objects, ordered in either regular or irregular formation. When capturing patterns what is crucial is the vantage point. This is the point where you shoot your photo from. Now it all depends upon you. If you want to shoot a small scale compact kind of pattern, then make sure you fly close. As close as possible. This is important if you want your photos to have details.

But more often than not, in aerial photography, patterns will emerge on a large scale. In this case, the technique called bird’s eye view is the best. Just tilt your camera down. You will find yourself amidst amazing and compelling patterns.
Some of the best compositions consist of shapes, lines, or colors with repeated occurrences in the same exact way. To get a strong photo it’s highly recommended that you fill up your frame with those geometric patterns. It is the regularity of the object’s arrangement that makes all the difference.
On the contrary, you can also find an irregular pattern. If it seems counterintuitive, you are not wrong. It is. But with good composition, you can create patterns with irregular objects. In fact, you have lots of freedom to create patterns from what you see everywhere, despite being more difficult to shoot.
Always try to fill up the frame. Since your spectators can’t see any destruction in the photo, the drama it creates is really strong thus make your composition more compelling. Play with angles. Try to figure out what works best for your composition. Sometimes straight up snap can create something captivating, sometimes more intuitive approach can make it look better.
- Texture
Sometimes it becomes a bit challenging for photographers to capture photos with proper depth and dimension. No matter whether it is a drone photo or not. Since (most) cameras can’t capture 3D images, it is obvious that those photos will lack depth. So there is a pretty good chance that when it comes to fruition photos can turn out flat.

To avoid that, look for chances to incorporate texture in your drone photos. In that way, you can trick your spectator’s eyes into thinking that they are looking at an object that exists in our regular 3-dimensional plane.
Texture is something that exists on the surface detailing your subject. It can be the surface of solid rock, a wall made of bricks, top of a forest, waves of the ocean, etc.
There are so many usages of texture, you can combine it with other interesting aspects like lines, shapes or patterns to yield a much more compelling result. For example, in a particular scenario line within the texture can lead your viewer towards your focal point thus adding a uniform texture.
- Contrast

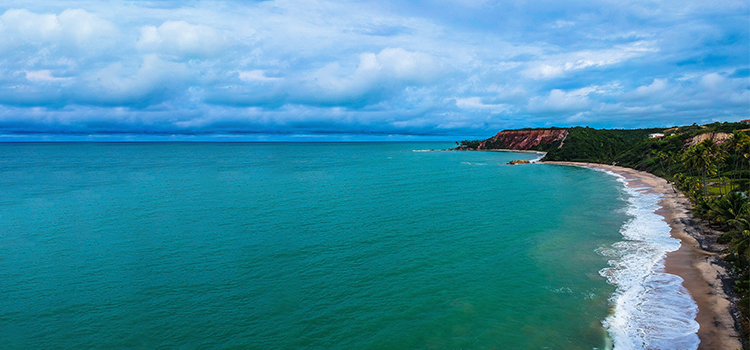
This beautiful photo of the beach has a powerful contrast that is distinguishable by the sand and the water. This is one way to effectively emphasize the subject, create high contrast with different elements on your frame. But the perfect way you can use contrast is to blend color into your photos.
However, in photography, contrast is synonymous with opposition. So to make your composition more interesting find opposite color (black and white), shapes (round and squared), size (big and small), natural element (land and water), you have nearly infinite options to choose from.
On the other hand, inner workings of color contrast are also very important as this is the most perfect way to use contrast in the photo. According to the color theory, and color theory for painting; Contrast is made of pairs of opposing color. You can use the primary color with a complementary color to create more substantial contrast.

Colors can be distinguished into two groups:
Warm – red, yellow, orange
Cold – blue, purple, green
Your photo can have a different mood depending on what color you use. But it varies from spectators to spectators, the message that you want to convey will not always translate what you want them to be.
There are certain aspects though, which can have diverse effects. Warm color can evoke comfort, closeness, and passion and cool color can evoke sadness, remove and calm. But again this is subjective and varies from spectator to spectator. It is always dependable, you can’t force them to feel what you have implied.
In addition to that, contrast can also strengthen the atmosphere of your photos. If you want a strong composition, then use deep and structured color. If you want to get a subtle feeling, use pastel and faded color.
Moreover, contrast also adds drama and dimension to your photos. The strategy is to keep the composition simple and abundant use of unplanned color is not recommended. Otherwise, you will create a chaotic feeling and thus can confuse the spectators.
The best way to learn about the different color science and application is by practicing and playing with the color. And a great tool for that is Paletton. And it’s free.
- Abstract
Abstract photography also referred to as experimental, conceptual, or concrete photography is a means of depicting a visual image that doesn’t have any direct or immediate association with the object world and has been created through photographic equipment.
This is what you will find on Wikipedia. It also mentioned there has been no commonly used definition of the term “Abstract Photography”. So what we can see is that we have a huge area to discover. We can do so many things with abstract photography.
Watch the photo above and try to think of something translatable. There are no wrong answers. It really depends on how you want to see it, so as a photographer you also have advantages over this.
As I have mentioned before, perspective is everything in photography. A unique perspective can bring out so many appealing features of any location. It is really astonishing how drone photography can show others amazing locations from a different point of view.
Try to capture the environment that is seldom visible from the ground and then use lines, shapes, and colors to create an unreal structure. The more unreal the colors, shapes and texture, and patterns, the more bizarre it appears to the viewers.
- Pareidolia

Has it ever occurred to you, while looking at a picture of something abstract, subconsciously you find yourself a pattern? That pattern can represent an animal or a part of it, a human figure, or some worldly object. If your answer is yes, it’s perfectly OK. This kind of psychological phenomenon in which the mind responds to a stimulus, usually an image or a sound, by perceiving a similar pattern where none exists.

It can be anything, commonly we are perceived by images of animals, faces, or objects in the clouds, the landscapes, the moon, and even on Mars.
In drone photography, you are more likely to see such pareidolia than in any other type of photography. When you look downwards from above, you have a large area and a different perspective of things. So, from above, we are more prone to find those patterns that can perceive our vision.
One old trick that you can do is to use google map in terrain mode. Like we said in the beginning, it helps your mind to understand what to expect. If you are planning to do a photo-shoot on Small Island, you better check what you can get from 500 feet above the ground.
There are lots of apps out there to help you find places where you are more likely to find pareidolia. (E.g. PhotoPills)
- Isolation

More often than not, artists use this ideology the most to create their stories. And why not. The more effectively you use this in your photography, the more it strongly conveys the emotion that you want to show. The most common use of this ideology is to express depression, agony, pain, rage, and dark emotions. Sometimes isolation is used to spark questions like, “What are they doing in the middle of nowhere?” and “Are they lost?”
In this format, most photographers use only 2 colors. Sometimes it’s monochromatic. But when you need to show something specific use more than one color.
Another idea is to produce an image as simple as possible or as clean as possible. Minimalist framing can make your composition stand out from those which are not. (Sometimes) Less is more! Push your viewer to only one thing. The most prominent thing in the frame. Lead them there. It will automatically evoke curiosity. This is very interesting because there is nothing more “itching” than curiosity.
- Shadows
In photography, light plays a very important role since this is what makes the photo. So, normally as a photographer, you pay a great deal of effort to make sure that the lighting is appropriate. This is the essence of all photography. So, what about shadows, then?

Well, shadows are the unavoidable part of the light. The combination of both light and shadows can benefit the composition by a huge margin. Master the light and shadows. Since shadows balance the photo with the darkness and light, thus, mastering it will do you a great deal of confidence.
In about every great composition, you will see some sort of shadow manipulation. And most of them are black and white photos. But apart from that, shadows can be manipulated to form a specific pattern or shape. At day time, shadow formation changes every minute as the earth rounds the sun. So what you get in the morning will differ from what you will get in the middle of the day.
From the above, you can see some spectacular frames and shapes. What is more interesting though, is the playful formation of shadows and how it affects the overall scenario.
Moreover, shadows can help you direct attention to a specific area or help you see the complete image in an artistic manner. You also can focus on the shadows instead of the subject, if it forms a more interesting composition. There are basically zillions of ways you can use and manipulate shadows, hide them, focus on them or do what is better suited.
Lastly, take into account the timing. Shadow’s strength and length depend on it. When the sun is closer to the horizon, the shadows are longer but more defused. On the contrary, in the central hours, shadows are stronger and darker.
- Interesting subject
Framing an interesting subject in your photograph is the answer to the question “what makes great picture works?” Simple enough, isn’t it? But you will soon find yourself in despair when you start looking for subjects of interest. While up there in the air, everything seems interesting at first. One reason for that is your perspectives which shift themselves, creating an illusion. Which is a good thing, don’t get me wrong. But then there is also the delusion of finding everything you watch interesting. When your perspective shifts (in drone photography) it also shifts your views, therefore falling for some nonsensical abstract object is understandable.
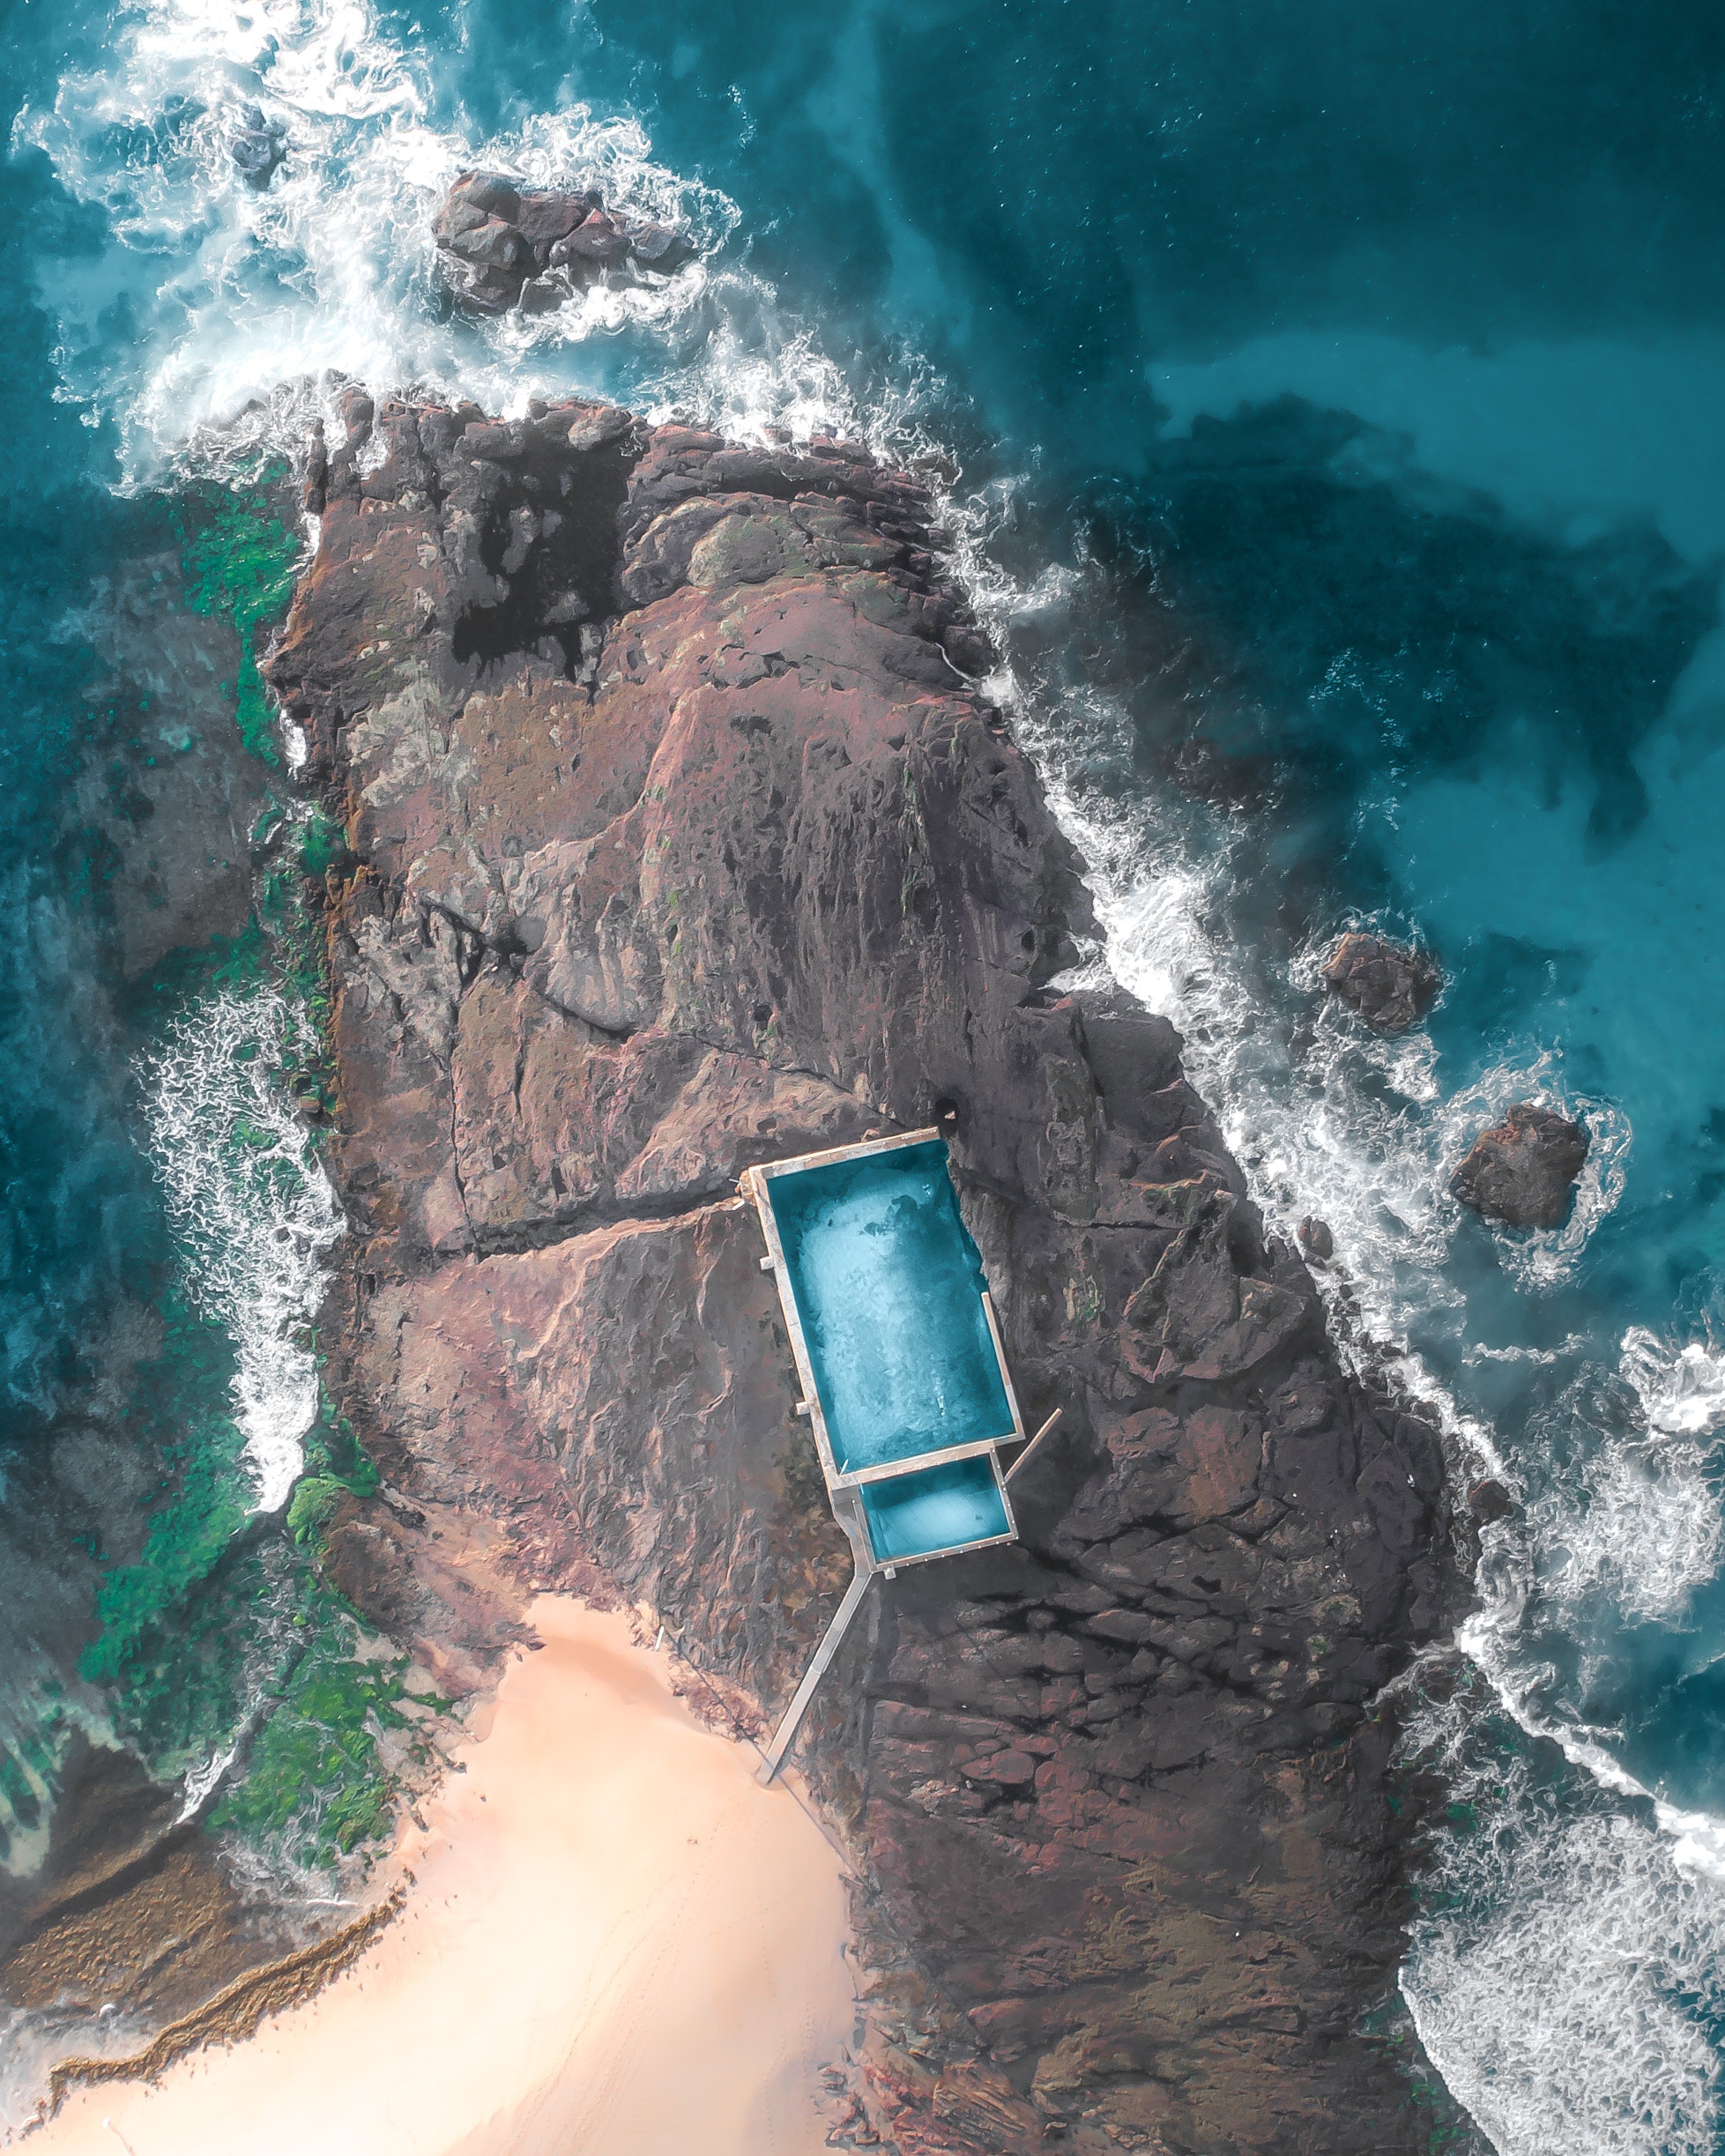
Here are some tips to help you find some interesting subjects. Your subject should have the ability to tell a story. Whatever the subject may be, it has to have that evoking element in it. A simple hut can be a very powerful subject. The same way a rock, a tree, even a pool can be an interesting subject if you can bring out the evoking element. Your subject has to be in the center of attention. When you draw the attention of your viewer to a specific area or element and make her stare at it for a few minutes. That’s the point. If you are able to draw your spectator’s attention and evoke some emotions in them, then you got yourself a pretty great photograph.
As we have mentioned before, in an aerial photograph it is easy to fall for almost anything. But it’s also easy to find some interesting-looking subject which actually has some meaning to it. So look for an interesting subject with a story.
- Powerful Sunset or Sunrise
No matter what you want to capture, light is essential. In a good lighting conditions, you can be almost 100% certain that you will nail the photograph every time you shoot and whatever you shoot. Some people prefer to shoot in the golden hour when the sun is on the horizon about to set off. That is the period of time when the color of the sky goes from orange to yellow or in other words golden tones, having a warm color temperature.

Golden hour also appears at the time of sunrise. Wait for a few minutes after the sunrise, then you will see the golden tone everywhere. Apart from that, there is also another time called blue hour. Basically, this is the time right after the sunset. Many other photographers prefer this blue hour over the golden hour. This is when the sky has a deep blue hue with cold color temperature and saturated colors. Absolutely love it.
However, what about the sunset (or sunrise)? C’mon, everybody loves a sunset or sunrise photo, don’t you? Sunset or sunrise has the ability to make a photograph beautiful. Look for a location and a moment in time where the Sun can add to the composition and turn a great photo into a legendary one!
- Long Exposures

Long exposure is the art of using slow shutter speed to capture the progressive effects of time passing in one photograph. This technique will allow you to capture the clouds, water, and bustling road as they pass along the highway. Long exposure photography is addictive. Once you get to use it properly, you will be rewarded with terrific-looking artistic images.
It can be used to capture the smooth water of the ocean, star trails, picture-perfect fireworks, light painting, Ferris wheels, and lightning. There are so many other areas where it can be used to portray different aspects of beauty and artistry.
Long exposure photography has been always tied to a tripod and other stabilization gimbals. But nowadays, recent technology allows us to use more sophisticated technology like a drone. Almost all drones use stabilization gimbal to stabilize the image from unnecessary shake. This allows the drone to take long exposure shots. But you have to look for the wind all the time. Despite having equipped with all the stabilization technologies, wind can shake the whole drone apart and your photos may end up blurred.
Look for the ideal location, use terrain view on the map to find out suitable locations for your drone photos. Use all the tricks mentioned above to capture the perfect frame. If the rule of thirds works for you then use it more often. Use a leading line to tell a story. Whatever works for you, use it, combine it to create the perfect blend.
- Panoramas (including 360 degrees)

Panoramic images are beautiful. It elongates our field of view horizontally, allows us to see more. It is sometimes known as wide format photography. This type of photography has a very unique perspective. It captures and shows more than what our eyes are accustomed to seeing. Panoramic photos can be captured in so many ways. By nature, this type of photography is very diverse.
In the past, to capture panoramic photos you needed several cameras and then a lot of stitching. But, now, thanks to the advent of computer science, you can do all these things with just one camera and software.
You can do some really intriguing photography with a drone. Since a drone can yield some really great perspective, you can fairly assume that the panoramic image will also have some dynamics to it. Landscape, cityscape, oceanscape look for an interesting location with some great wide view. Get the drone up in the air and shoot, rotate and shoot. And capture the whole scene with a panoramic image. After taking the photo you can then modify the photo to have some unique perspectives like 360-degree aerial panorama, Spherical Panoramas, Equirectangular Panorama, and Planet shaped panorama, etc. Before diving in with the drone, make sure to find an ideal location for your panorama photo. Otherwise, it will end up resulting in some disappointing images.
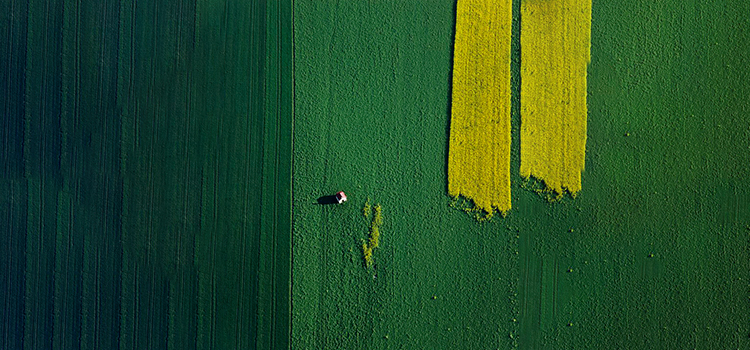
- Human Element In The Frame

Adding the human element in the drone photo can benefit you with three things. First of all, it adds the idea of size into the spectator’s mind. Our mind will spontaneously compare every element of the frame with each other and get the idea of perspective. After we all know the scale of how big or tall a person can be. Here is a simple analogy, when you see a person in a desert you immediately know the scale of everything in the frame. That way you know what you are looking for.
Secondly, this type of photo can give your spectator something to which he or she can immediately connect or even relate in some cases. This connection on the other hand makes the photo even more powerful, as the spectators can feel what is there to feel.
Thirdly, it adds a story to your photos. When you add a human element in your photo it adds a story to the beautiful shot. Moreover, it also adds emotions to your photos. Use all the nasty tricks that you have learned then apply those in the photo. By carefully composing and by carefully positioning your elements in the frame you can create powerful images.
After all, what better ways to convey emotions and telling a story than using real humans and use them to tell the story.
These fifteen elements or ideas are some of the basics of what makes a beautiful photo. Use these elements of surprise in your photos and you will get some amazing-looking images.
#7- ND Filter For Drone Photography

In nighttime drone photography, using long exposure is not uncommon. Taking these shots are relatively easy, as most of the drone uses stabilized camera gimbal. Just crank up the shutter speed first, then point at something you want to capture and press the shutter. If you are to capture objects with illuminating light like cars, boats, or any other objects, you will end up taking something with cool light trails. But in the daylight situation, it is a completely different story. Even if you use long exposure with the smallest aperture and lowest possible ISO you will end up getting an overexposed photo. It is almost inevitable that you won’t get a perfectly exposed photo.
This is where the ND filter comes into play. ND filter refers to the natural density filter. This prevents extra sunlight to enter the lens, thus allowing you to use a longer shutter speed in the daylight condition without overexposing the whole photo. You can use it to smooth out the trail of a fountain or the wave on the shore. They help to create a motion blur due to the longer shutter speed. This is great for time-lapse where you need more of a natural, active feel to moving objects.
#8- Post-processing
In any kind of photography, post-production is as important as the photography itself, if not more. You will find yourself spending more time in post-processing than photography itself. There are lots of aspects of photography where you will feel the need to do the job after photography. Different types of photography need different types of retouching. For example, in wedding photography, you will focus on the lighting and the overall color balance of the photo. In some cases, you might end up playing with the shadows and the highlights to make the bride and groom more artsy in a photograph.
This is somewhat different in portrait photography. You will do all the things mentioned above, but you will focus more on the skin tone of the model. You might need to sharpen the face or whatever. Most important is the composition in portrait photography. So photographers often modify the background or the environment of the composition to make it more suitable. And all of this happens in post-production.
Now, back to drone photography. Unlike your typical photography drone photography is a bit challenging. First of all, you are most likely to use a camera that is designed for shooting video (in most cases). Because most of the consumer drones are designed for cinematography, not photography. That’s why the overall quality of the photograph often lacks sharpness and resolution. Most drone cameras house relatively small sensors compared to professional DSLRs. So the quality is not up to the mark unless of course, you use a custom gimbal with a DSLR.
So to compensate for the shortcoming post-processing magic is necessary. You might need to do all the things that you typically do like color-correcting, balancing highlights and shadows, exposure bracketing, and so on. But what is interesting though is the perspective and what you can do with it. Like seriously, you can literally manipulate the whole frame and make a completely different composition. When you are up in the air it is very easy to get carried away with all the freedom and the views. And this is a good thing because it will help you get the most insane piece of a photograph that you have ever seen.
#9- Use Tablet as a Display Screen
Here is a little trick. Use a tablet as your display screen. Quit using your phone as your display screen. The screen size is of your phone is an issue, but this is not entirely for that reason only. When taking beautiful aerial photographs you want to get the biggest and the brightest view possible. You don’t want to miss the entire view that your drone sees. Connecting your tablet to your drone allows you to see more and compose the best possible frame and focus on your subject more.
It also adds additional safety and allows you to use your phone for all the right purposes. You are free to use your phone to capture behind the scene for your Instagram stories and all the other tasks. Do yourself a favor. Use a tablet.
#10- Extra Supplies
Never go out for a drone shootout without preparing for the worst. Like any other camera, the drone is also prone to so many things. The battery can go off before getting the money shot. Propellers can get stuck in the tree or breaks apart. The SD card can fill up real fast. Not only that, in the night your drone can get lost in the dark.
Be prepared for this inconvenience. Keep an extra battery pack with you. This is one big factor to keep in mind. Drones are not well known for their best battery life. An average drone can last about 10 minutes and a high-end drone, on the other hand, can last about 20-25 minutes. So to avoid abrupt disruption, please invest in an extra battery. They are not cheap, but it will be very challenging to work in that little time frame.

Use a propeller guard, if you want to avoid damaging your drone. Crushing or getting a drone stuck on the tree is not uncommon. We have all suffered at some point. No matter how deft you are flying a drone, it is almost inevitable to avoid an accident. Apart from that if you get in contact with the propellers, it can result in some minor injuries. The gist is, use a propeller guard.
Keep extra propellers. All propellers are fragile (except those carbon fiber ones) and detachable, so they can easily get lost in oblivion. You know, an accident happens. But fear not, propellers are not expensive. Keeping them in your backpack can save you from some serious inconvenience.
Nowadays, good techs are getting cheap and cheap techs are getting good. That also applies to your drone too. The ability to shoot 4k videos with drones is very common and the abundance of 4k drones ensures that. What it translates to is that you will end up shooting more 4k stuff than any other and here is the problem. 2 min of 4k video can take up to 1 GB of space. Trust me, you really don’t want to miss the money shot just because you don’t have enough memory. No matter how big or small always keep an extra SD card.
One last important thing, if you are into nocturnal photography, you better use LEDs so that you never lose it in the dark. On top of that, it looks cool.
#11- Find Community & Learn From Them
This is just the beginning of drone photography. Creativity has just scratched the surface of drone space. You can do so many things with drones, possibilities are endless. There are so many people with different ideas and talents. They will do the same thing as you do, but differently sometimes more creatively. This is because drone photography is a relatively new art form and with this, there are a lot of ways to do the same thing.
Find like-minded people, get inspiration from them. Ask a lot of questions from those who you find interesting. Get in touch with people and with their work. Follow a forum on this specific topic. There are a lot of great drone photography forums out there, be a member. Follow this topic on Reddit, you will get some great ideas.
Moreover, you also can follow some great drone photographers on Instagram. You will find some great professionals who pioneered drone photography in its earliest stage. For starter, you can follow these guys-
Abstract Aerial Art: JP and Mike Andrews are behind Abstract Aerial Art, a website where they showcase bizarre photographs of rarely seen places and structures captured with a drone.
Joshua Foo: is a photographer based in Sydney, but currently traveling around South East Asia. He’s interested in all sorts of photography from Street to Portraits.
Stian Klo: is a professional and award-winning fine art landscape photographer from Harstad in Northern Norway. He used to be a professional house DJ and producer, but decided to retire at 26 and developed a passion for photography.
Undoubtedly a powerful tool for photography, drones have opened doors to shoot from angles and locations like never before. While they certainly aren’t for everyone (with a lot of people skeptical about their inception), they have made a huge impact on photography and aren’t looking to phase out anytime soon, so why not hop on the train?
Just remember, mastering drone photography doesn’t come to everyone overnight. It can get seriously tricky, but with practice, planning, and time, you can take your shots from amateur to amazing.
That said, after doing all the photography and everything you will still need to edit your photos to make it presentable. No matter what you do, right out of the drone no photo will be presentable for social media or any kind of media. The thing is, editing drone photos take just as much learning and practicing as capturing them. Even if you’re already a gun at post-production editing, editing photographs taken from high above—considering the differences in lighting and angles—is a whole new skill.
From bulk discounts to compact packages, we offer various benefits to our customers. Here at Color Experts International, Inc., we offer the best watch photo retouching and watch manipulation services. If you are a watch photographer then we can help you reduce all the photo post-processing burden and save you some of your valuable time. When it comes to retouching and color correction in watch photographs, you have our utmost dedication and promise. Promises to bring you the best services in this sector. Here is a list of advantages of choosing us over others, but this list is by no means is limited to the following.
- An experienced team of 200+ professionals for fashion apparel & accessory products
- We add or remove watermarks and are adept at adjusting brightness and reducing noise.
- We ensure complete data security and confidentiality of your pictures.
- Quick turnaround time
- Latest Cutting edge technology
- Highly experienced and skilled professionals
- 24/7 customer support and assistance
- Competitive rates
- Proven methodologies to deliver quality services
- High volume discount
- Rush delivery service
- We produce 5000 image edits per day
- Simplified and competitive pricing based on work volume
Color Experts International, Inc. (CEI) has been providing best-in-class bulk photo editing services for the past 30 years. Throughout the experiences, we have learned, what our clients actually want in their finished product. We have specialized in online-based marketing platforms and eCommerce. So we are familiar with the rules and regulations that those platforms need. With a perfect blend of experience, skills, dedication, and punctuality, we offer a wide range of image editing services that can assure you the perfect quality finished work. We have served more than 10,000 clients at both SME and Corporate levels. Many new customers also turn to us for reliable image manipulation services. You don’t have to believe our words, try us and hit the Free Trial button. If you are familiar and already convinced with our services then send us a Quote Request for our latest offerings.
We also have other popular services, if you are interested then you can go check our services page.


