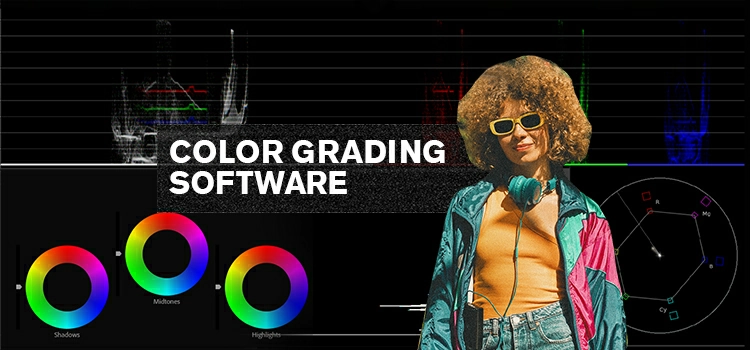
Top Color Grading Software in 2025: Free & Pro Tools Compared
You’ve likely seen a film or YouTube clip that left you thinking, “Those colors are incredible!” That’s the impact of color grading. It elevates your video to a sleek, professional standard. For creators of all levels – from seasoned filmmakers to those just starting – color grading revolutionizes your visuals.
But here’s the thing: finding the right color grading software isn’t easy. There are numerous options available. Some are free, some are pricey. Some are beginner-friendly, while others feel like you need a film degree just to open them.
Choose the best color grading tools for 2025. We’ve tested free and paid options in real projects to help you find the right fit for your skills, budget, and vision.
Let’s dive in and find the perfect color grading tool for you.
What to Look for in Color Grading Software
Before you dive in and start downloading tools left and right, let’s pause for a second. Color grading is a creative canvas. It adds emotional tone and vibrant color to your story. You need software that supports your vision.
So, how do you know what to look for? Let me break it down.
1. Compatibility with Your System
First things first—does it run on your machine? Some tools are Windows-only. Others are Mac-exclusive, and a few support Linux too. Always check this before you commit.
2. Color Scopes & Tools
Seek out tools like waveforms, vector scopes, and histograms. These gems aren’t solely for the pros; they empower you to grade with exactness, leaving guesswork in the dust.
3. LUT Support
Lights, camera, action! If you crave cinematic flair in a flash, LUT support is your secret weapon. The right software helps you easily import and customize LUTs. Plus, it won’t crash or glitch, so your show stays on track.
4. Workflow Integration
Choose color grading software that works with Premiere Pro, Final Cut, and other tools. This saves time and boosts creativity.
5. Real-Time Performance
Say goodbye to laggy previews and long waits to render! Hunt for GPU acceleration or other performance-boosting features. This is crucial, particularly when tackling 4K content or beyond. Your projects deserve speed and efficiency, so don’t settle for anything less!
6. Learning Curve
Choose your tools carefully – they can make or break your game. Some are easy to use, like plugging in a toaster. Others need a lot of tutorials to master. Pick the ones that fit your skills perfectly, so you can dive in with confidence.
7. Price Tag (Free vs. Paid)
Create a budget that shows the best tools. Free options may be appealing, but premium software offers many advanced features. You’ll also receive quicker support, making your investment a productivity booster.
Best Paid Color Grading Software (Professional Use)
Below, we’ve listed the top professional color grading software options in 2025. These are trusted by filmmakers, editors, and colorists around the world. I’ll break down who each tool is best for, what makes it stand out, and what to watch out for before you buy.
Let’s get into it.
1. Adobe Premiere Pro + Lumetri Color Panel
Best for: Editors who want seamless color grading within their editing workflow
Adobe Premiere Pro’s Lumetri Color Panel is a powerful tool that transforms footage into a visual feast. It helps you elevate your projects with expert color grading.
While Lumetri may not eclipse DaVinci Resolve in expert grading, it sparkles for most creators. Brimming with essentials, it offers basic corrections and stunning looks. With curves, color wheels, vignettes, and HSL controls, you’re in for a treat. The icing on the cake? Everything sits snugly within your beloved editing interface.
It grades in real-time using GPU acceleration and integrates with Adobe tools. Import and apply LUTs in a few clicks. Perfect for YouTubers and videographers. It streamlines their workflow for a pro look.
Key Features:
- Built-in Lumetri Color Panel for real-time grading
- Creative and technical LUT support
- Curves, color wheels, HSL sliders, and vignette tools
- Adobe Dynamic Link integration
- Compatible with most professional color monitors
Pros:
✔️ All-in-one editing and grading workflow
✔️ Great for quick turnaround projects
✔️ Integrates with Adobe apps like After Effects
✔️ Tons of tutorials and presets available
Cons:
❌ Requires an Adobe Creative Cloud subscription
❌ Limited compared to high-end color grading tools
❌ Interface can feel cluttered for grading-only workflows
2. Final Cut Pro X
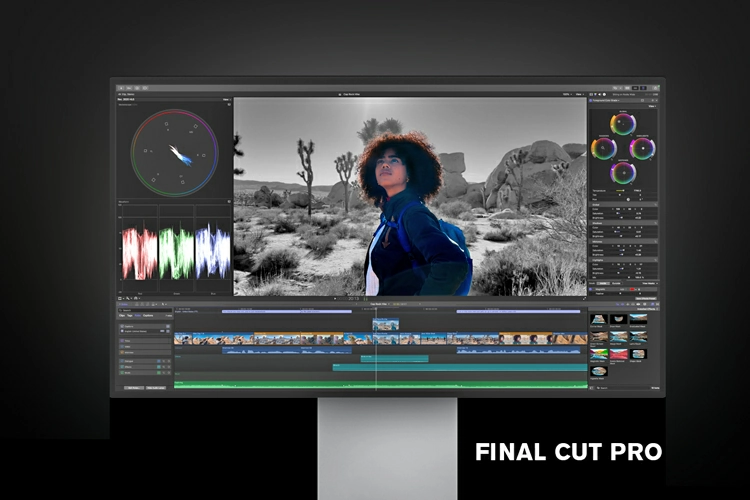
Best for: Mac users who want fast, pro-level color grading in a sleek interface
If you’re a Mac user and love speed, simplicity, and power rolled into one, Final Cut Pro X is your best friend.
Final Cut Pro X is a symphony of speed and simplicity in color grading. With the Color Inspector and intuitive color wheels, it dances through cinematic palettes. Curves and hue/saturation tools conjure stunning visuals that captivate the eye. Seamlessly designed for Mac, it ensures smooth playback and effortless rendering.
Magnetic Timeline revolutionizes editing and grading, making it lightning-fast. It supports HDR, LUTs, and multi-cam color matching, making it ideal for creators.
And since it’s a one-time purchase ($299.99), you won’t get locked into a monthly subscription.
Key Features:
- Real-time color grading with color wheels and curves
- HDR support and ProRes RAW workflow
- Custom LUTs and look presets
- Magnetic Timeline for quick edits and grades
- Seamless performance on Mac hardware
Pros:
✔️ Clean, easy-to-use interface
✔️ Optimized for speed on macOS
✔️ One-time payment (no subscription)
✔️ Powerful enough for serious grading projects
Cons:
❌ Mac-only—no Windows support
❌ Not as deep as DaVinci Resolve for pro colorists
❌ Fewer native grading plugins than Adobe ecosystem
3. Adobe After Effects (with Plugins)
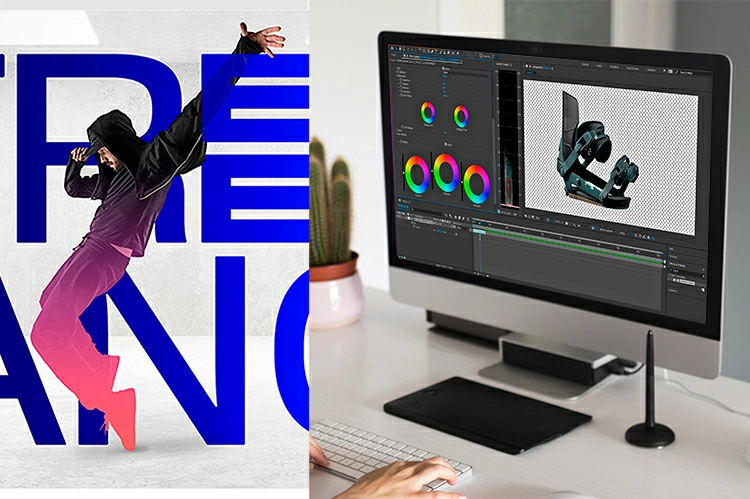
Best for: Advanced color stylization, motion graphics, and VFX-heavy projects
For total control, use Adobe After Effects. It’s great for effects enthusiasts. After Effects is unique, but with plugins like Magic Bullet Looks, it becomes ideal for color grading.
After Effects shines with its layer-based wizardry, letting creativity flow. Animate every detail, even your color grades, to bring visions to life. Craft dynamic aesthetics, conjure stunning color transitions, and weave in surreal effects. Take command, controlling each frame with precision and flair.
It’s not the fastest option for basic grading, but when your project needs motion design + grading + visual FX all in one place, After Effects wins big.
Key Features:
- Supports pro-level plugins like Magic Bullet Looks & Colorista
- Animate color grades and transitions over time
- Layer-based control for advanced visual stylization
- Great for short films, music videos, and ads
- Full integration with Adobe Premiere Pro
Pros:
✔️ Insane flexibility with grading and visual effects
✔️ Ideal for highly stylized or animated grading
✔️ Plugin support expands grading capabilities
✔️ Part of Adobe Creative Cloud workflow
Cons:
❌ Steeper learning curve for beginners
❌ Slower for real-time grading and rendering
❌ Requires third-party plugins for best results
4. FilmConvert Nitrate
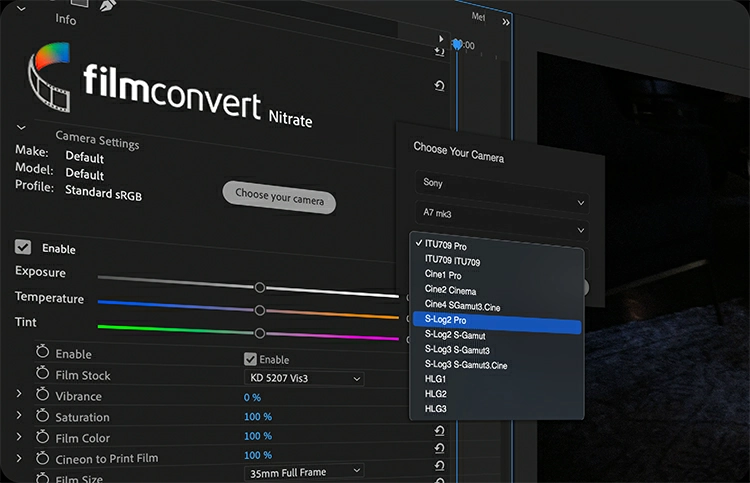
Best for: Filmmakers who cherish the look of genuine film
If you’re after that look of real film – deep grain, cinematic colors, and a rich, organic feel – then FilmConvert Nitrate is something you should consider. FilmConvert Nitrate is more than a basic LUT pack or a color grading plugin; it features a full film emulation engine.
With FilmConvert, you can match your digital footage to specific film stocks with precision. And, just like real film, you can control the grain, color, and curve response of the emulation. What makes it stand out the most is the integration of camera profiles.
FilmConvert supports a wide range of cameras, ensuring you receive the best grade for your footage, regardless of whether you’re shooting on a RED, Sony, Canon, or mirrorless camera. Nitrate will make the necessary adjustments to the film emulation based on the records your camera captures.
It perfectly works with Premiere Pro, After Effects, DaVinci Resolve, and Final Cut Pro. This means there won’t be any new software interface to learn, which helps you focus on creativity!
Key Features:
- Authentic film stock emulations (Kodak, Fuji, etc.)
- Adjustable grain, curve, and color settings
- Camera-specific profiles for accurate results
- Works as a plugin with major editing software
- Real-time previews with GPU acceleration
Pros:
✔️ Delivers a true film aesthetic
✔️ Easy to use with drag-and-drop presets
✔️ Works inside your existing workflow
✔️ One-time purchase (no subscription)
Cons:
❌ Not a full-fledged color grading suite
❌ Best for stylized film looks—not clinical grading
❌ Limited control compared to DaVinci or Colorista
Best Free Color Grading Software (Beginners & Budget Creators)
Not everyone can afford a color grading tool. But you don’t need to spend hundreds of dollars. Free tools are available, and they’re impressive.
These tools might not have all the advanced features pros use. But they provide plenty for most creators. From YouTubers to indie filmmakers, these options make your footage look polished and cinematic, for free.
5. DaVinci Resolve (Free Version)
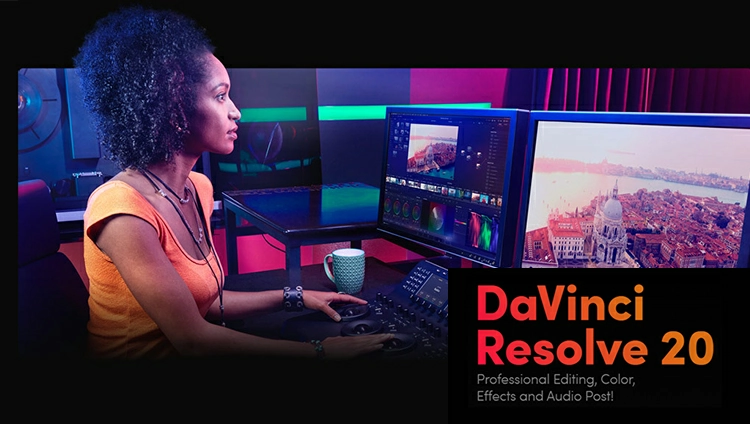
Best for: Beginners and pros who want serious color grading tools, without the price tag
The truth is, DaVinci Resolve’s free version is more than just decent. It stands out as one of the strongest video editing and color grading tools around.
You get access to industry-standard color grading features that many paid tools lack. Think about advanced color wheels, curves, qualifiers, tracking, and power windows. Whether you adjust exposure or create cinematic looks, it’s all included.
And yes, you can do more than just grade. The free version includes editing, VFX (Fusion), and audio tools (Fairlight), making it a complete post-production suite. It’s like having Hollywood software on your home PC.
So what’s the catch? The main limits are no 4K+ export, no noise reduction, and no multi-user collaboration—but for solo creators and content producers, that’s no big deal.
Key Features:
- Professional-grade color grading tools
- Full editing, audio, and VFX suite included
- Real-time color scopes, LUTs, and node-based workflow
- Available on Windows, macOS, and Linux
- Free forever, no watermark, no trial limits
Pros:
✔️ Unmatched power for a free tool
✔️ Great for learning professional workflows
✔️ Wide online community and tutorials
✔️ No annoying ads or usage limits
Cons:
❌ Demands a strong system (especially GPU)
❌ Slight learning curve for beginners
❌ 4K+ export and advanced AI tools locked to Studio version
6. Blender (Video Sequence Editor)
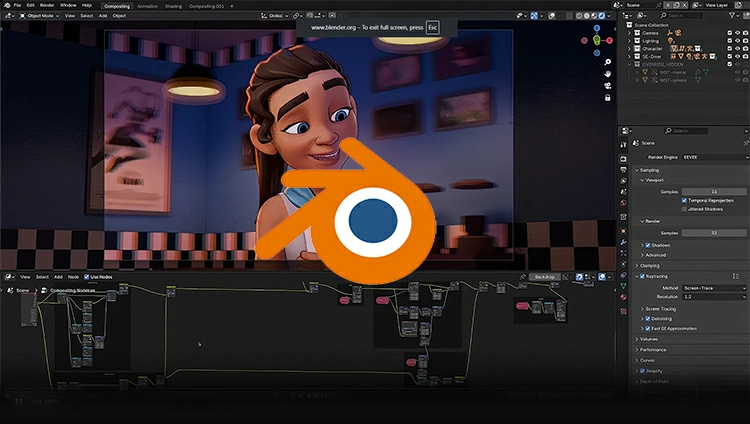
Best for: Creators seeking an all-in-one solution for color grading, animation, 3D modeling, and editing, without any upfront cost.
Blender is famous for 3D modeling and animation. But did you know it also has video editing tools? It includes a Video Sequence Editor (VSE) and strong color grading features! Blender may not match the elegance of DaVinci or Premiere, but it offers basic color grading.
You can adjust brightness, contrast, and saturation. You can also apply LUTs and stack effects on the timeline. What is unique about Blender is the amount of freedom it provides, along with customization.
Blender lets you paint your video any color you want, drop in 3D objects, or sprinkle on fun little moving bits—all in one place. Best part? It costs nothing, and anyone can peek at the code. The only bump is the first few days: the buttons feel strange because Blender isn’t just a simple cutter-and-trimmer. Stick with it, and the weird layout turns into second nature.
Key Features:
- Experience freedom with open-source software—no secret fees lurking about.
- Flexible interface with an effects stack and customization options.
- Unlock creativity with support for LUTs and essential grading tools.
- Step into a realm rich with integrated 3D, VFX, and animation tools.
- Offered for: Windows, macOS, and Linux.
Pros:
✔️ 100% free with no feature lock
✔️ Extremely flexible and customizable
✔️ Great for combining 3D and video projects
✔️ Large, active open-source community
Cons:
❌ Steep learning curve for non-Blender users
❌ Interface isn’t designed primarily for video editing
❌ Lacks pro-level scopes and grading controls
7. Lightworks Free
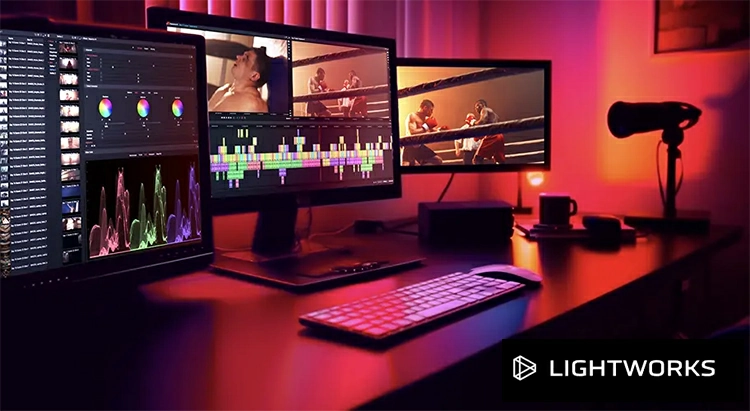
Best for: Intermediate editors who want fast performance and professional-looking results without paying upfront
Lightworks Free is one of the oldest names in professional video editing. It has even been used in Hollywood films. The good news is that there’s a free version. This version offers solid color correction and grading tools. It’s perfect for content creators and indie filmmakers on a budget.
You won’t find advanced color grading like in DaVinci Resolve. However, you do get real-time color wheels, RGB curves, and basic scopes for tuning your look. It’s fast and responsive. The modern, minimal interface feels smooth, even on mid-range machines.
Lightworks has drag-and-drop LUT support and built-in presets. This means beginners can easily start color grading without a tough learning curve.
The key limitation? Export video resolution peaks at 720p in the free version. Craving 1080p or 4K glory? You’ll need to elevate your game to the Pro plan. Yet, for practice, social media gems, or student projects, Lightworks Free remains a stellar choice.
Key Features:
- Realtime color correction with wheels and curves
- Lightweight and fast performance
- Built-in LUT support and grading presets
- Simple interface with timeline-based workflow
- Available for Windows, macOS, and Linux
Pros:
✔️ Professional editing with decent grading tools
✔️ Quick and responsive, even on older machines
✔️ Easy to learn and use
✔️ Free forever with no watermarks
Cons:
❌ Export limited to 720p in free version
❌ Lacks advanced scopes and HDR tools
❌ Interface isn’t as visually rich as others
8. Shotcut
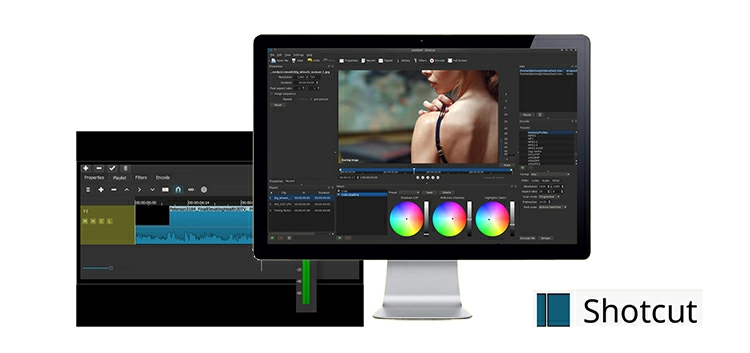
Best for: People new to video editing who are looking for an intuitive, open-source program with some rudimentary color correction tools.
If you’re new to video editing and looking for something flexible and gentle on your learning curve, free of charge, then Shotcut is a good option for you.
This video editor is open-source for Windows, Mac, and Linux users. It has decent color grading features, including color wheels, contrast, saturation, screws, and even LUTs for quick cinematic effects.
Think of it like a tidy desk: every tool sits in its own drawer, so you can work the way you like. It won’t win a beauty contest, but it gets the job done. Perfect for YouTubers, weekend tinkerers, or students just starting out.
All the features of Shotcut are accessible to all users. There’s no trial, no watermark, no limitations; you have full access from the beginning.
Key Features:
- Color grading balance, brightness, gamma, and LUTs.
- Completely open-source and free.
- Modular, drag-and-drop interface.
- Supports a wide range of different formats and codecs.
- Compatible with Windows, Mac, and Linux
Pros:
✔️ Perfect for beginners and casual editors
✔️ No subscription, no watermark, no restrictions
✔️ Lightweight and runs well on most computers
✔️ Active open-source community for support
Cons:
❌ UI can feel a bit dated or clunky
❌ Not suitable for high-end grading or pro workflows
❌ No built-in scopes or advanced color tools
9. Kdenlive
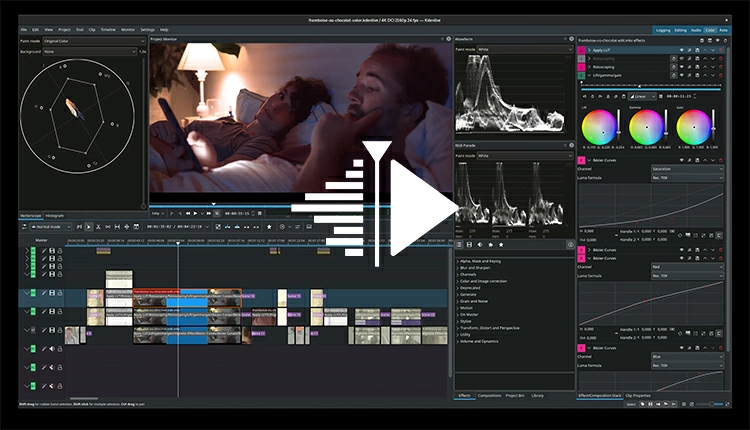
Best for: Linux users, open-source fans, and intermediate editors who want full control without the cost
If you use Linux or like open-source tools, Kdenlive is a top free video editor. It also has impressive color grading features.
Kdenlive provides a complete set of color correction tools. It has LUT support, RGB curves, color wheels, keyframe adjustments, and color scopes. These scopes include histograms and waveforms. You usually find these features in paid software, but they are free here.
The interface is modular and customizable. It may not look the best, but it works efficiently. Since it’s actively developed by the open-source community, new features and performance upgrades keep coming.
Kdenlive works great on Linux, Windows, and macOS. It’s especially loved by Linux users who seek professional tools without relying on commercial software.
Key Features:
- Full color correction and grading panel
- Real-time scopes: waveform, histogram, vectorscope
- Keyframe-based grading adjustments
- LUT import and preview support
- Cross-platform: Linux, Windows, macOS
Pros:
✔️ No cost, no ads, no hidden features
✔️ Surprisingly advanced for open-source software
✔️ Active development and community support
✔️ Great for indie filmmakers and content creators on Linux
Cons:
❌ UI feels a bit technical for absolute beginners
❌ Occasional bugs or crashes with large projects
❌ Not as fast or polished as DaVinci or Adobe tools
10. HitFilm Express (with Color Grading Tools)
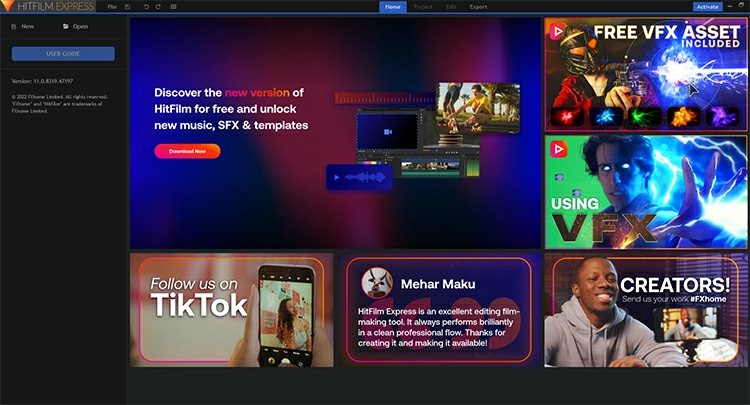
Best for: YouTubers, hobbyists, and content creators who want built-in VFX and solid grading on a budget
HitFilm Express is an underrated all-in-one toolbox. It’s perfect for creators who want to edit, add visual effects, and color grade—all in one spot.
HitFilm Express may not be a dedicated color grading app like DaVinci, but it offers key tools. You get color wheels, curves, exposure sliders, LUT import, and color temperature adjustments. These features can easily add a cinematic touch to your videos.
But what makes it really shine? The built-in VFX and motion graphics tools. You can color grade and composite cool effects in the same timeline, without bouncing between software.
The base version is 100% free, but if you want more advanced grading features (like scopes or additional effects), you’ll need to grab some low-cost add-ons. The good news? You only pay for what you need—no forced subscriptions.
Key Features:
- Built-in color correction and grading tools
- Supports LUTs and custom grading effects
- Visual effects and editing all-in-one
- Easy drag-and-drop interface
- Upgradeable with optional add-ons
Pros:
✔️ Beginner-friendly and fast to learn
✔️ Great for YouTube and social content
✔️ Runs well on mid-range systems
✔️ No subscription—pay for add-ons if needed
Cons:
❌ Not as powerful or deep as Resolve
❌ Some grading tools require paid add-ons
❌ Lacks pro-level color scopes out of the box
FAQs
- Is DaVinci Resolve completely free for professionals?
The free version has the most high-end color grading tools, including advanced color correction, LUTs, and scopes. The Studio version adds noise reduction, HDR grading, and pixel-perfect exports.
- Which software is best for beginners?
If you’re new, try Shotcut, HitFilm Express, or Kdenlive. All three are free, fairly simple, and lightweight even on modest computers.
- Do I need a powerful PC for color grading?
4K or RAW formats, color grading can be intensive. Use a strong GPU and 16GB of RAM with DaVinci Resolve or After Effects for the best results. Shotcut and Kdenlive can operate on less powerful PCs.
- Color correction vs. color grading: what’s the difference?
Adjust exposure, white balance, and contrast for a visual symphony. Craft the moment and stir the soul with expert color grading.
- Can I use free software to apply LUTs?
Most free software works with LUTs. Programs like DaVinci Resolve, Shotcut, HitFilm Express, and Kdenlive let you import your favorite film looks and apply them to your videos in merely a few clicks.
- What is the best free software with pro features?
DaVinci Resolve Free stands out. It offers top-notch grading tools that can compete with paid software.
- Should I use separate software for editing and grading?
Stick to one of the two options: DaVinci Resolve or Fin.
Final Thoughts
Enhance footage with color grading for breathtaking visuals. Easily achieve impressive effects using free tools like DaVinci Resolve, Kdenlive, and Shotcut.
Use DaVinci Resolve Studio, Premiere Pro, or Final Cut Pro X to unleash your creativity. These user-friendly tools include presets and a helpful community. They assist you in achieving fantastic results.
So, choose software that fits your skills and workflow perfectly. Bring your creative vision to life and experiment freely. Make your story shine as brightly as it sounds.