An Ultimate Guide to Time Lapse Photography

What if you could fast-forward everything with a remote? Think how amazing it would be to see a flower blossom within seconds. Or, watching clouds that usually slow drift over the sky, racing like white rabbits during the day.
This superpower is what we call ‘time-lapse’ photography!
‘Time-lapse’ can be defined as a series of photographs taken over time. It can span several minutes, hours, or even days. When played back, these photos bring a sense of movement that is many times faster than the real pace. This form of capturing moments is akin to taking a gentle-paced story and transforming it into a playful cartoon.
So, curious to pick up further about time-lapse photography and its working procedure? For that, surely you need a comprehensive guideline. Here you go!
Understanding Time Lapse Photography
If you are pondering how time-lapse photography functions differently from other photography techniques, you must first apprehend its definition.
When a photographer clicks several static pictures sequentially of the same frame at a consistent interval for some time and then plays over the entire series promptly, it results in time-lapse photography.
So, in short, time-lapse is a general way of photography that includes shooting several images of particular content and merging them to create an impression of a video.

Mostly, this technique is used by photographers for shooting prolonged activities that usually would not be attention-grabbing if witnessed naturally. The time-lapse system allows you to capture such changes, movements, and evolutions of the subject that occur over a course of time.
To make it even simpler, let’s consider the case of a flower blossoming. From sprouting seeds to eventually blooming, the entire process takes time to complete its course of action. Now, in order to record and view this slow and lengthy procedure, the time-lapse method is used.
A time-lapse photographer will take individual shots of a flower, right from seedling to blooming, and then merge them sequentially to create a video showing the full growth of the flower.
Time-lapse can manipulate time to create an illusion of speeding up the movements of the flower in the footage. As a consequence, the overlong process of days’ worth can end in just a few seconds or at most minutes.
Apart from that, an amazing example of a time-lapse leveraged by many shutterbugs lately is observing the growth and evolution of a toddler for a few months. Sunrise, sunset, moving cars, moving stars in the night sky, waterfall, etc., are some other cases where time-lapse photography is often applied.
Necessary Equipment for Time-Lapse Photography
The gadgets that you usually need for other types of photography, time-lapse photography, require similar kinds of gadgets. You don’t need any extraordinary kits for time-lapse shooting. Most photographers already have these basic devices as their go-to tools.
Let’s check out the listing of the equipment that you will need for time-lapse photography-
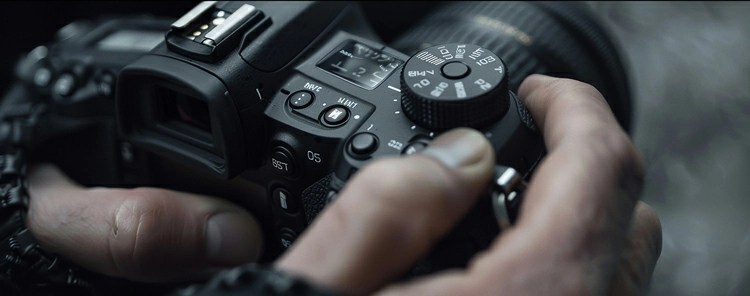
1. Camera
Although technically you can pick any camera for taking time-lapse shots, the easiest route is to go with DSLRs or mirrorless cameras. Because almost every latest digital camera, whether it’s a DSLR or a mirrorless, has an integrated intervalometer. So you can get your job done with fewer tools.

Nonetheless, you can also use other regular cameras or even smartphones for shooting time-lapses. But in these cases, you will need to attach an additional intervalometer.
2. Intervalometer
Just as specified in the earlier segment, if you are working with a mirrorless camera or a DSLR that already has this feature built-in, you don’t require this tool.
However, if not, an intervalometer is a must for time-lapse photography. But first, let’s understand how it plays a part in shooting time-lapse images.
Essentially, this works as an external apparatus or often as software(mostly in cases like taking pictures with smartphones and cameras that have downloading features) for cameras to measure small intervals of a particular amount of time.

This means you can shoot a certain number of photographs that are spread out equally in exposure using an intervalometer. Therefore, there is no need for you to sit like a robot with your camera and manually click several shots every second (which seems more unlikely to do realistically) to get perfect time lapses.
3. Tripod
As time-lapse photo shooting requires your camera to stay still for a long time, you need a solid base supporting your camera to keep it stable. So, here comes an essential gadget to the rescue, a tripod.

Using a tripod can keep your camera stabilized and restrict its movements between frames. Thus, you will be able to avoid blurred images from getting shot and end up with clear and vibrant photographs almost with every click.
4. Neutral Density/ND Filters
Neutral density or ND filters are required when you are shooting in sites having reflective surfaces. Reflections and excessive brightness can mar your entire picture quality and leave unwanted effects on it.

In such circumstances, neutral density filters basically work like sun specs for your camera. It helps to decrease the intensity of light approaching from the camera lens and change the color temperature.
That’s why neutral density filters are also needed in time-lapse photography to get optimal exposure even in bright locations.
Camera Settings for Generating Time Lapse
The result of your time-lapse photos somewhat depends on your camera settings. It is best to keep your settings manual, where you can make the adjustments to the camera yourself.
The key factors that you need to bear in mind are cataloged below-
Aperture Setting:
An accurate aperture will deliver an adequate amount of light and put the theme of your content in focus. So, you need to try out some tests to know your right aperture to get the best outcomes.
Camera Focus:
If your camera is set to autofocus, it might change its focus on different subjects between every shot. This will be problematic and create inconsistency while shooting an expeditious time-lapse, such as a busy street or crowd gathering.
Therefore, to continue a consistent and reliable focus, keep both your camera & lens in manual mode.
Shutter speed Setting:
Shutter speed value can vary depending on your requirements. You have the full liberty to choose the shutter speed based on your subject. To be more precise, while capturing moving subjects, if you want it to look clean and sharp, you need to choose a shutter speed of 1/100 or even faster.
Whereas, for shooting speedy moving content like a crowd or something, a shutter speed of 1/50 will result in a smooth video. Usually, a standard shutter speed is considered twice the frame speed for time-lapse photography.
ISO Setting:
ISO setting is determined by the presence of light on your working site. Normally, a low ISO setting is deliberated to be best while shooting time lapses as it lessens both graininess and graphic noise or visual distortion.
However, a highlighter set is compulsory for it. A high ISO setting will be necessary if you shoot time-lapse photographs in a low setting. But then the outcome of your time lapses will appear grainier.
Time-lapse interlude/interval: The interval period while taking time-lapse shots revolves around the position and engagement of the elements present there. Take into consideration that the shooting break/interval is longer than the exposure phase.
Think through the speediness of your selected subject to know the correct interval span of your time-lapse. This interval span also refers to the frame rate. For fast movements, you will need shorter intervals like 1 to 3 seconds. Then again, for slow movements, you will need longer intervals, like nearly 30 seconds.
Shooting Time-Lapse Photography: Step-by-Step Guidelines
Now that you know enough about time-lapse photography, you can go ahead with the process to shoot it. So, collect and gather all the equipment that you will need in order to get started.
Step 1- Review your Scene Location in Advance
Time-lapse photography requires a long time of commitment. That’s why, before you start shooting, you will certainly want to review the location to ensure certain prospects.

For example, understanding the tactic of framing the subject, how much exposure of light different areas of the spot is getting, or whether there will be any sudden interruptions or not.
Step 2- Get Everything Balanced
Remember: if you don’t balance your gear yourself, you’ve already started wrong. Lock your camera on a tough tripod, plant the tripod where no one will bump it, and you’ll get crisp, clean shots every time.
In case you are using any mechanical slider to move along with your camera, be sure to secure and fasten it tightly so that it stays put in its spot. Otherwise, your time-lapse would end up with wobbly shots.
Step 3- Make Adjustments to Your Camera Settings
Choose your camera settings in manual mode for creating time-lapses. Then, depending on your scene’s location and condition, adjust various settings (aperture, focus, shutter speed, ISO, etc.) of your camera accordingly.
Step 4- Format your Intervalometer
Get your intervalometer set. Whether it is a separate device, downloadable software, or an inbuilt feature of your camera, you need to select and decide on how much length of the interval should be and exactly how many images you want to take overall.
Usually, you choose the camera’s interval in seconds, minutes, or hours. And, you also decide how many pictures the camera will shoot for your sequence.
Step 5- Keep it Absorbing
Time-lapse is an exciting concept in itself since it can make the advancement of hours, days, or months occur in minutes or sometimes even in seconds. Yet, there are some tricks you might have to use to keep your video more enticing.
Zooming, panning, blurring, or cutting your time lapses to have things moving are some of the techniques that can make your video interesting and grab the attention of your viewers.
Step 6- Click an Experimental Shot
Click a shot capturing a set of 10 pictures in 10 seconds of an interval as a test or experimental shot. This will help you to know and understand what timing works for your time-lapse and if the exposure gives the impression of being dead right.

Step 7- Initiate Shooting
As soon as you have gotten your nearly perfect images from testing your experimental shots, you are all set to start shooting your desired time-lapse photographs. So, no room for the delay! Just go for it.
Step 8- Go for Editing your Final Shots
Once you’ve got your final shots, you need to start editing in order to visualize them. You can download some editing software that offers time-lapse features, like Adobe Creative Cloud, to have your job done.

Utility of Time-Lapse Photography
Well! You can use time-lapse photography on anything that can change its external presence or appearance.
Actually, it is used as one of the most versatile methods of shooting by photographers for many experimental purposes. Both short and long-range are used for creating time lapses. Let’s have a glance at it.
Short-range projects of time lapses:
- Plant life – Flowers that are opening and closing daily.
- People – People doing different kinds of household chores, activities, walking & running in general, etc.
- Astrophotography– Tracking or tracing of stars, shooting stars, eclipses, etc.
- Small projects– Documenting paintings, drawings, crafts, etc.
Long-range projects of time lapses:
- Advance plant life – Flowers blooming, fruits & crops growing, leaves withering, etc., such changes that happen over a long course of time (weeks/months).
- City life–View of busy roads and highways in city lighting, how the transit of transports happens smoothly in a time-lapse, and also vice versa over a long phase of time, which may take hours or even days.
- Large projects – Capturing the progression of any construction or outward renovations in a time-lapse that occurs over a long period.
Ending Notes…
Found time-lapse photography exciting and engaging? No doubt, it’s a creative technique of presenting moving objects or growing plants strikingly through the medium of photography. Time-lapse photography is unique, scintillating, and robust enough to pack a punch.
Leveraging the right equipment, understanding the procedure properly, and taking actions following the steps mentioned above eventually can lead to bringing out mesmerizing time-lapses.


