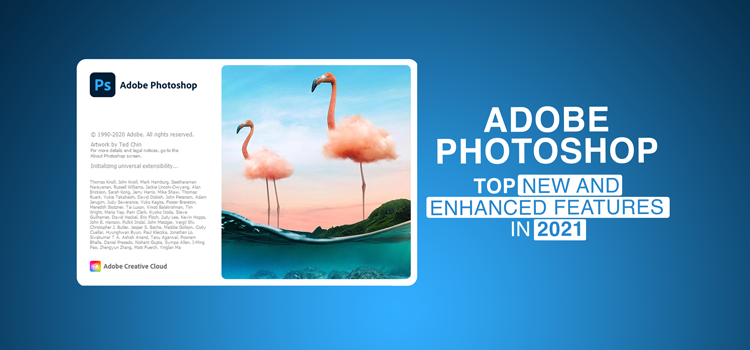
Adobe Photoshop Top New and Enhanced Features in 2021
Who doesn’t know about Photoshop? Even if you aren’t a photography freak, somehow or the other you heard about Photoshop due to its popularity all over the world. However, if you are a Photoshop pro or a beginner, surely you have worked with various tools available in Adobe Photoshop to edit and enhance images. Photoshop has 21 versions in total till 2020 with many updates made into each version over the years. Adobe releases a new version of Photoshop periodically adding new and enhanced features. So, are you ready to get introduced to the Adobe Photoshop new features in 2021?
We are ecstatic to acknowledge that Adobe Photoshop CC has come up with some amazing AI features as well as enhancements in its latest version. Among the features that Adobe has incorporated, Sky replacement, neural filters, and new pattern preview are worth mentioning. Along with that, enhancements were made to parameters like Shapes, Select and Mask, Cloud Documents, and so on.
Let’s dilate upon some of the top features that Photoshop has included in the 2021 version. Hopefully, you will be mesmerized knowing about these stellar and mind-boggling features.
Sky Replacement
One of the enticing features that Photoshop has come up with is sky replacement. People have been hunting for swift and shortcut ways to replace skies in images. This feature automatically isolates the sky from the foreground elements in a photograph.
To select a sky, just choose Select > Sky (Foreground selection- choose Select > Inverse). In this way, you can make the necessary adjustments to the image.

Now, to replace the sky with the help of Adobe Sensei’s AI and machine learning, simply select Edit > Sky Replacement. You will have a preset of skies to choose from or you can click the gear icon to load a new sky. Photoshop automatically fits the sky with the image area and then displays a preview. Sky replacement identifies the horizon and adjusts the foreground color to match the sky.

You can spot several customizable options on the Sky Replacement panel. You can use the Shift Edge option to reduce the fringing of the edges by shifting the edge of the layer mask for the sky layer. If you want to soften the edge, you have to use the Fade Edge that will soften the edge by blurring the mask for the sky layer. Setting a lower value will give a sharper blending and reduce halo effects that may appear for some sky and foreground combination.
Sky replacement avails of non-destructive adjustment layers to synchronize brightness, contrast, color, and tone to bring out the final composite more realistically. You can also use the Size slider to scale up and scale down the sky size and Sky Move to reposition the sky. Go for the Flip option to match the light direction.
Furthermore, you can have foreground adjustments as well that would adjust the toning to coincide with the new sky. The Multiply option darkens the area while the Screen option lightens the area.
Utilize the Sky Brush to manually paint the new sky in or out to decrease halos or enhance the appearance of the sky in complex areas like treetops. When the brush is selected, supplementary options like size, blend mode, and opacity show up in the Options bar.
Finally, output the results to a New Layer Group or to a Duplicate Layer. When adding new skies, click the Folder icon or use the Gear icon to create a new group.
Neural Filters
The second charming feature that Adobe incorporated in its latest version is neural filters. It’s purely based on artificial intelligence and machine learning geared to experimental and creative photo editing tasks. Basically, there are two types of filters, featured and beta. Featured filters are far advanced in the development cycle while beta filters refer to the 2nd stage of development.
Featured > Skin Smoothing
This particular filter eliminates skin imperfections and flaws while retaining the details in portraits. At first, select a portrait and open it in a Photoshop window.

After that, all you have to do is go to Filter and select Neural Filters. Following that, turn on the Skin Smoothing filter. If you want to control the skin texture, you have to use the Blur slider but for overall skin smoothness, you have to use the Smoothness slider. Once you are content with the skin appearance, hit the Ok button and it will create a new layer. After that, you can use masks to take away flaws from certain areas. So, create a mask and select a brush to remove imperfections from certain areas of the skin.

Beta > Smart Portrait
This filter is still in the developmental stage but can be utilized in Photoshop. It works by taking pixels from the original image and then generates new pixels from scratch that it thinks should work to produce a fictional output. For example, if you enhance the happiness of a face, Smart Portrait will automatically sense which set of teeth (Size and shape) to be placed on the mouth and create them. Make use of the Expressions and Subjects sliders to modify facial features, Mask sliders to adjust the placement and feathering of the masks, and Experimental slider to retain unique details in an image like mole, nose ring, etc.
To use Smart Portrait, choose a portrait and open it on a Photoshop window.

Go to Filter and select Neural Filters thereafter. Then, turn on the Smart Portrait filter. After that, you can control the Expression section by repositioning different sliders like Happiness, Surprise, and Anger.

You can also control the Subject section by moving the sliders like Facial age, Head direction, Hair thickness, Gaze, and Light direction.

With these sliders, you can increase or decrease the happiness, anger, surprise, vision, hair thickness, head direction, etc. of a person. Once you are content with the appearance, hit the Ok button. Like Skin Smoothing, here also you can create masks to modify certain areas.

Beta > Colorize
This particular filter adds color to an image. At first, select a black and white (grayscale) image.

Then, move on to Filter and select Neural Filters like the previous two ones. Next, turn on the Colorize filter and the black and white image that you selected will automatically turn into a colorized image. Then, click the color picker to pick additional colors and apply them by clicking in the preview area on the right.

When it comes to adjusting the color balance of the image, use the Scene color sliders (Cyan/Red, Blue/Yellow, Magenta/Green). Make use of the Focus/Scene slider to balance the weight of the auto/manually generated colors in the image.
Pattern Preview
If you are looking to draw seamless and continuous patterns, these new Pattern Preview features can do the job for you. Photoshop 2021 new features now allows you to easily move and adjust layers to create uninterrupted and repeating patterns. This feature is useful for drawing patterns for wallpapers, webpages, 3D textures, etc.
At first, select View > Pattern Preview. With that, the original canvas will be centered and virtual tiles of the document are created to fill the work area to preview the repeating and seamless pattern.

When the pattern elements are repositioned outside the canvas, Photoshop rules out any guesswork by displaying a live preview of the resulting tiled pattern.
Quick Actions
Let’s show you a few quick actions that you can apply in the latest version of Photoshop. At first, you have to open an image and then go to Help > Photoshop Help > Quick Actions to apply quick actions.
Once the Quick Actions panel shows up, you can see a number of quick actions appearing. Remove background, Blur background, Make B/W background, and Enhance image.
If you want to remove the background, choose an image and open it first.

Then, just hit the Remove background action and apply it. The background will be removed shortly. You can also revert it by clicking the Revert button.

If you wish to blur the background, you can do that on the same image. But we will pick another image to show you the blur effect. So, open the image on a Photoshop Window.

Then, click the Blur background action and apply it. The background will be blurred in a short space of time. Here also, you can revert it by hitting the Revert button.

Similarly, you can apply the other actions from the list as well to view the effects.
Live Shapes
When it comes to live shapes, notable enhancements were made into some tools like triangle tool, line tool, and rounded rectangle tool. For a triangle tool, previously we had to choose a polygon and set the sides to 3 to draw a triangle but now you can get a readymade triangle tool to draw.
Let’s create a rounded rectangle tool. At first, click the Shape tool from the toolbar and select the Rounded rectangle tool.
Once you create the rounded rectangle, you can see a tiny dot through which you can control the roundness of the rectangle. Even if you rotate the shape, the roundness, length, and width will remain the same. If you wish to modify the length and width after rotating, you can do so by dragging the points appearing on the shape. This is what made everyone so excited to looking forward to using the photoshop new features of 2021.

Now, let’s try a brand new triangle tool. Again, click the Shape tool from the toolbar and select the Triangle tool.
Now, single-click on the canvas and you will have two options. You can either draw an equilateral or draw the triangle from the center where you clicked. Then, you can modify the length and height of the triangle dragging the points appearing on it. Here, also you can control the roundness with the tiny dot showing up inside the triangle.

Version History
This is the special photoshop new features 2021 that maintains the history of the versions of a document when you save it. But point to be noted here is that it works only with cloud documents. So, you have to save your document on the Adobe cloud.
At first, select an image and go to File > Save as > Save to cloud documents and finally, save it by hitting the Save button.

Now, if you want to view different versions of the image you selected, you need to make some changes to the image and save it once you are done. You can modify the image several times to create more versions.
For example, if the image you chose looks too saturated, you can desaturate it. For that, create a Hue/Saturation adjustment layer. From the adjustment layer panel, lower the saturation to a small extent and save it by pressing Ctrl or Cmd S.

However, if you want the image to look black and white, you can create a Black and White adjustment layer and the image will turn into black and white. Save it again by pressing Ctrl or Cmd S.

Now, if you want to see all the versions, select the Window tab and open Version History from the drop-down menu. You will have all the 3 versions that you saved in a list.
The key point to note here is, these versions will stay on history for 30 days. So, if you want to permanently save them, all you have to do is mark them by pressing the icon showing up on the right side of each version. You can name the versions as well.
Select and Mask
Select the subject button inside of Select and Mask workspace has been immensely improved. Basically, two new Adobe Sensei features in Select and Mask have been added. Refine Hair and Object Aware Mode. Both of them are AI-powered and effective in tricky objects like the hair on complex and colored as well as textured backgrounds.
Previously, it would require to make a foreground selection and paint with a Refine Edge Brush to refine the mask along the edges of the hair. But with the inclusion of the Refine Hair feature, you can automatically refine the edges along with the hair with a single click instead of a time-consuming manual brushing method.
At first, select a complex and colorful image having a hairy or furry object.

Then, go to Select and Mask and click on the Select Subject. The hair isn’t masked out properly. For that, just simply click the button Refine Hair and it fantastically refines the hair or fur. In order to have a better look, you can change the background color to white or black.

Not to forget, Select and Mask has two engines in the latest version. One as we mentioned above, Object Aware Mode and the previous one, Color Aware Mode. Color Aware Mode is perfect for images having simple and contrasting backgrounds while Object Aware Mode is ideal for images having complex and colorful backgrounds.

That’s all about the photoshop new features 2021 incorporated and updated stunningly. No doubt, Photoshop has facilitated many tricky editing tasks with these features. Many of the actions that required a lengthy process to complete before, these new features have enabled us to execute them in a single-click or just in a few clicks.
To watch every step of our work process for this tutorial about the photoshop new features 2021, refer to the video below:

Click here to download this software and visit the official website of Adobe for more info.
Hopefully, you benefited immensely from the tutorial and do follow us on our website, Facebook, Linkedin, and Twitter pages to get our latest write-ups. Up until next time, have a chilling time!


